


In-Fusion Cloning Overview
This guide aims to explain and show you how to simulate In-Fusion cloning. This seamless cloning process employs the base pairing of homologous ends between linear DNA fragments.
To begin, the chosen plasmid - the 'backbone' - needs to be linearized. This step involves pinpointing where inserts will be placed in the backbone, and then linearizing the backbone at this insertion site. This can be achieved via inverse PCR or restriction digest.
The next phase is to add 15-20bp homologous ends to the inserts. This is done through PCR, utilizing primers that contain the homologous sequences. These primers should be designed with 15bp extensions homologous to the backbone, and 18-25bp homologous to the insert. For multiple inserts, ensure 18-25bp of homology for the insert being amplified and a 15bp extension of the added homologous sequence.
Smart primer design will ensure that the end of one fragment is homologous to the end of only one other fragment. This facilitates annealing of the inserts in the intended order and orientation.
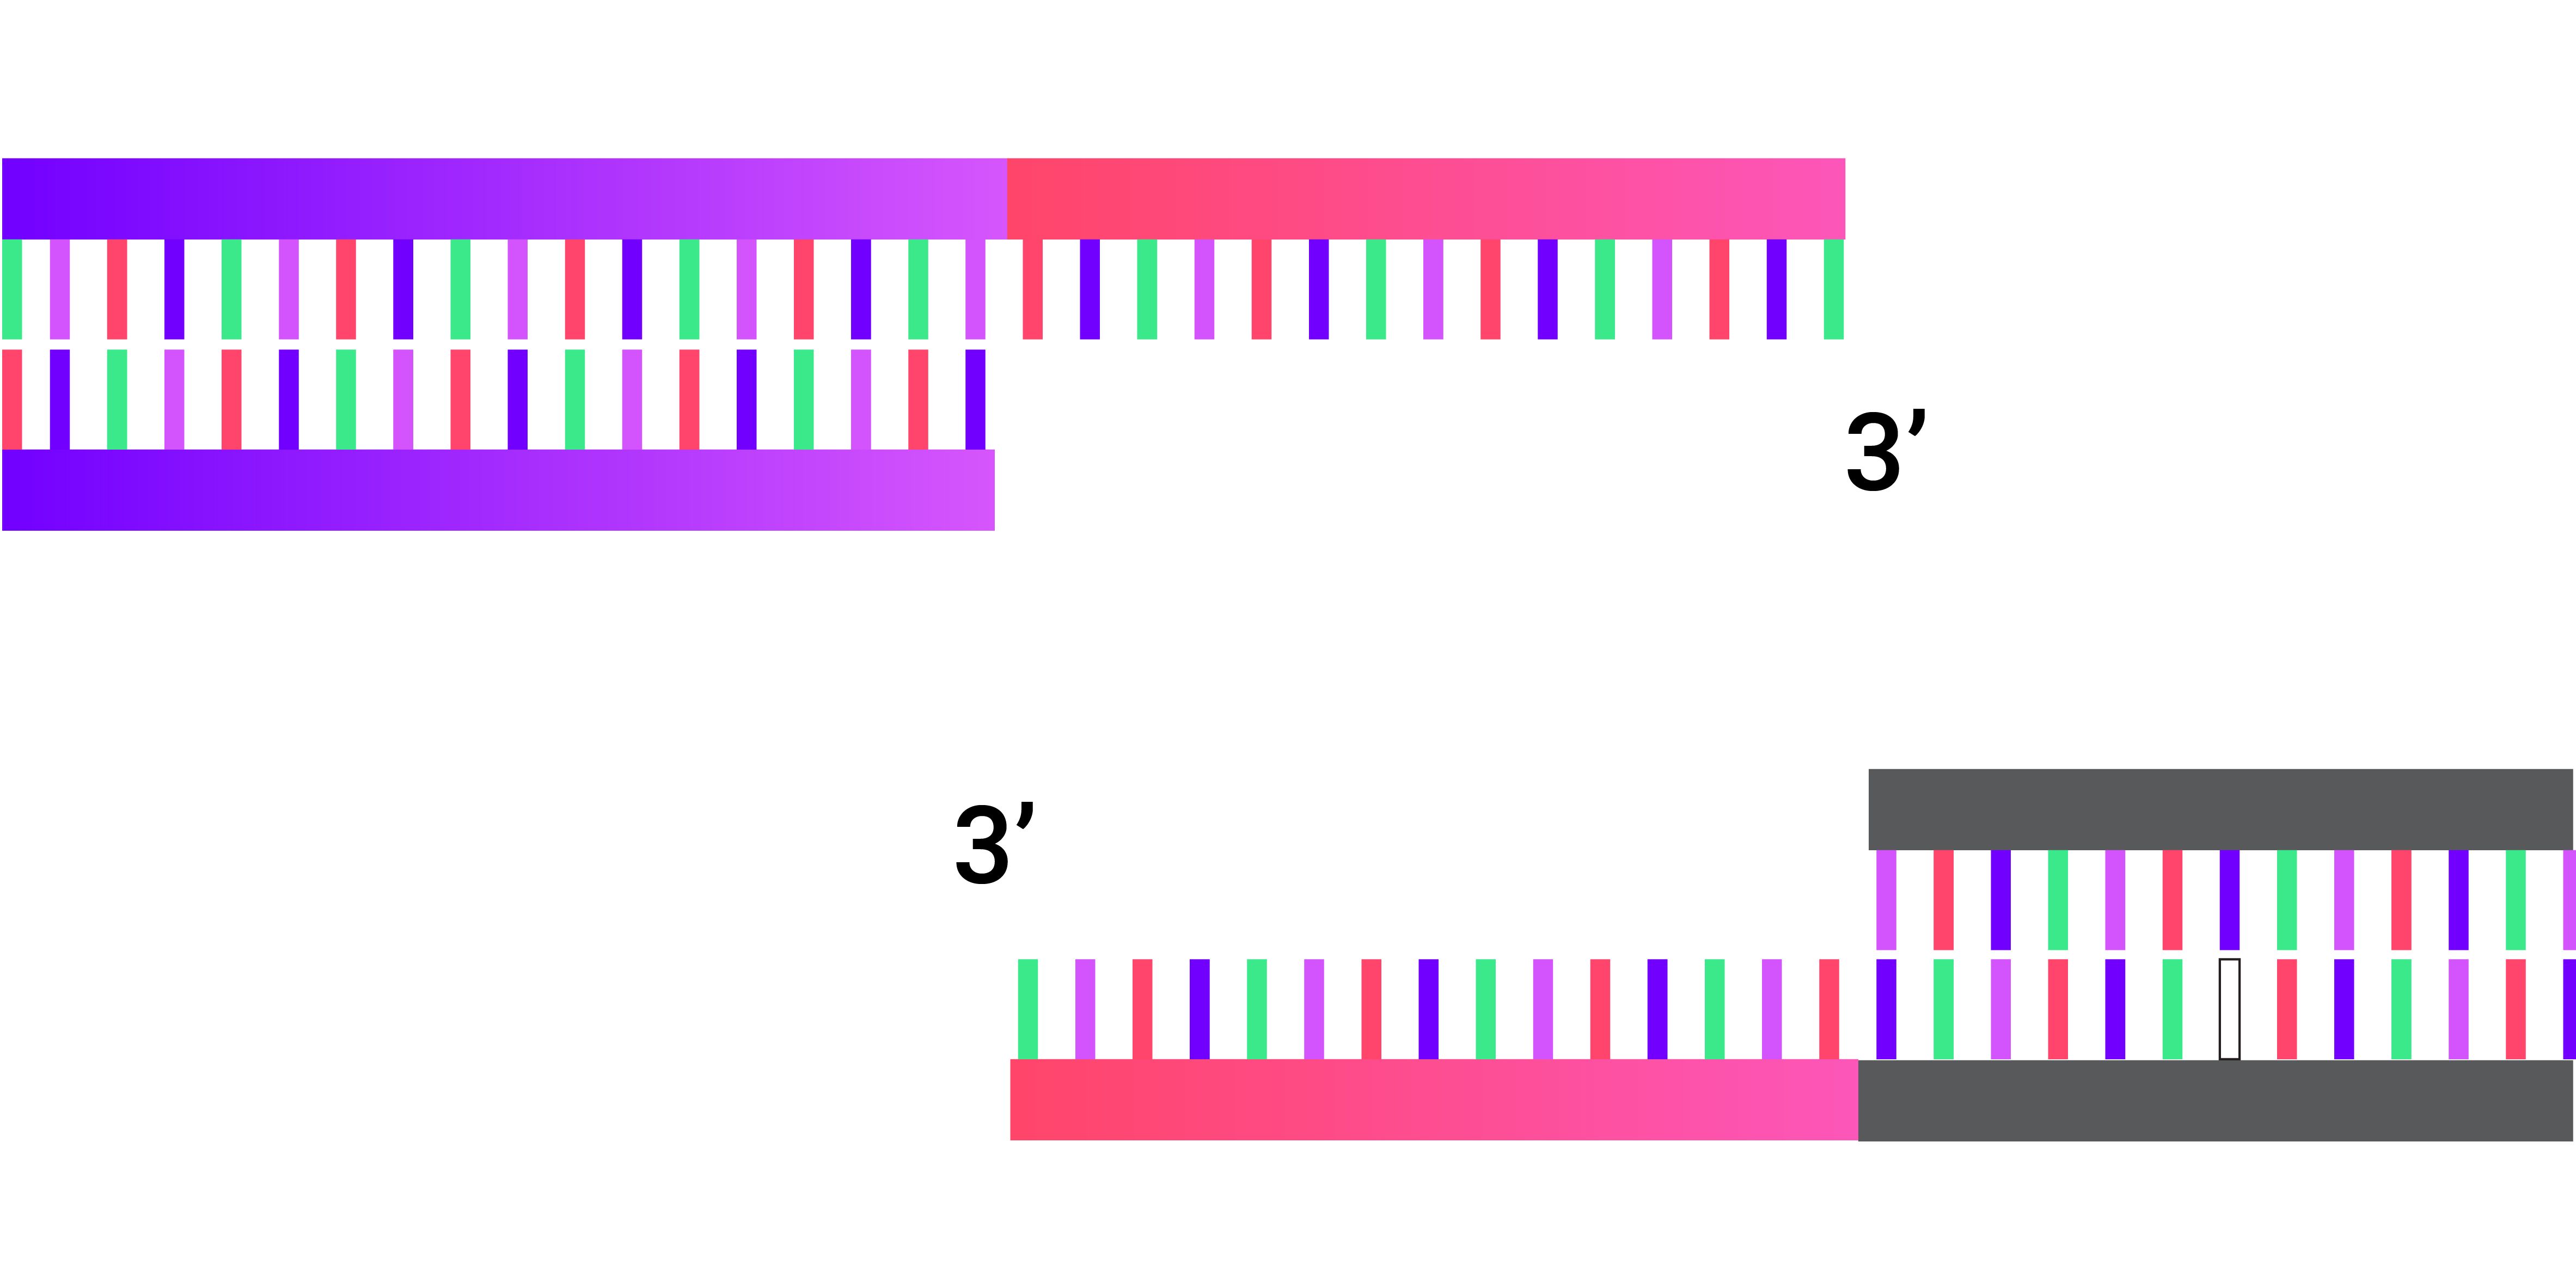
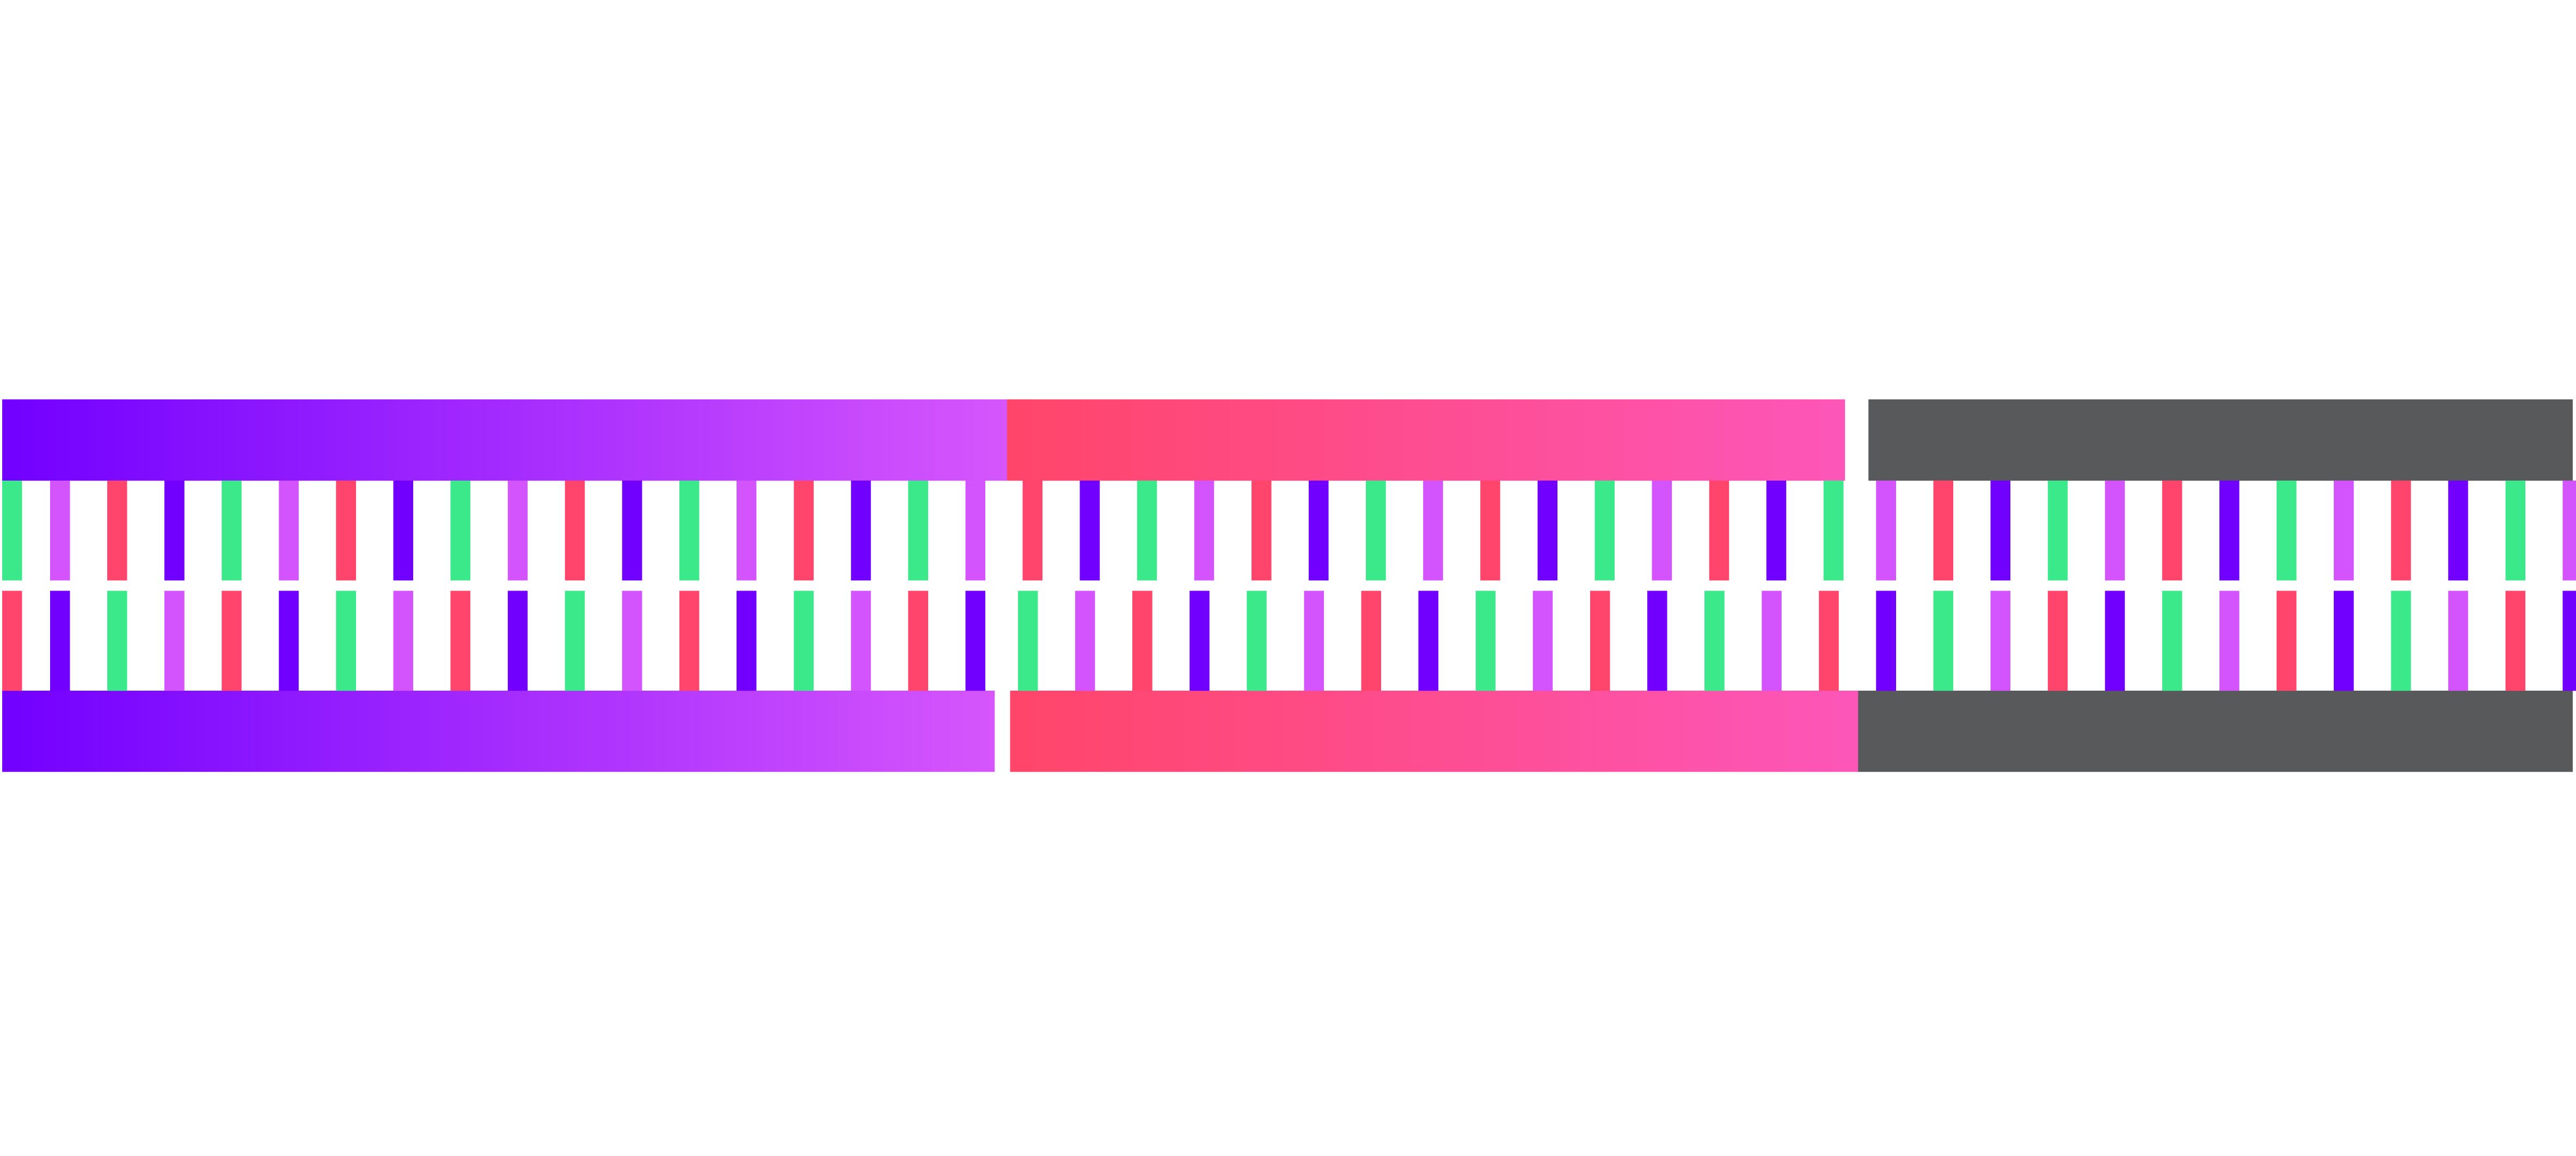
Then, the linearized backbone and inserts with homologous ends are mixed into an In-Fusion master mix. Within this enzyme mix, the 3' ends of the fragments are chewed back, producing single-stranded overhangs. The single-stranded overhangs of the backbone and inserts then anneal to each other through complementary base pairing, forming a single resultant vector.
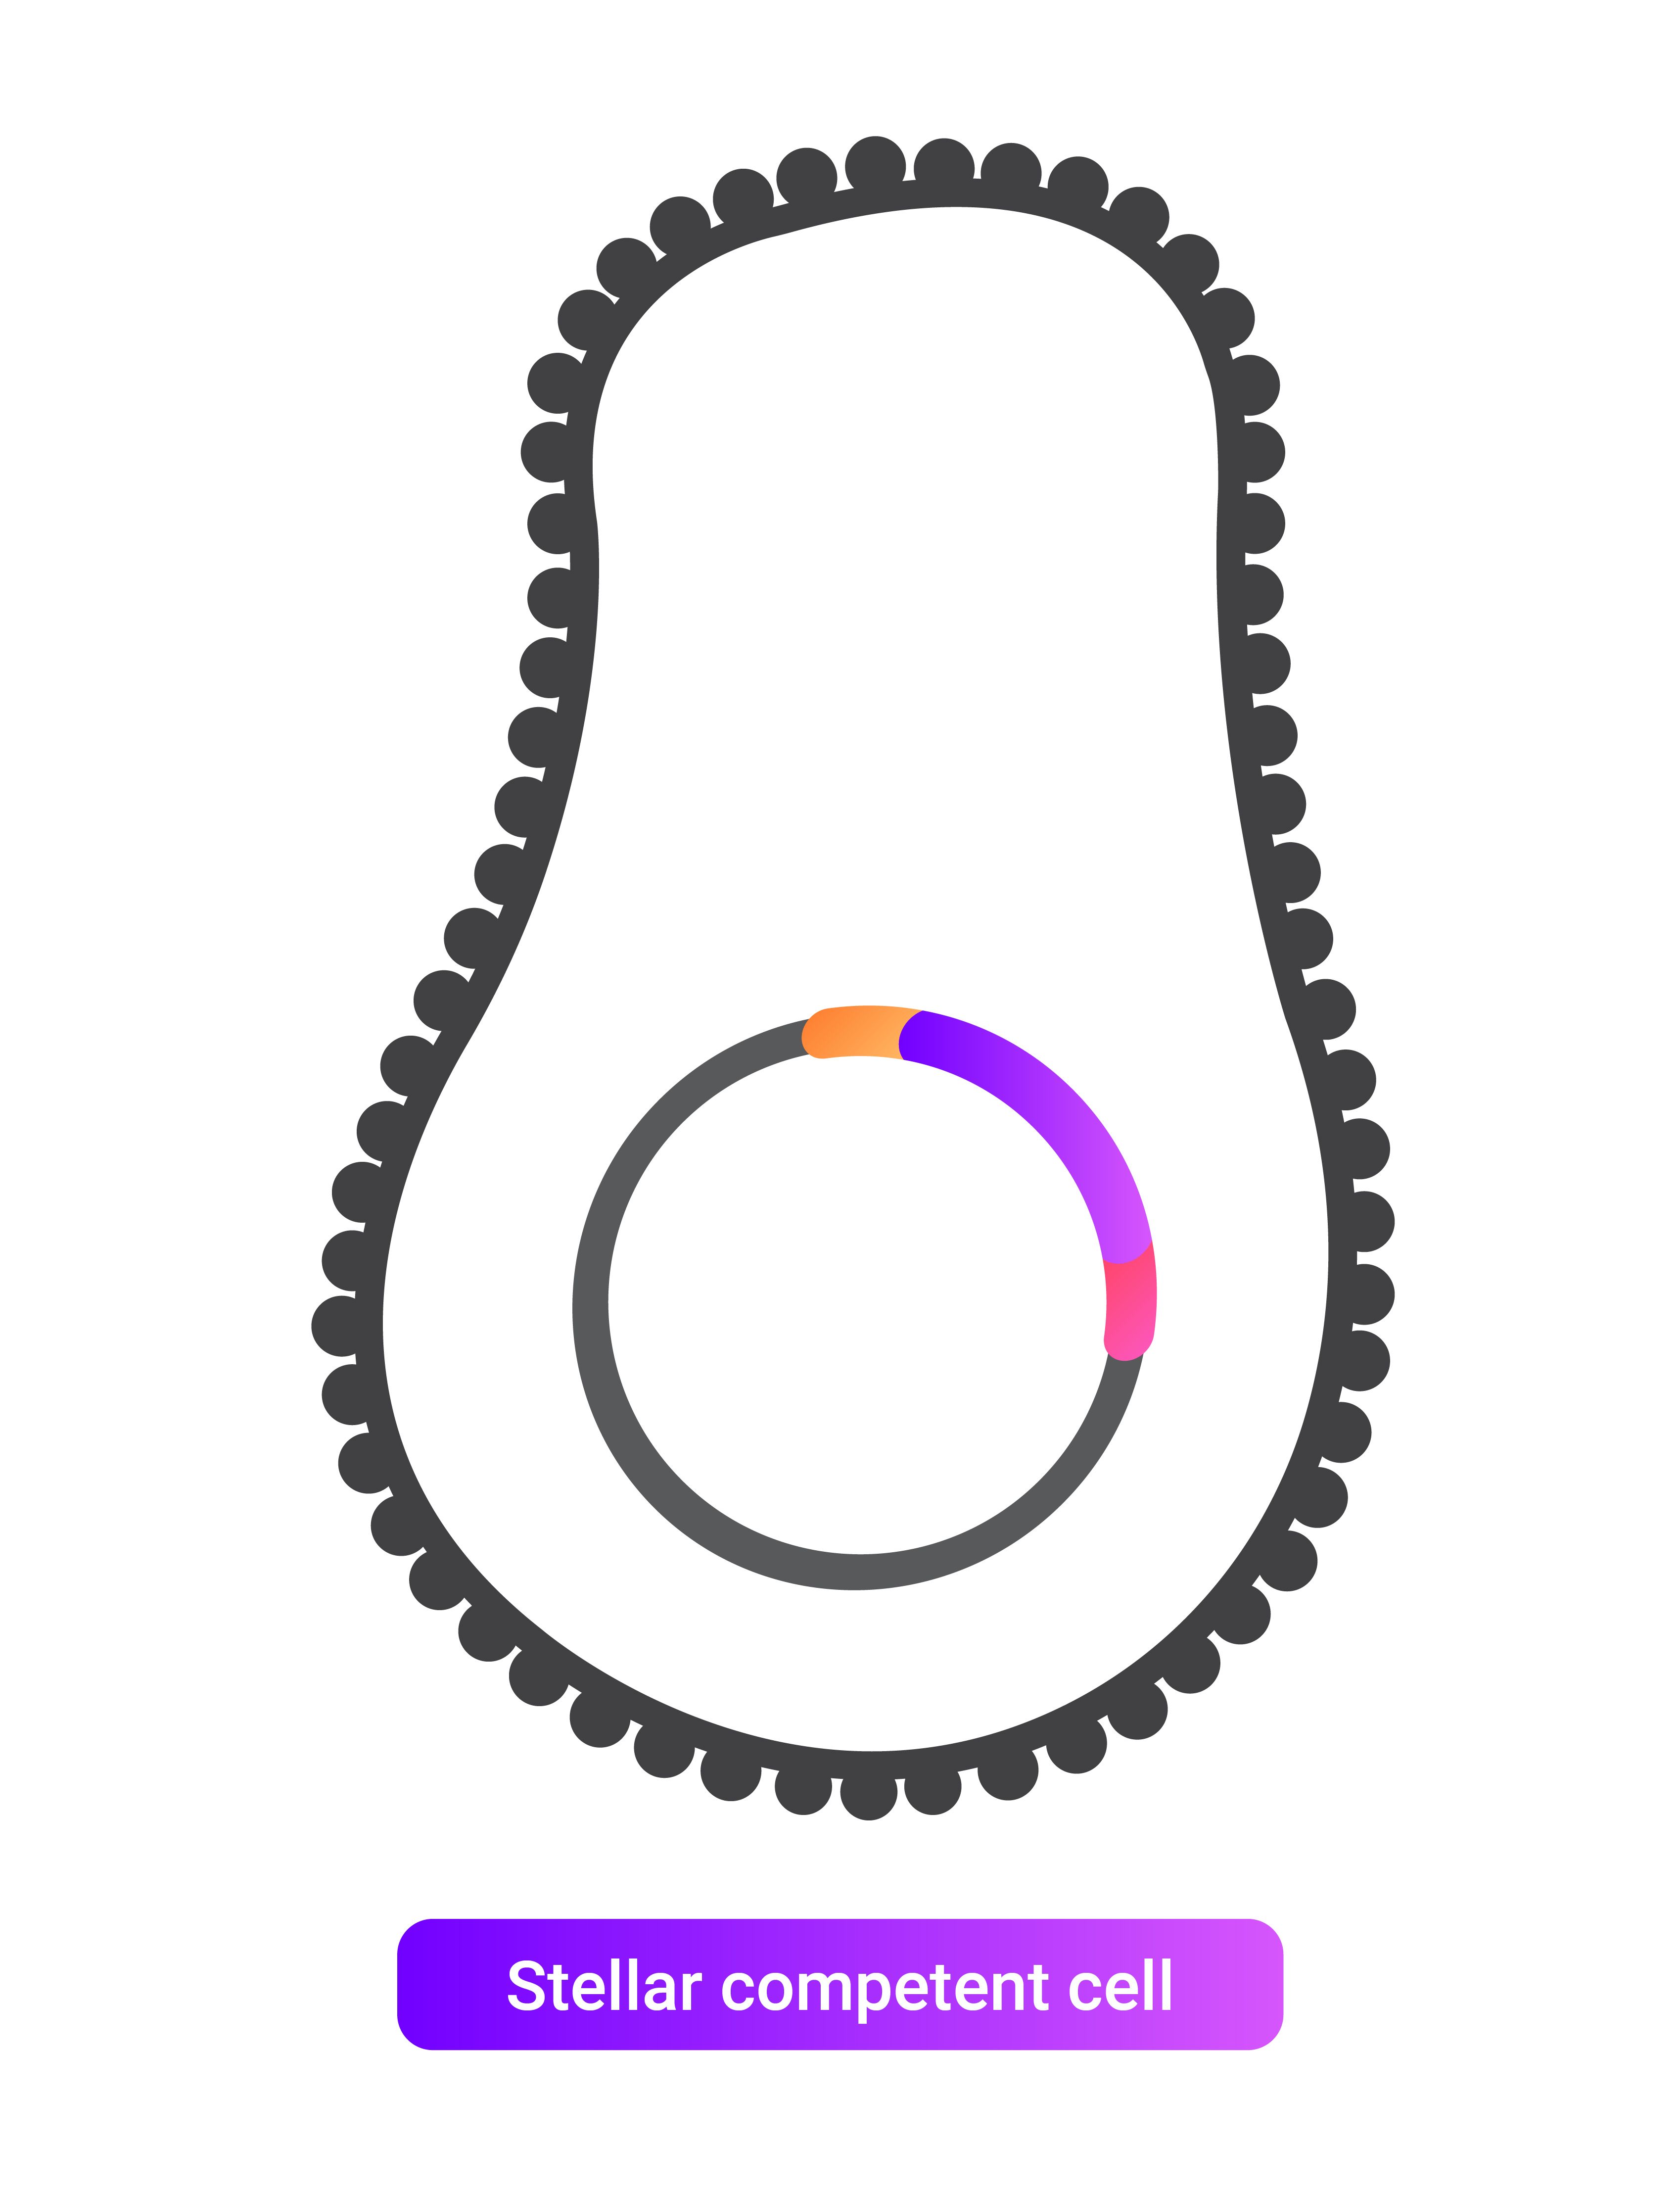
This vector can then be directly transformed into stellar competent cells without requiring a ligase or polymerase. In these cells, any gaps are filled, and the cloning vector is completed.
Overview of In-Fusion Cloning:
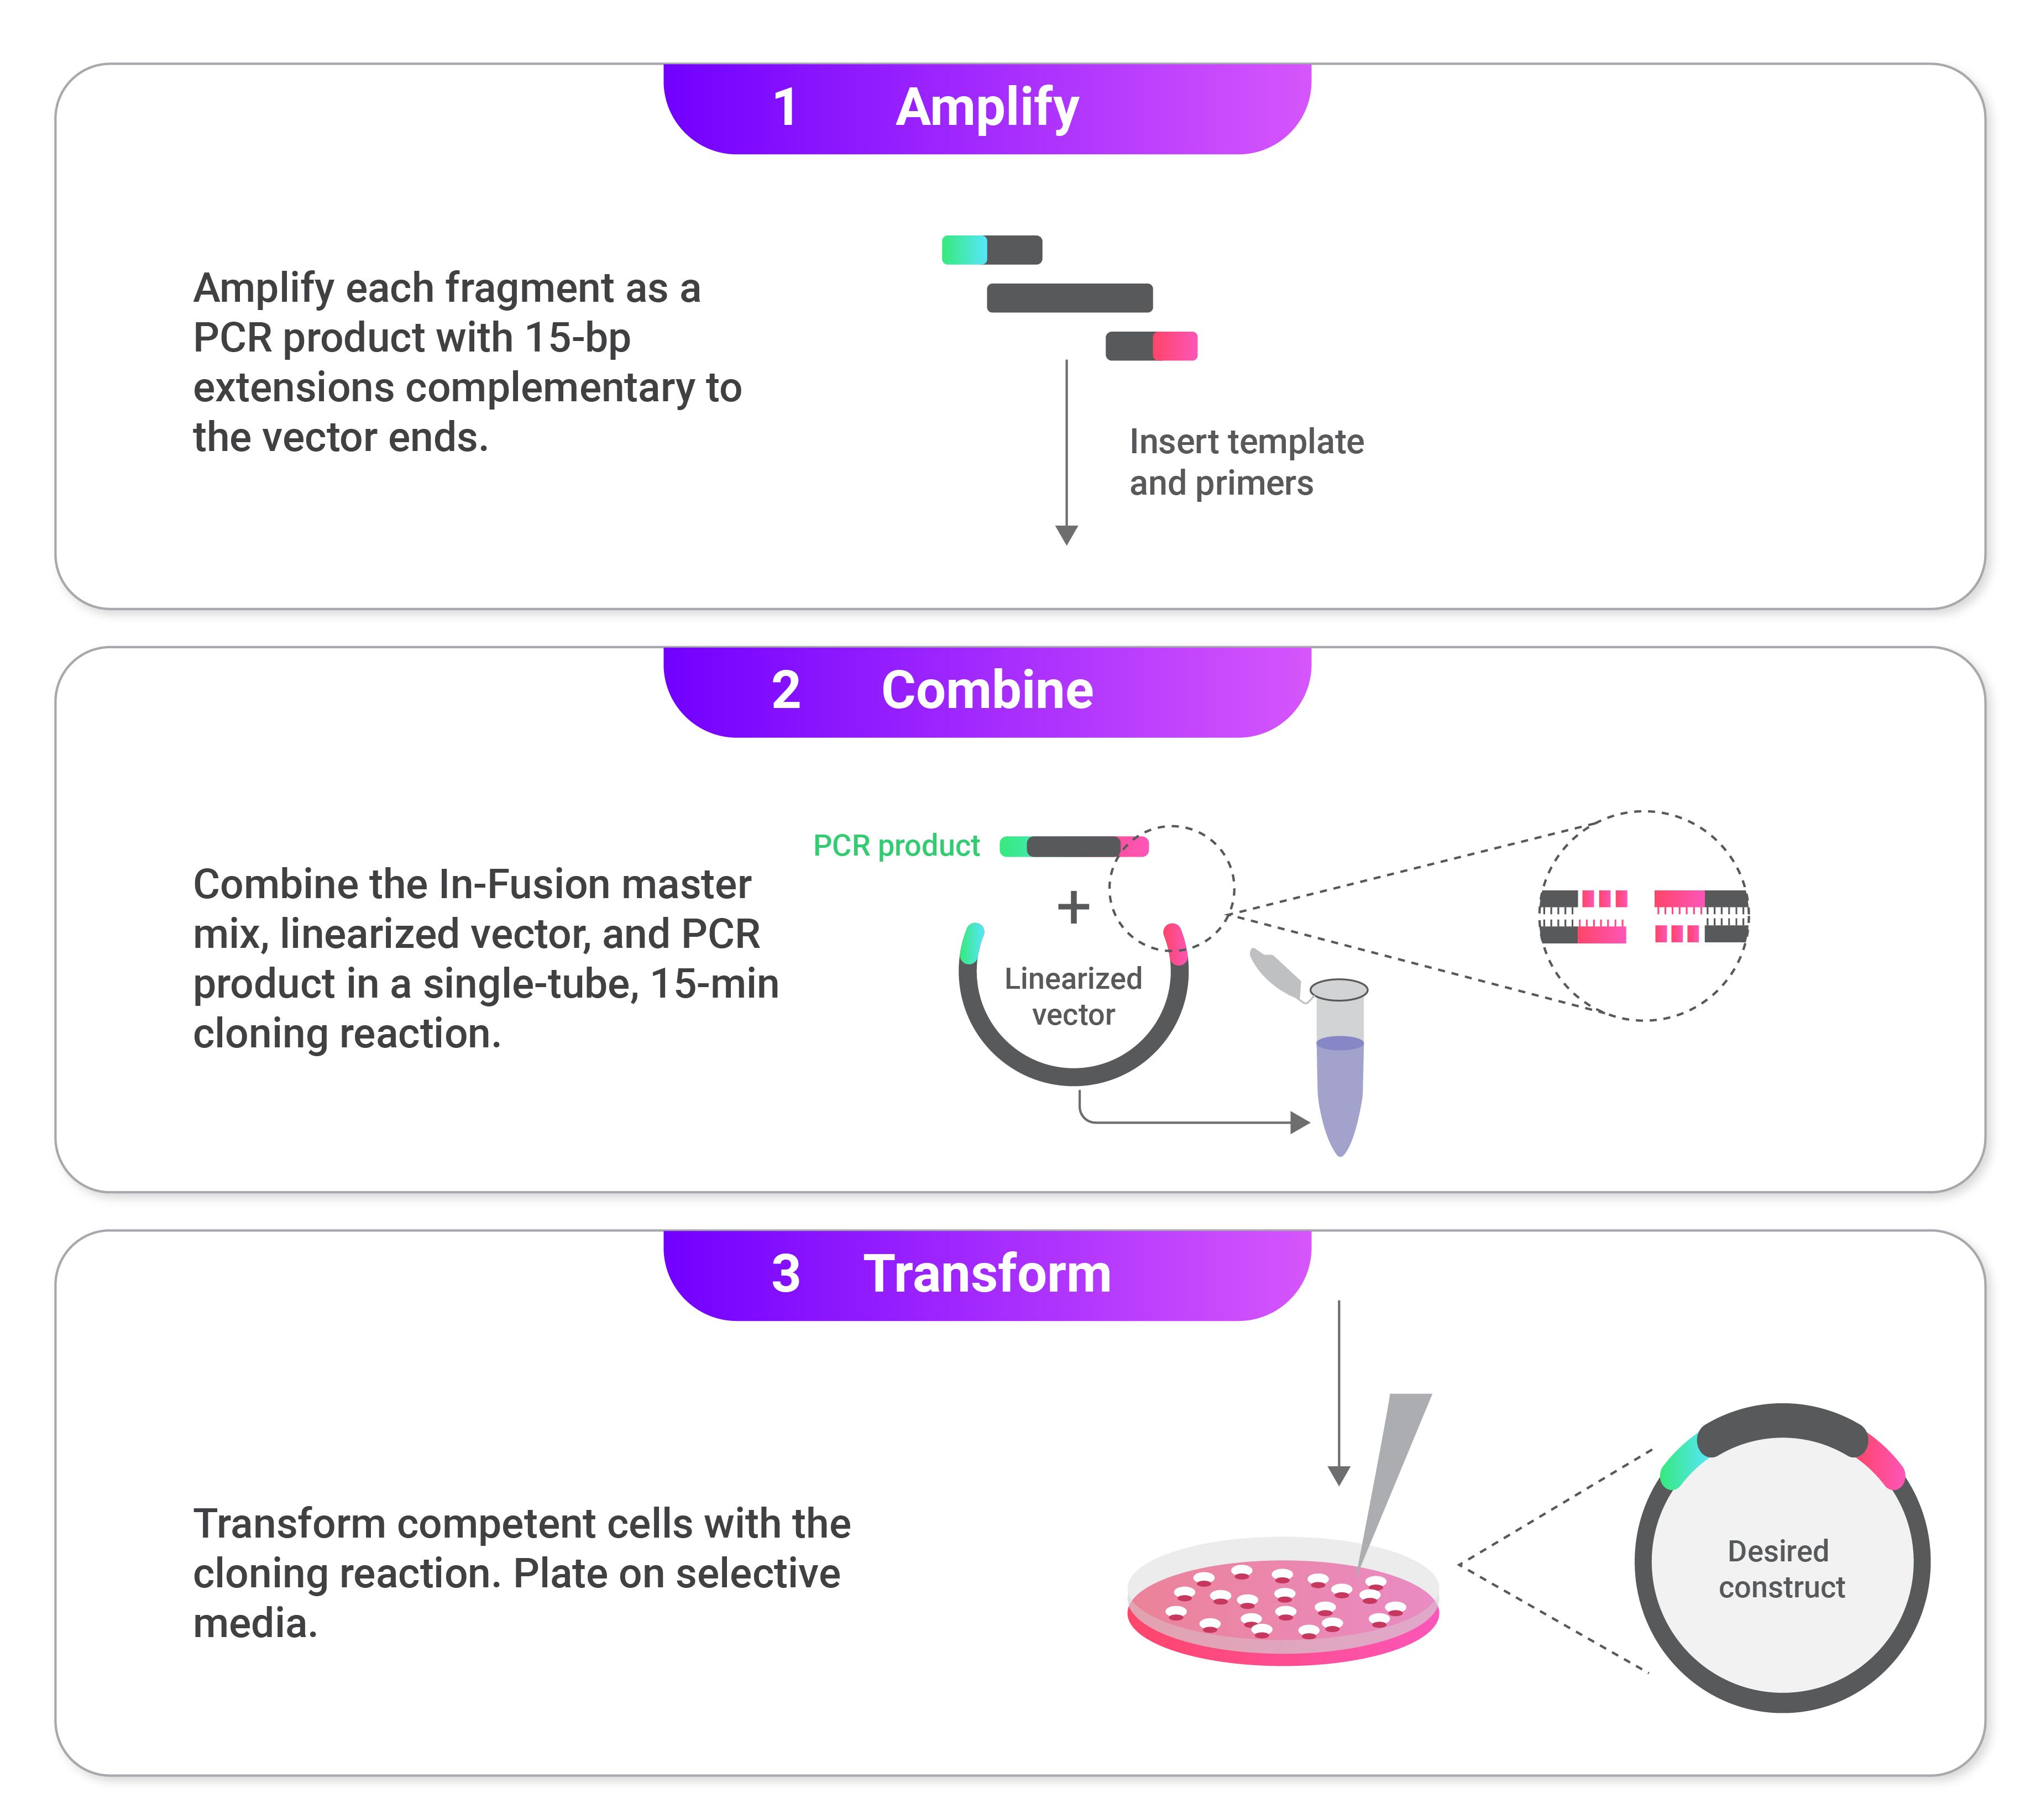
Steps in In-Fusion cloning:
1. Select insertion site and linearize backbone.


2. Add homologous ends to the inserts.

3. Chew back the 3' end of the fragments.
4. Backbone and insert annealed together.
5. Transform resulting vector into stellar competent cells.
Example of designing primers for multiple inserts in In-Fusion cloning:


How to simulate In-Fusion Cloning
With Mendelgen, performing a simulation of In-Fusion cloning is simple and straightforward. Follow the steps outlined below.
1. Open Mendelgen, and sign in.
2. Select and click a vector from your library to be used as the backbone.
a. The Mendelgen dashboard shown. 
b. When the page opens the selected backbone will be shown in the viewer.
3. Click the cloning tool button, displayed as a circular DNA sequence, in the toolbar at the top of the page. 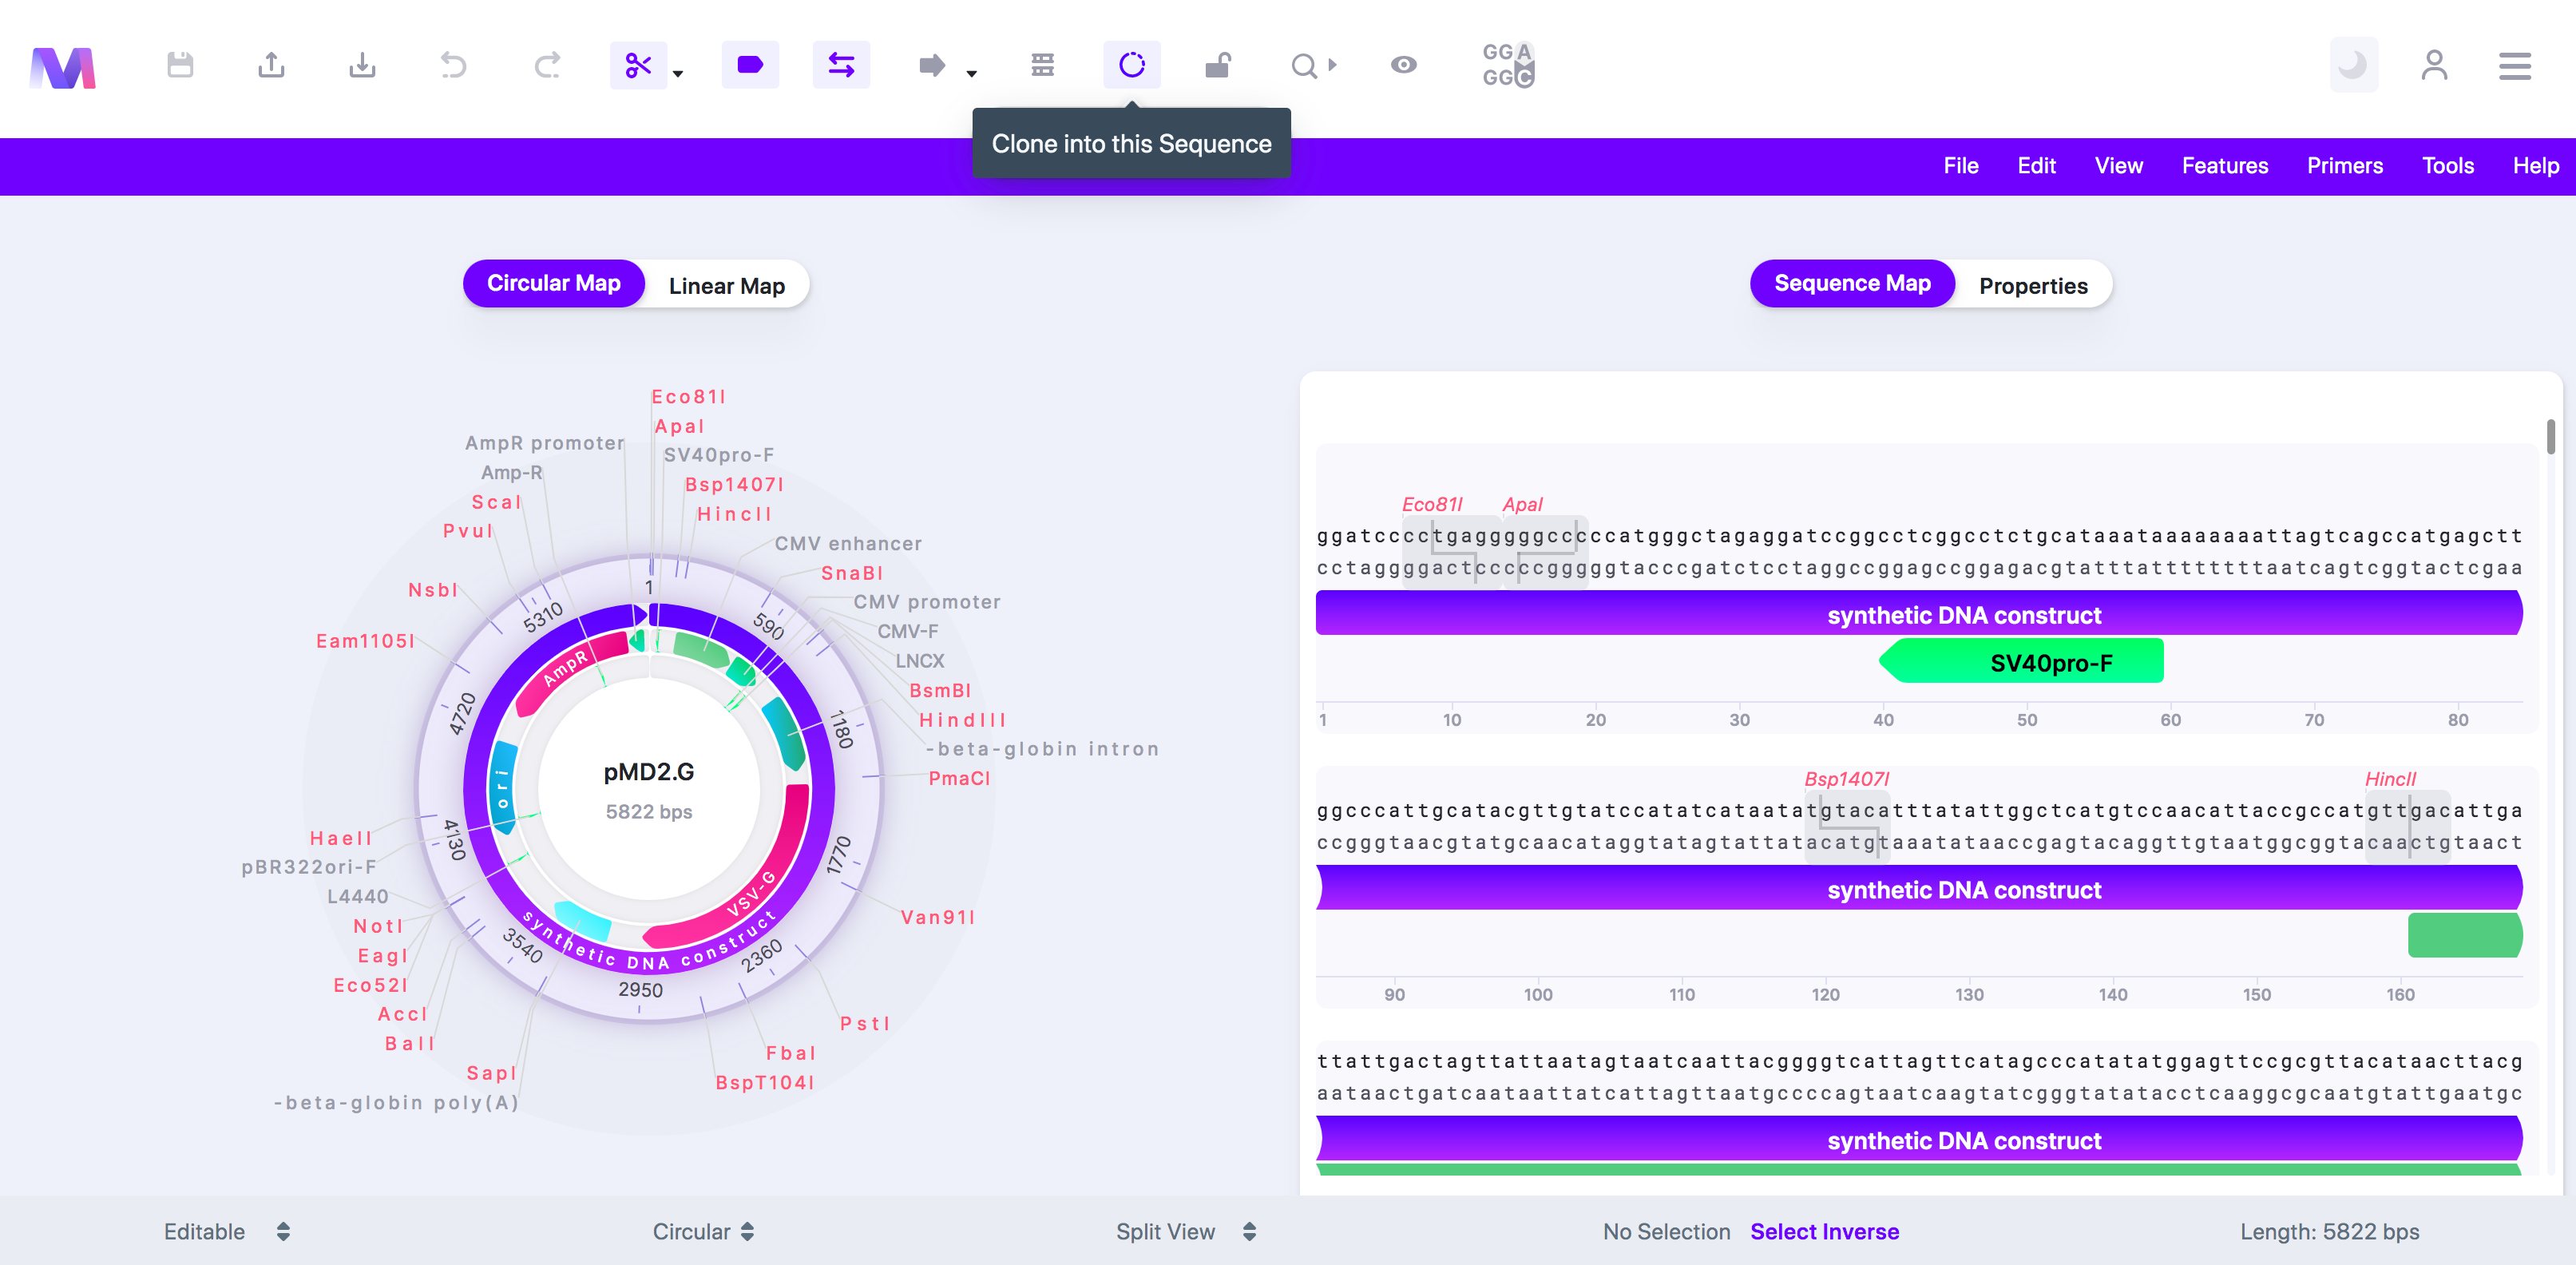
4. Select 'In-Fusion Cloning' in the dropdown.
a. A tab will open to the right of the viewer titled 'Create a In-Fusion Cloning Vector'.
b. The cloning tool clicked with In-Fusion Cloning highlighted and the cloning tab open. 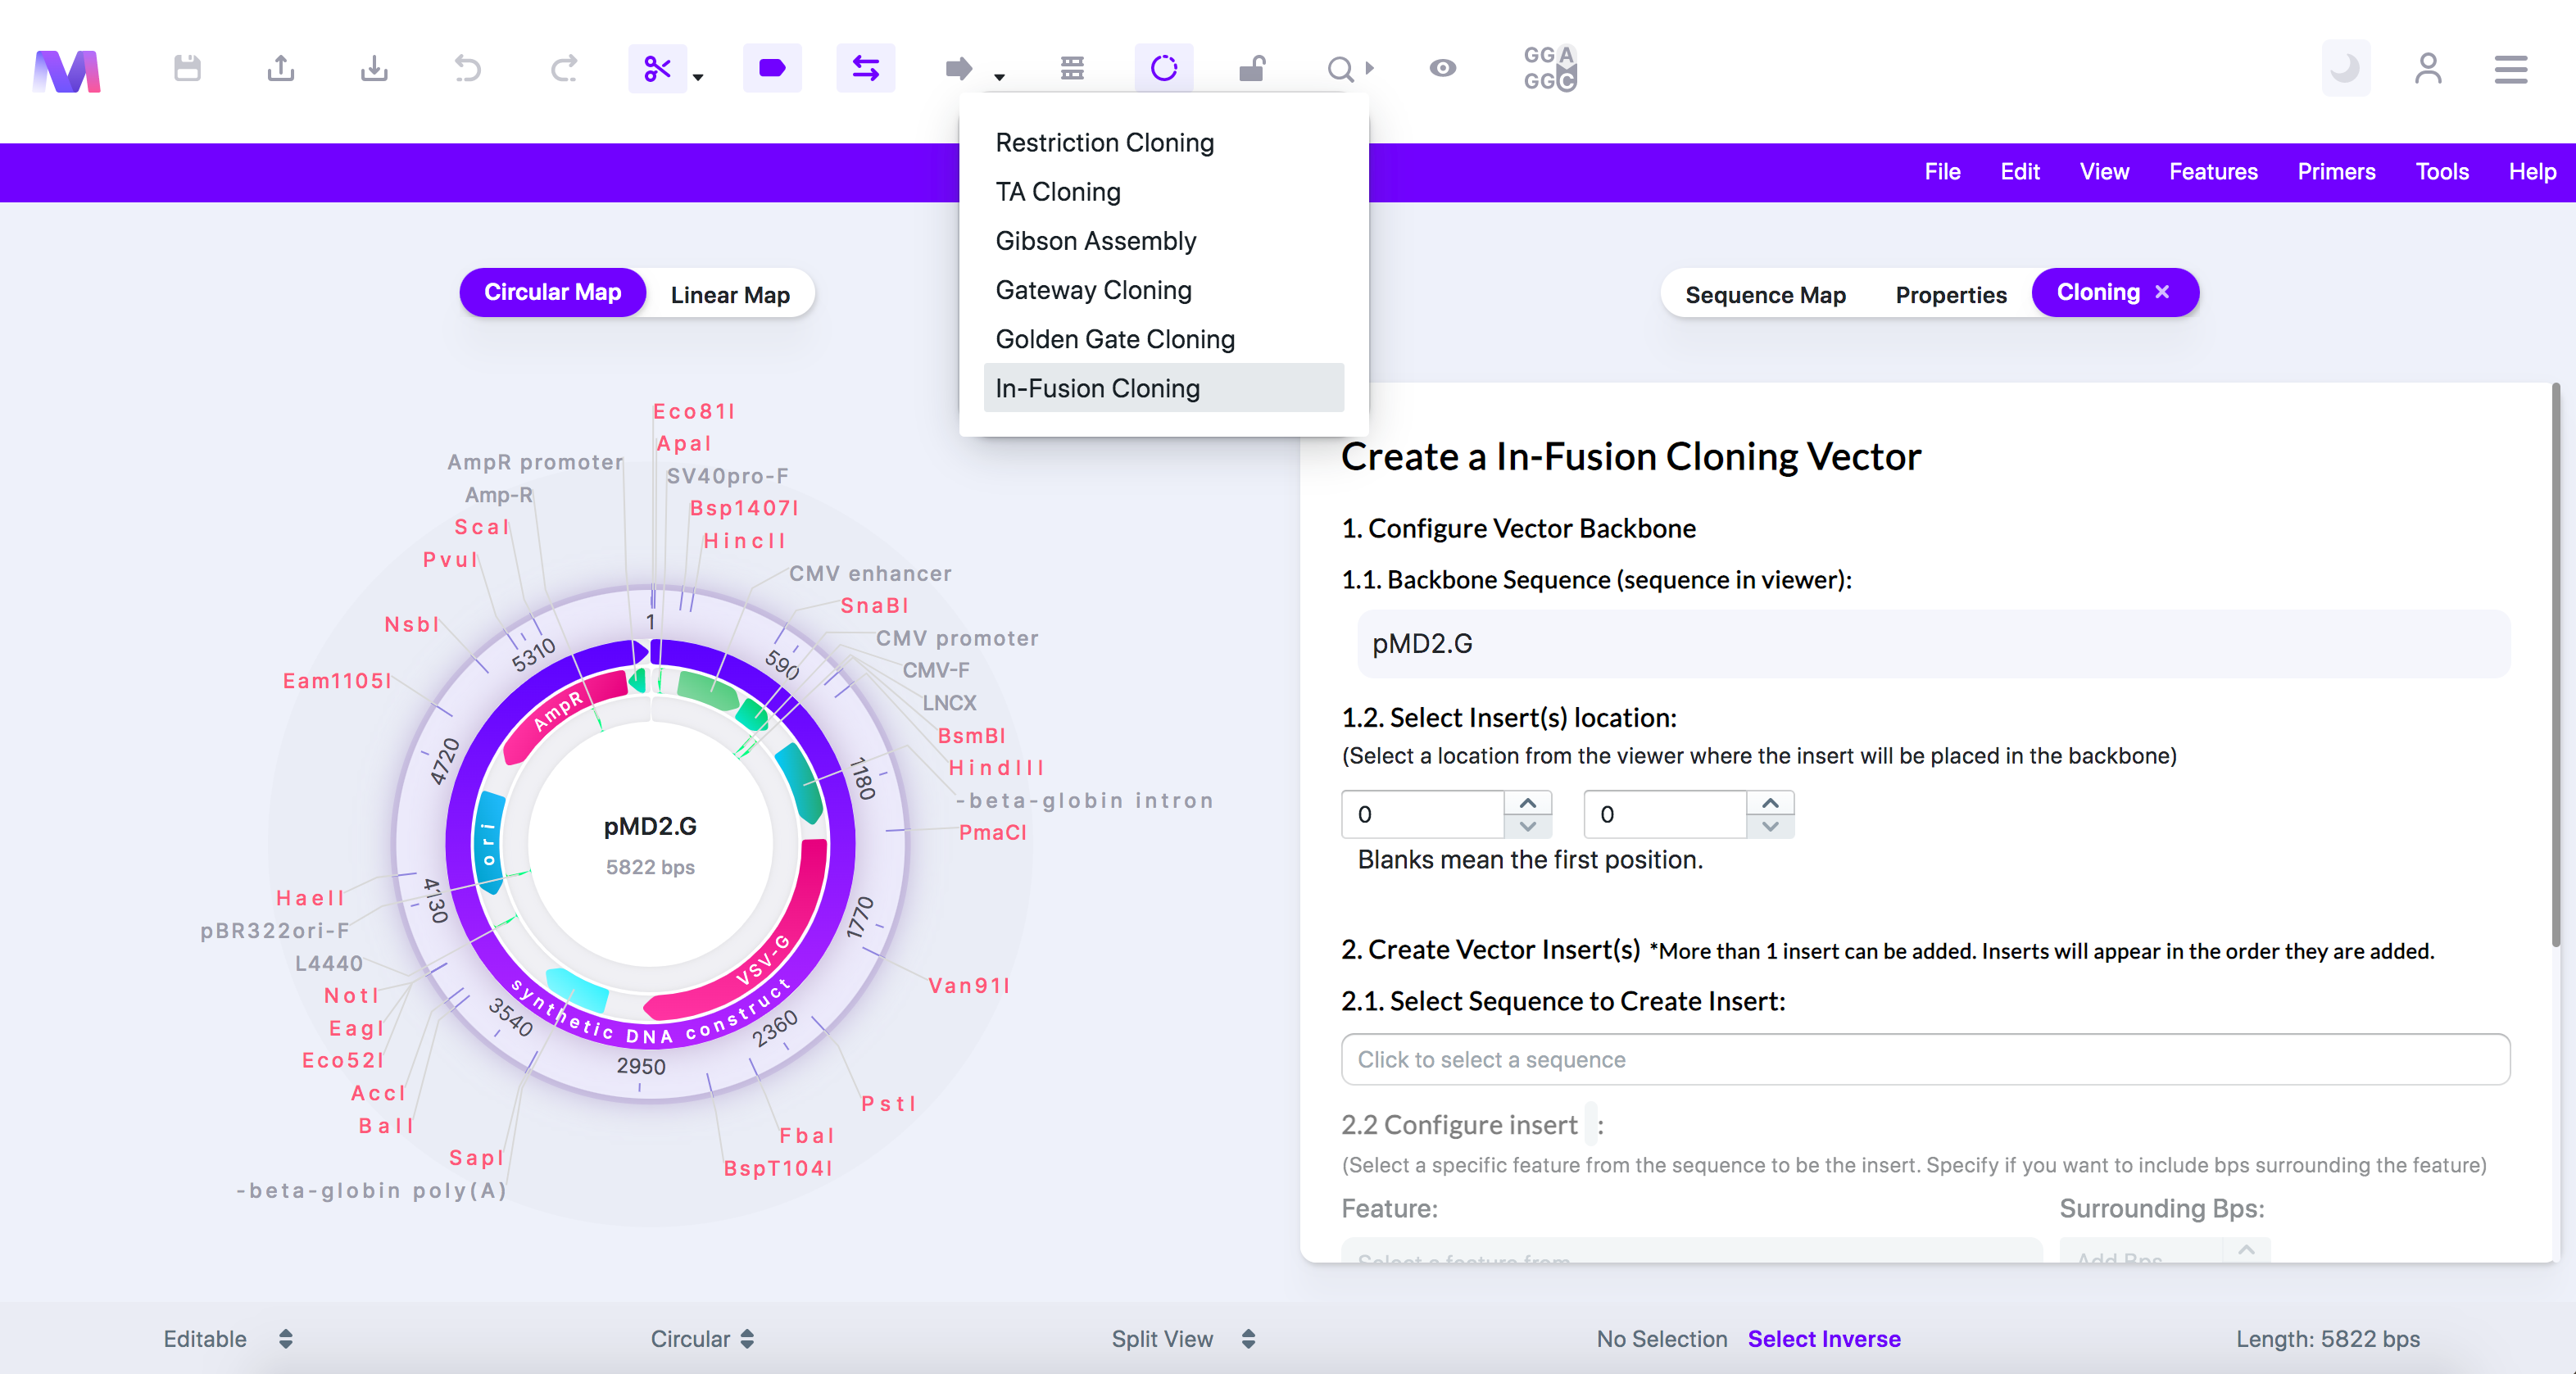
5. In the first step you choose where the insert(s) will be placed in the backbone.
a. The backbone is the sequence displayed in the viewer.
b. Click a feature or click/drag over a location in the viewer to select the region where the insert will be added. 
c. Or switch to the 'Sequence Map' tab and click on a feature or location and then switch back to the 'Cloning' tab. 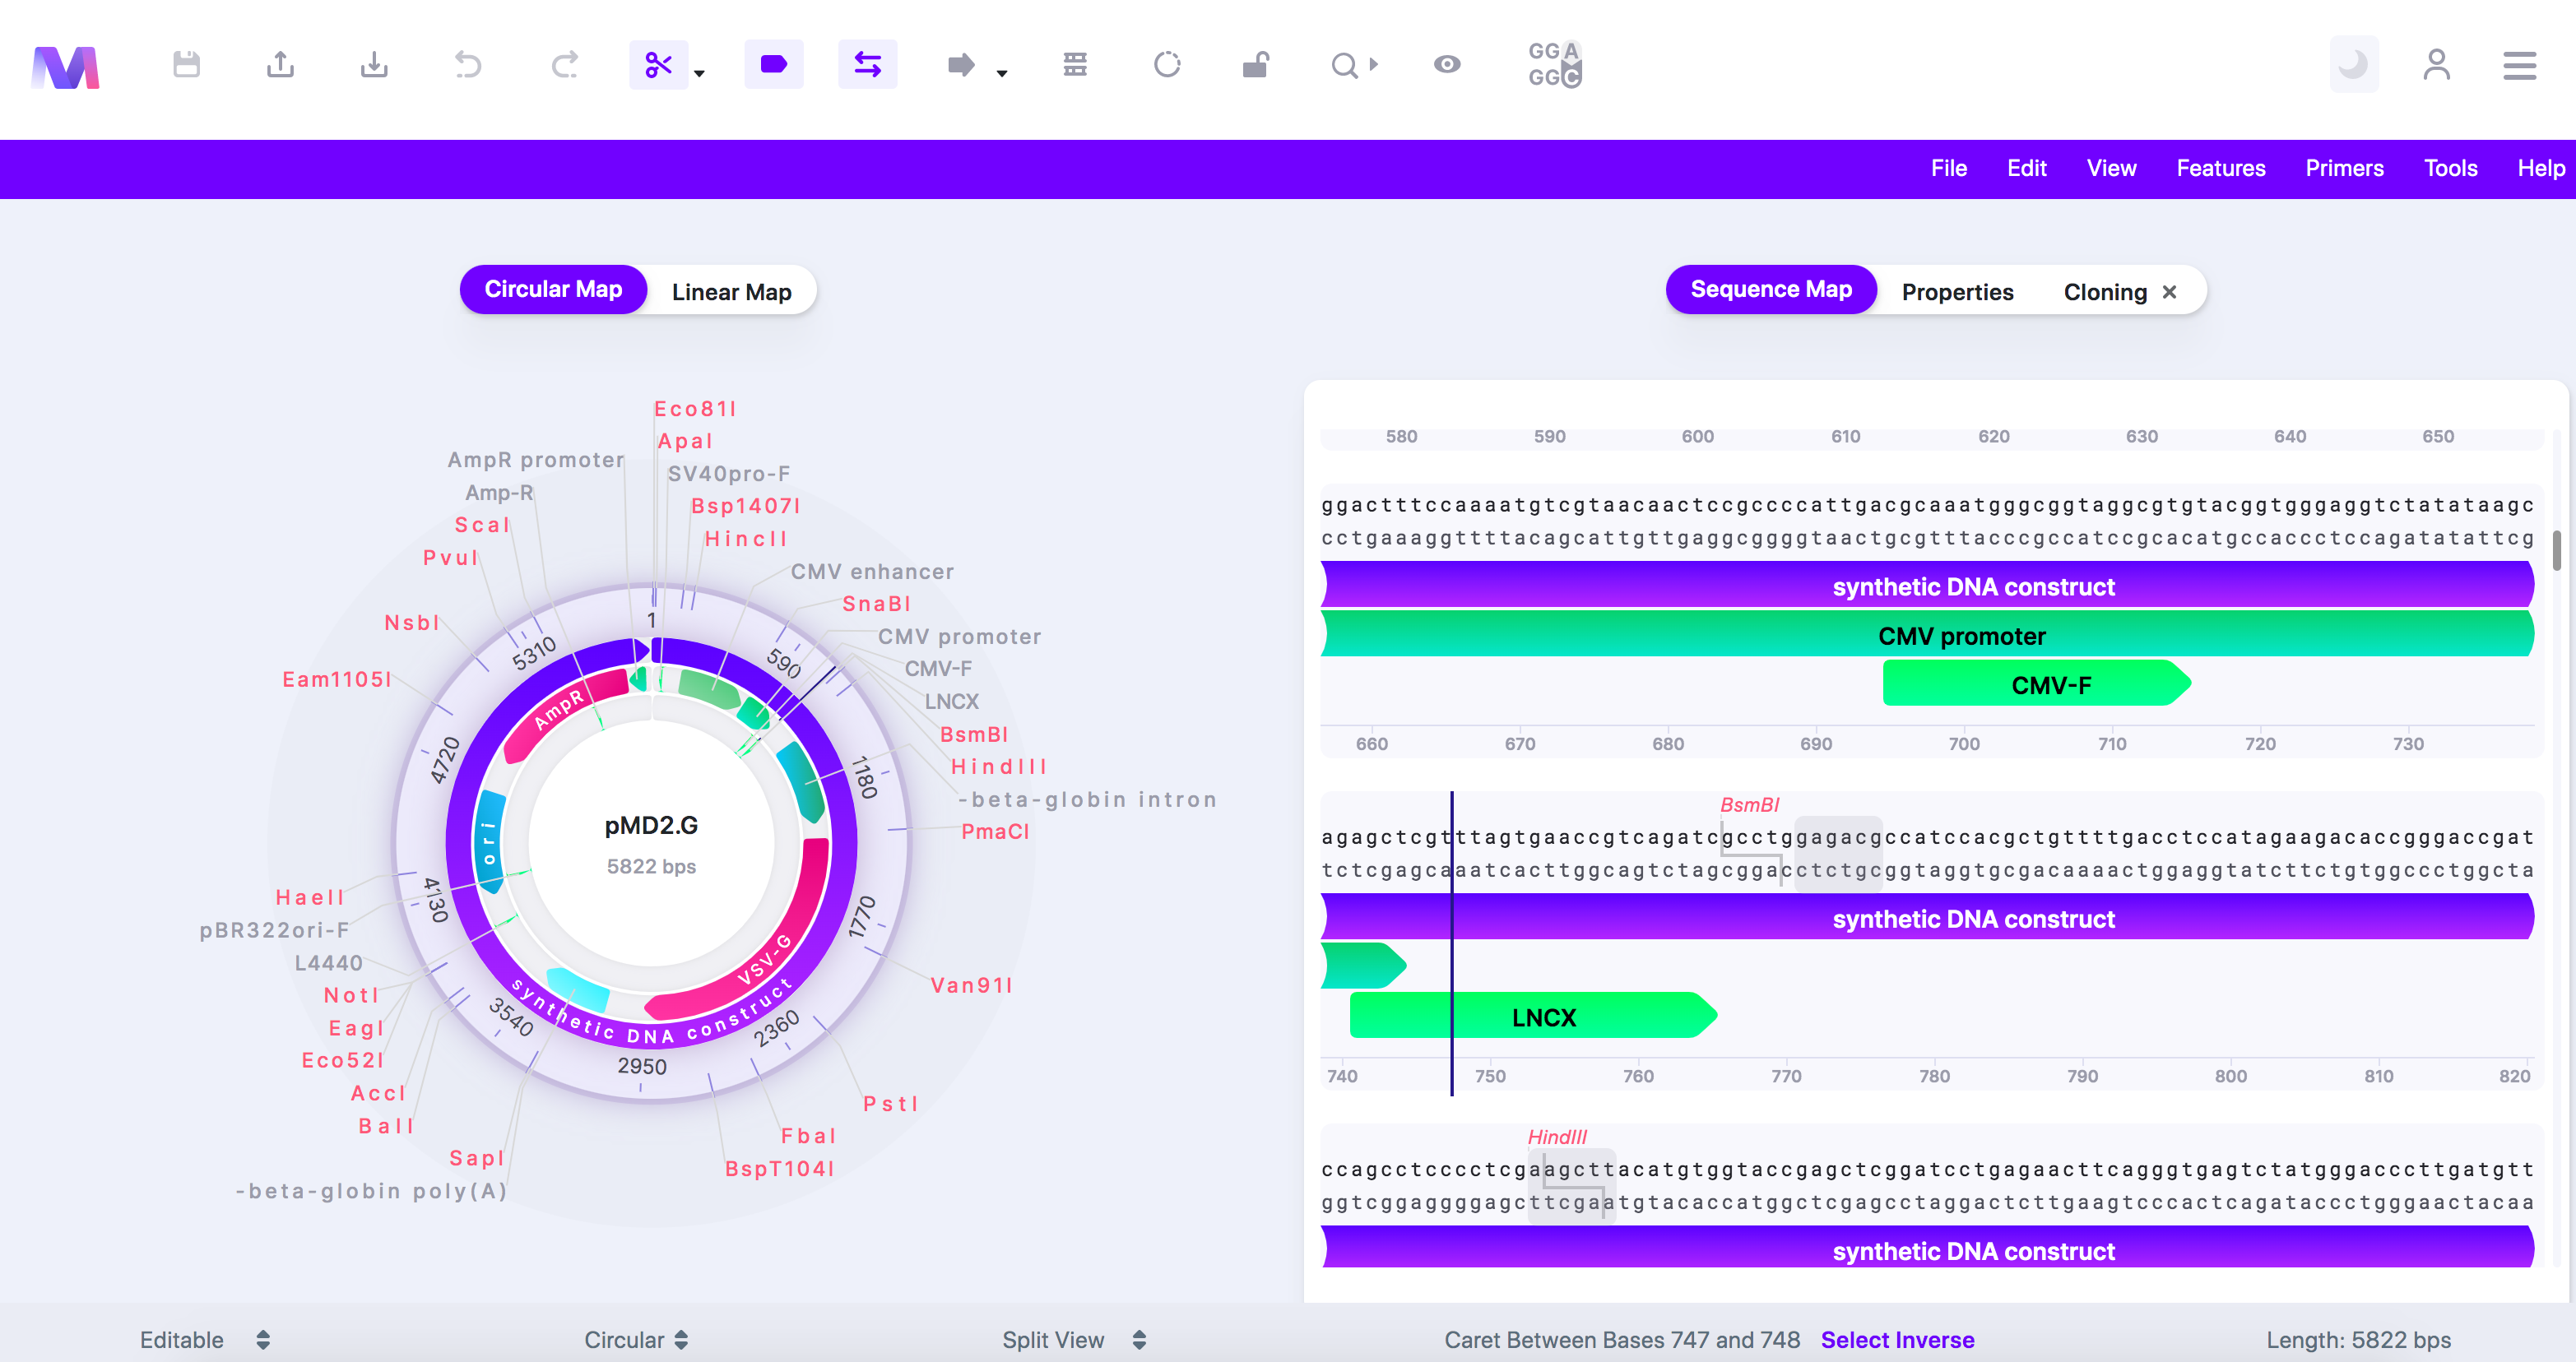
6. Select the insert sequence(s) containing the gene(s) of interest.
a. Select a sequence loaded from your library. 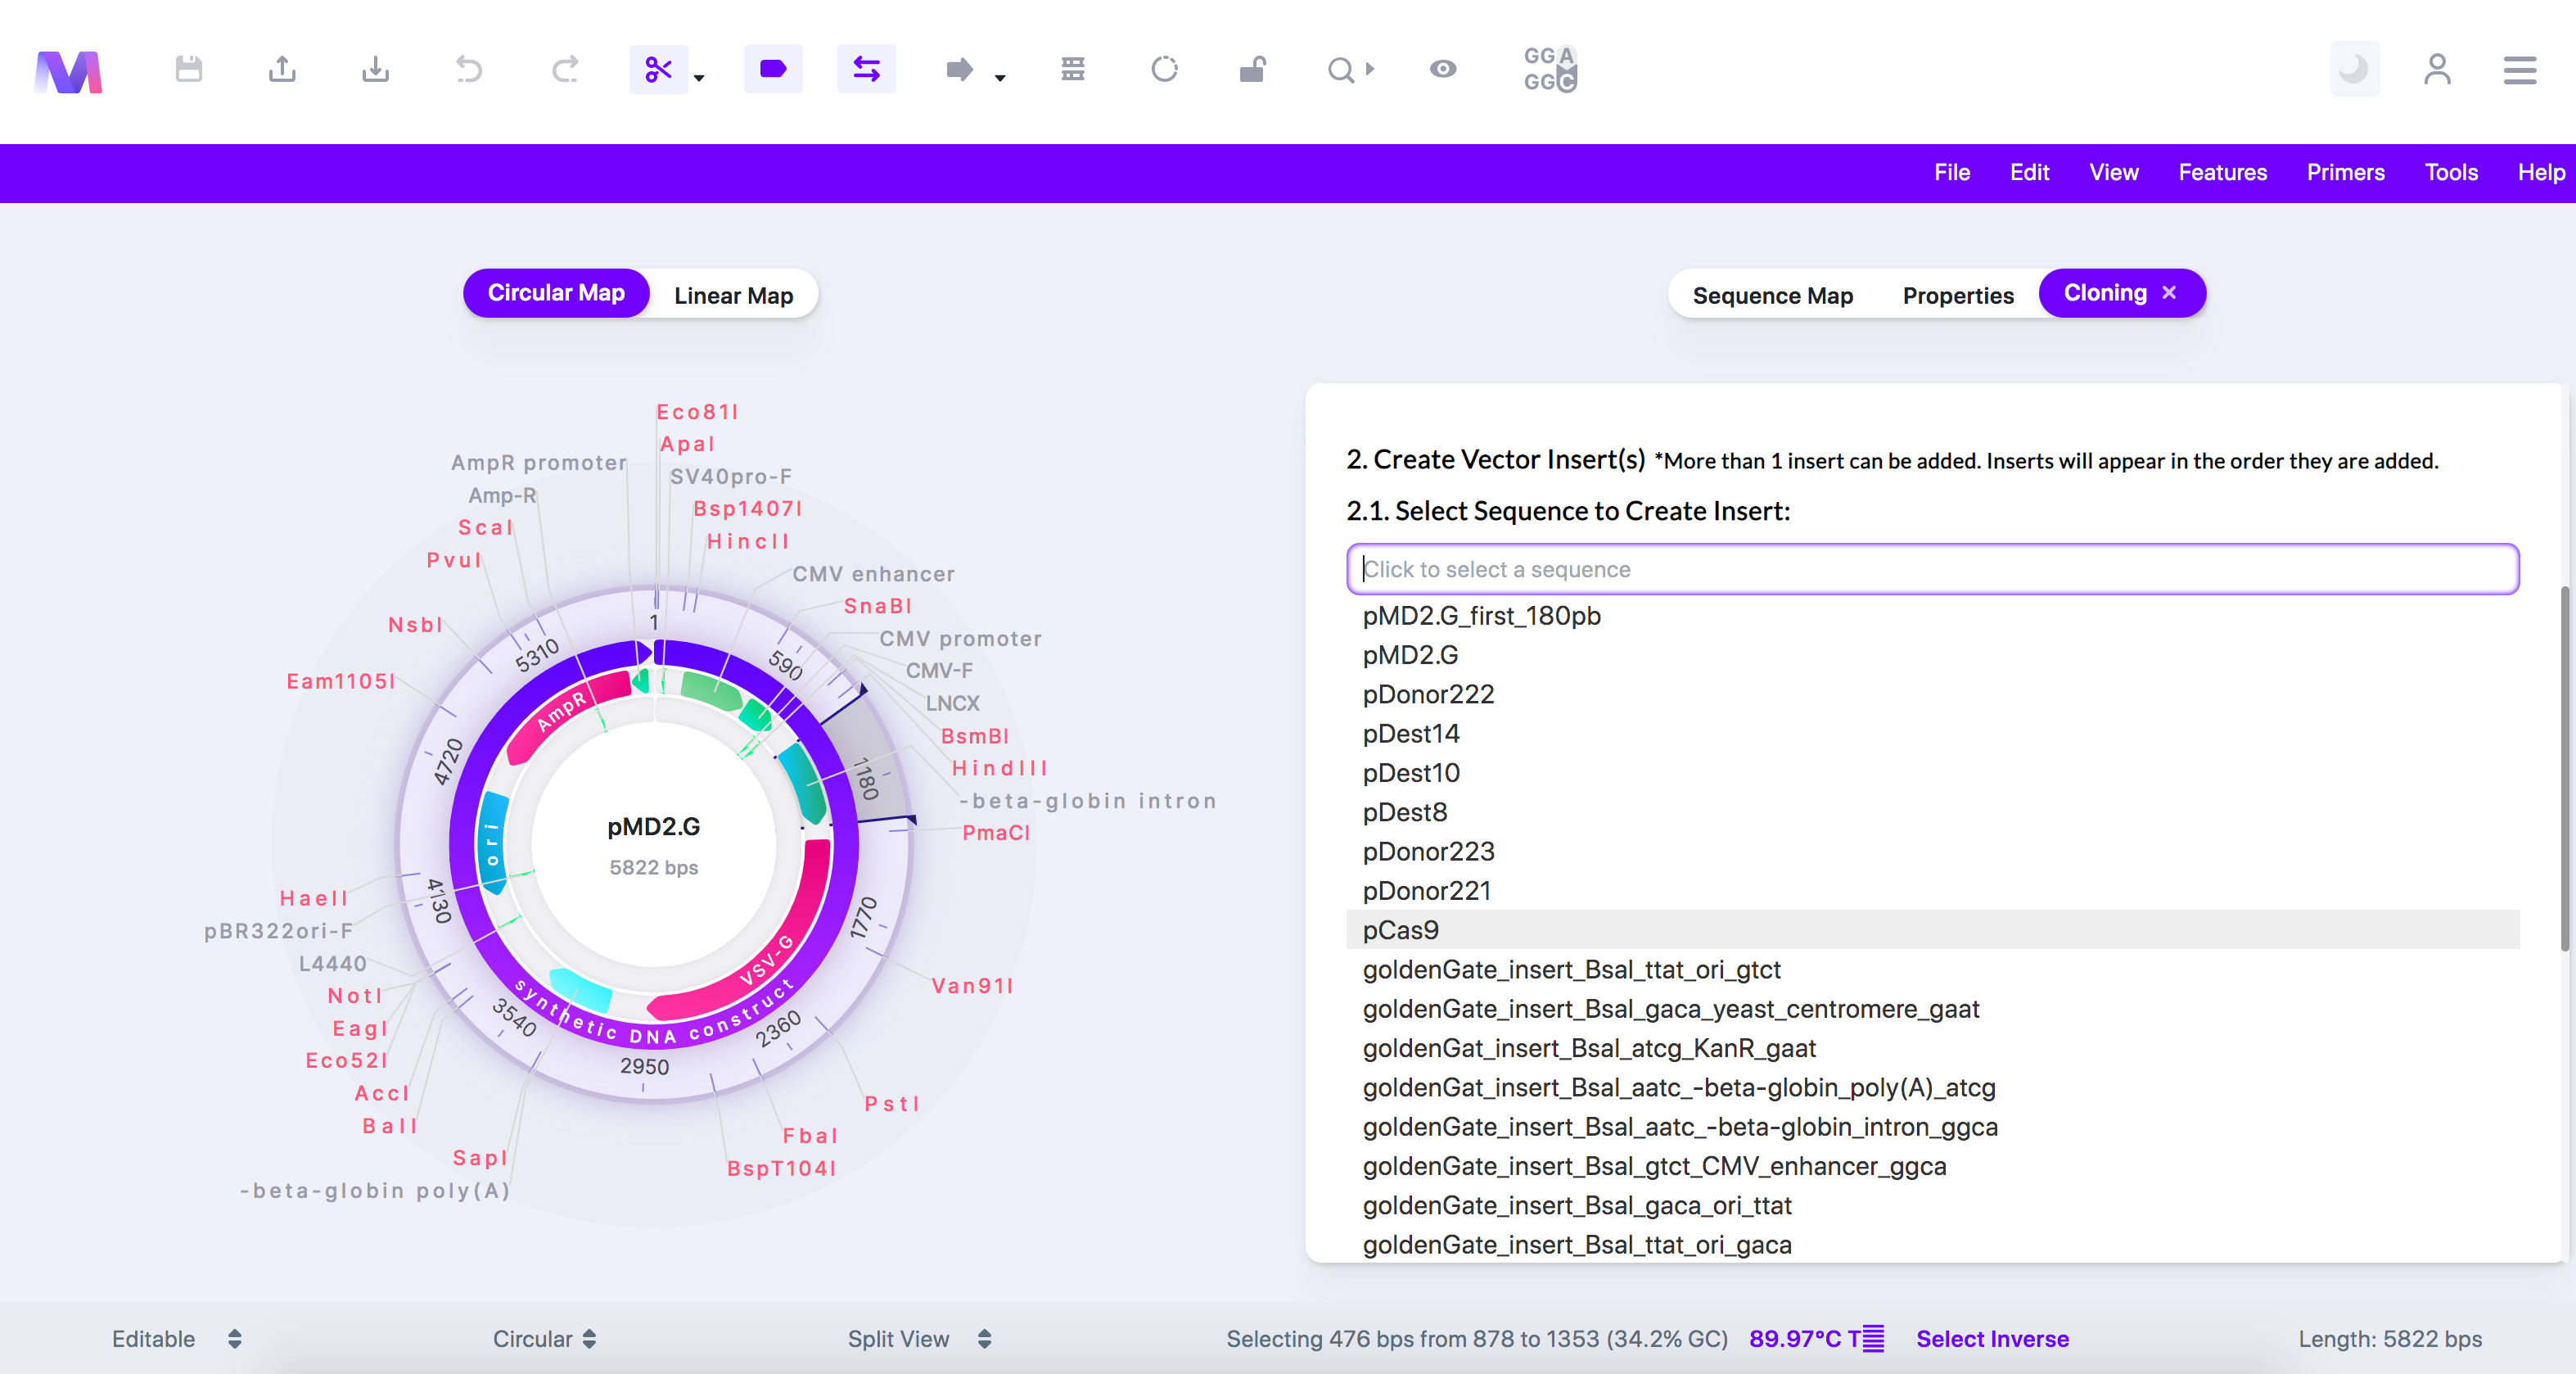
b. Configure the sequence so only the region of interest will be inserted in the backbone. You can skip this step if you want the entire sequence to be inserted.
i. Choose the feature, base pairs surrounding the feature, and the orientation of the insert.
c. Click 'Create Insert' and the insert will be added under 'Insert(s) Created'.
d. Up to 4 inserts can be created at a time.
e. The sequences will be placed in the backbone in the order they are added.
7. Check the correct inserts have been added under 'Insert(s) Created'.
a. Click the 'X' by the sequence under 'Insert(s) Created' to remove it from the list of inserts.
b. Many Inserts shown under 'Insert(s) Created'. 
8. Click the 'Clone' button to perform an In-Fusion Cloning simulation.
a. You will not be able to click the 'Clone' button if any errors exist.
b. An error highlighted above the cloning button preventing cloning. 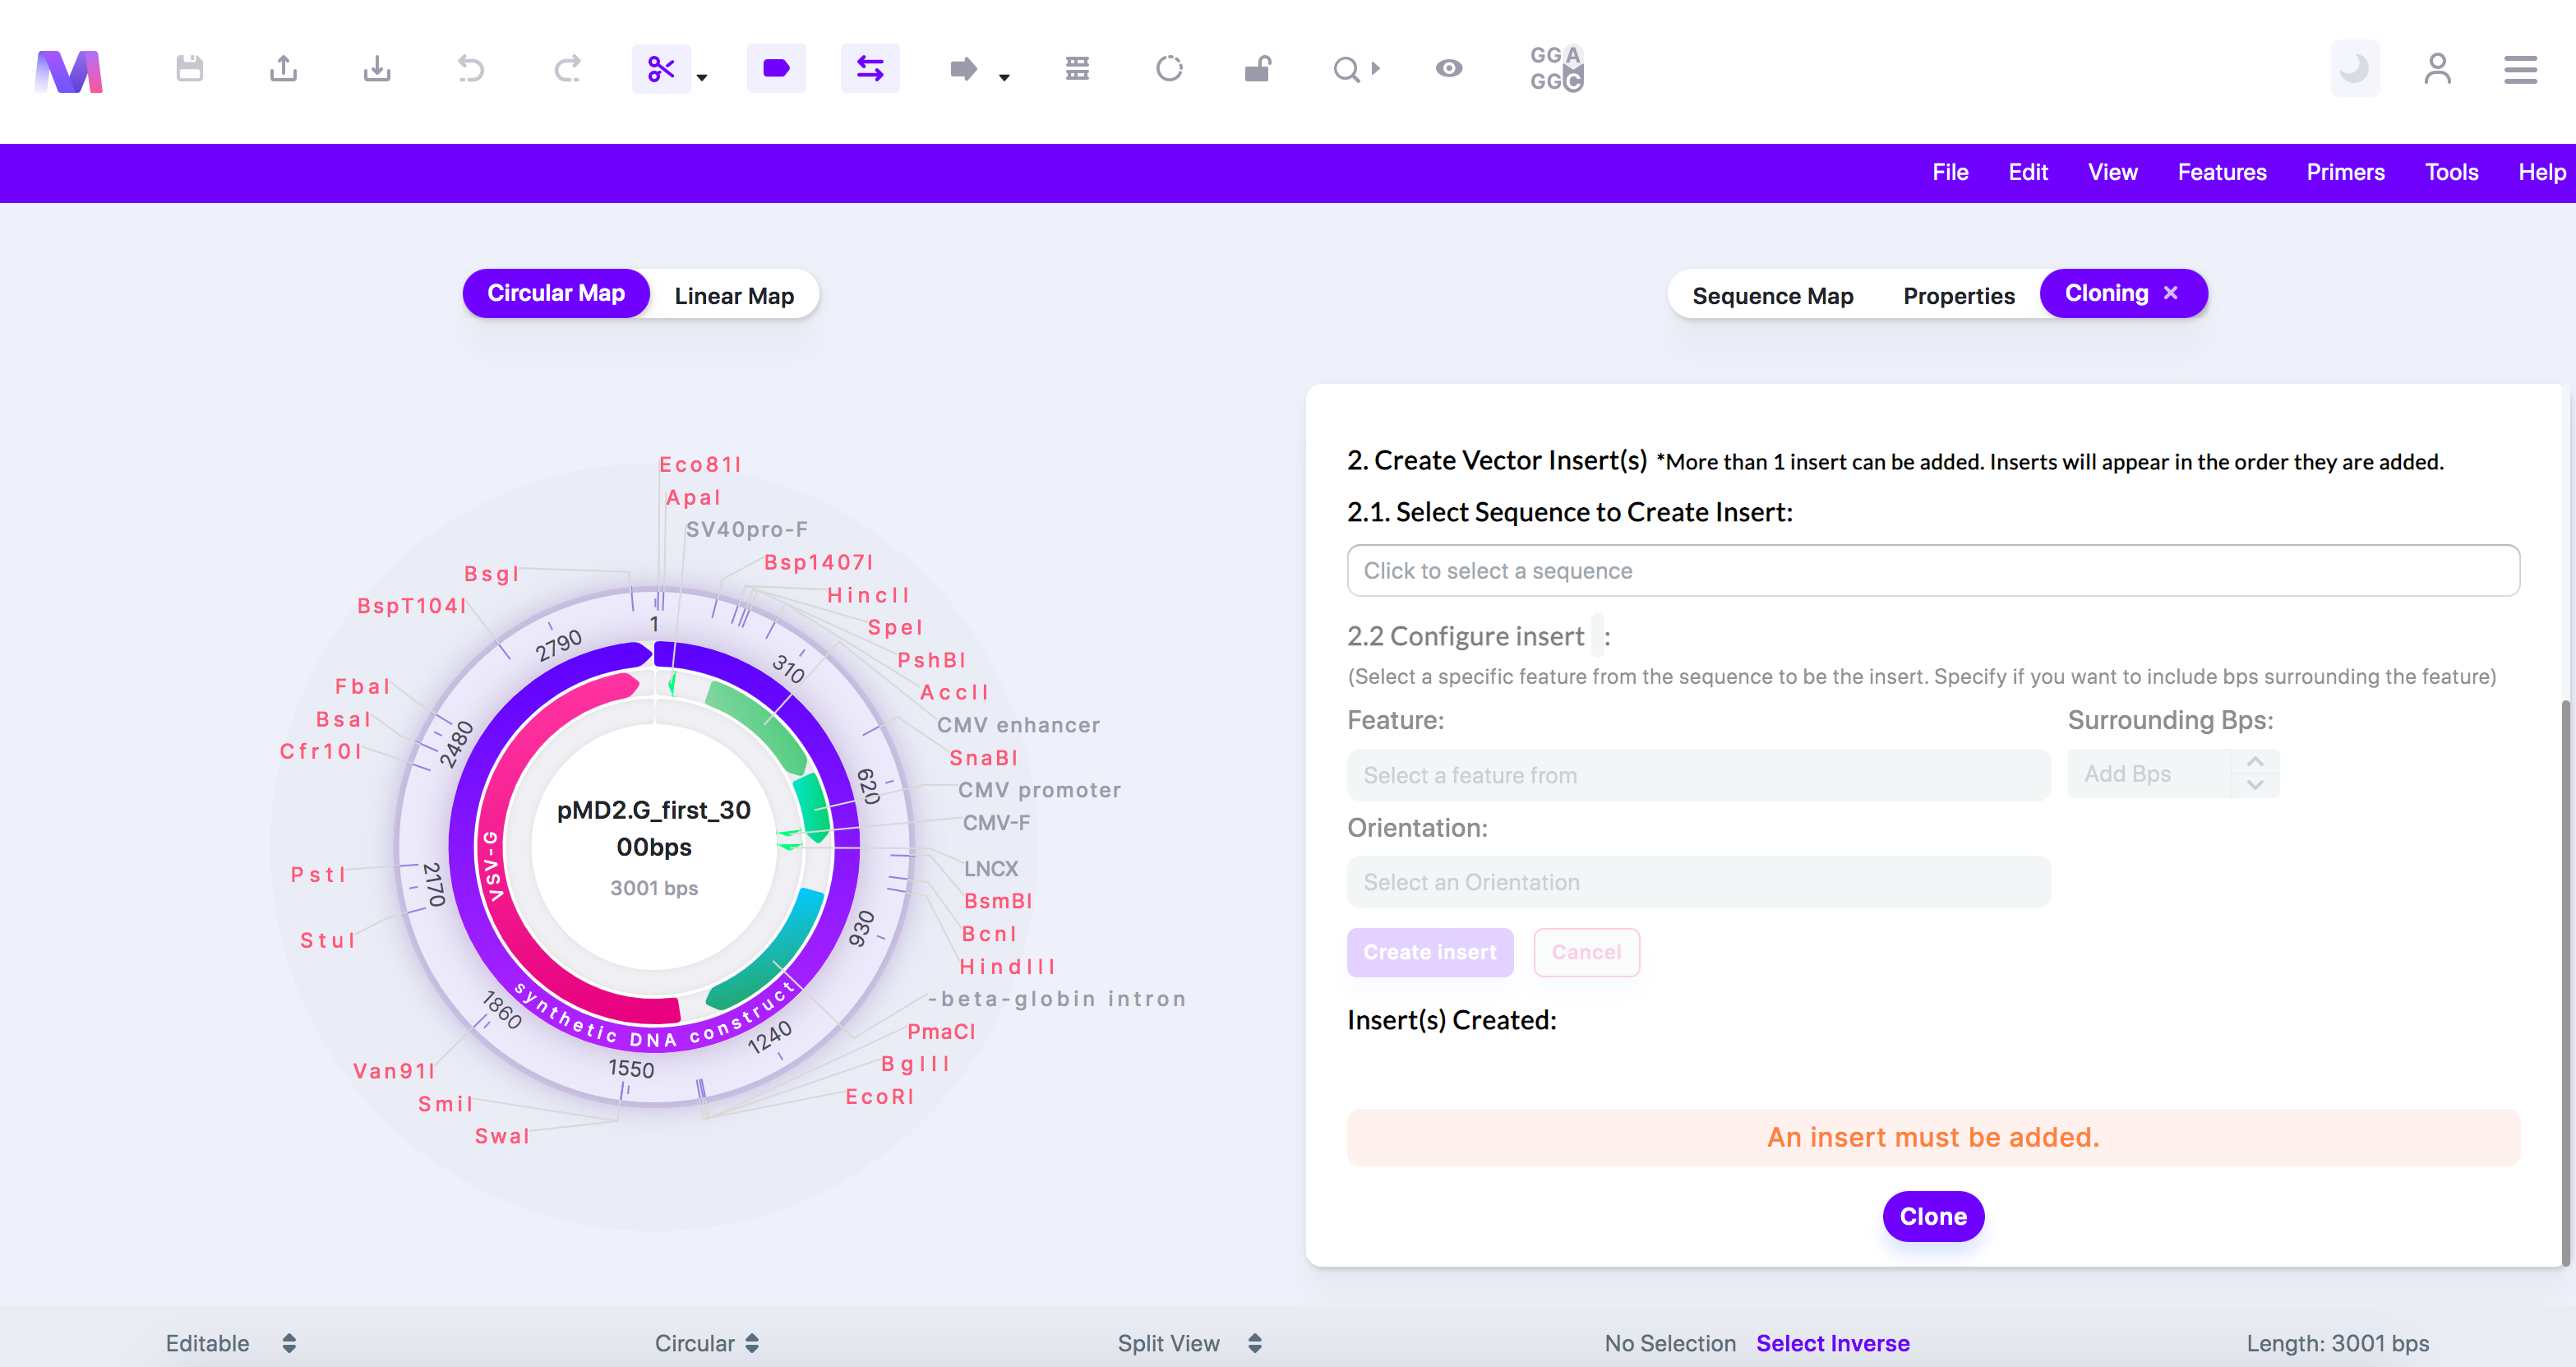
c. Errors and their description
i. An insert must be added.
ii. Too many inserts have been added.
iii. For a linear backbone the start position cannot be greater than the end position in the Selected Insert(s) location.
1. The inserts are placed between the start and end positions. For a linear backbone it would not be possible for the start to be greater than the end.
2. An error showing the start position is greater than the end position. 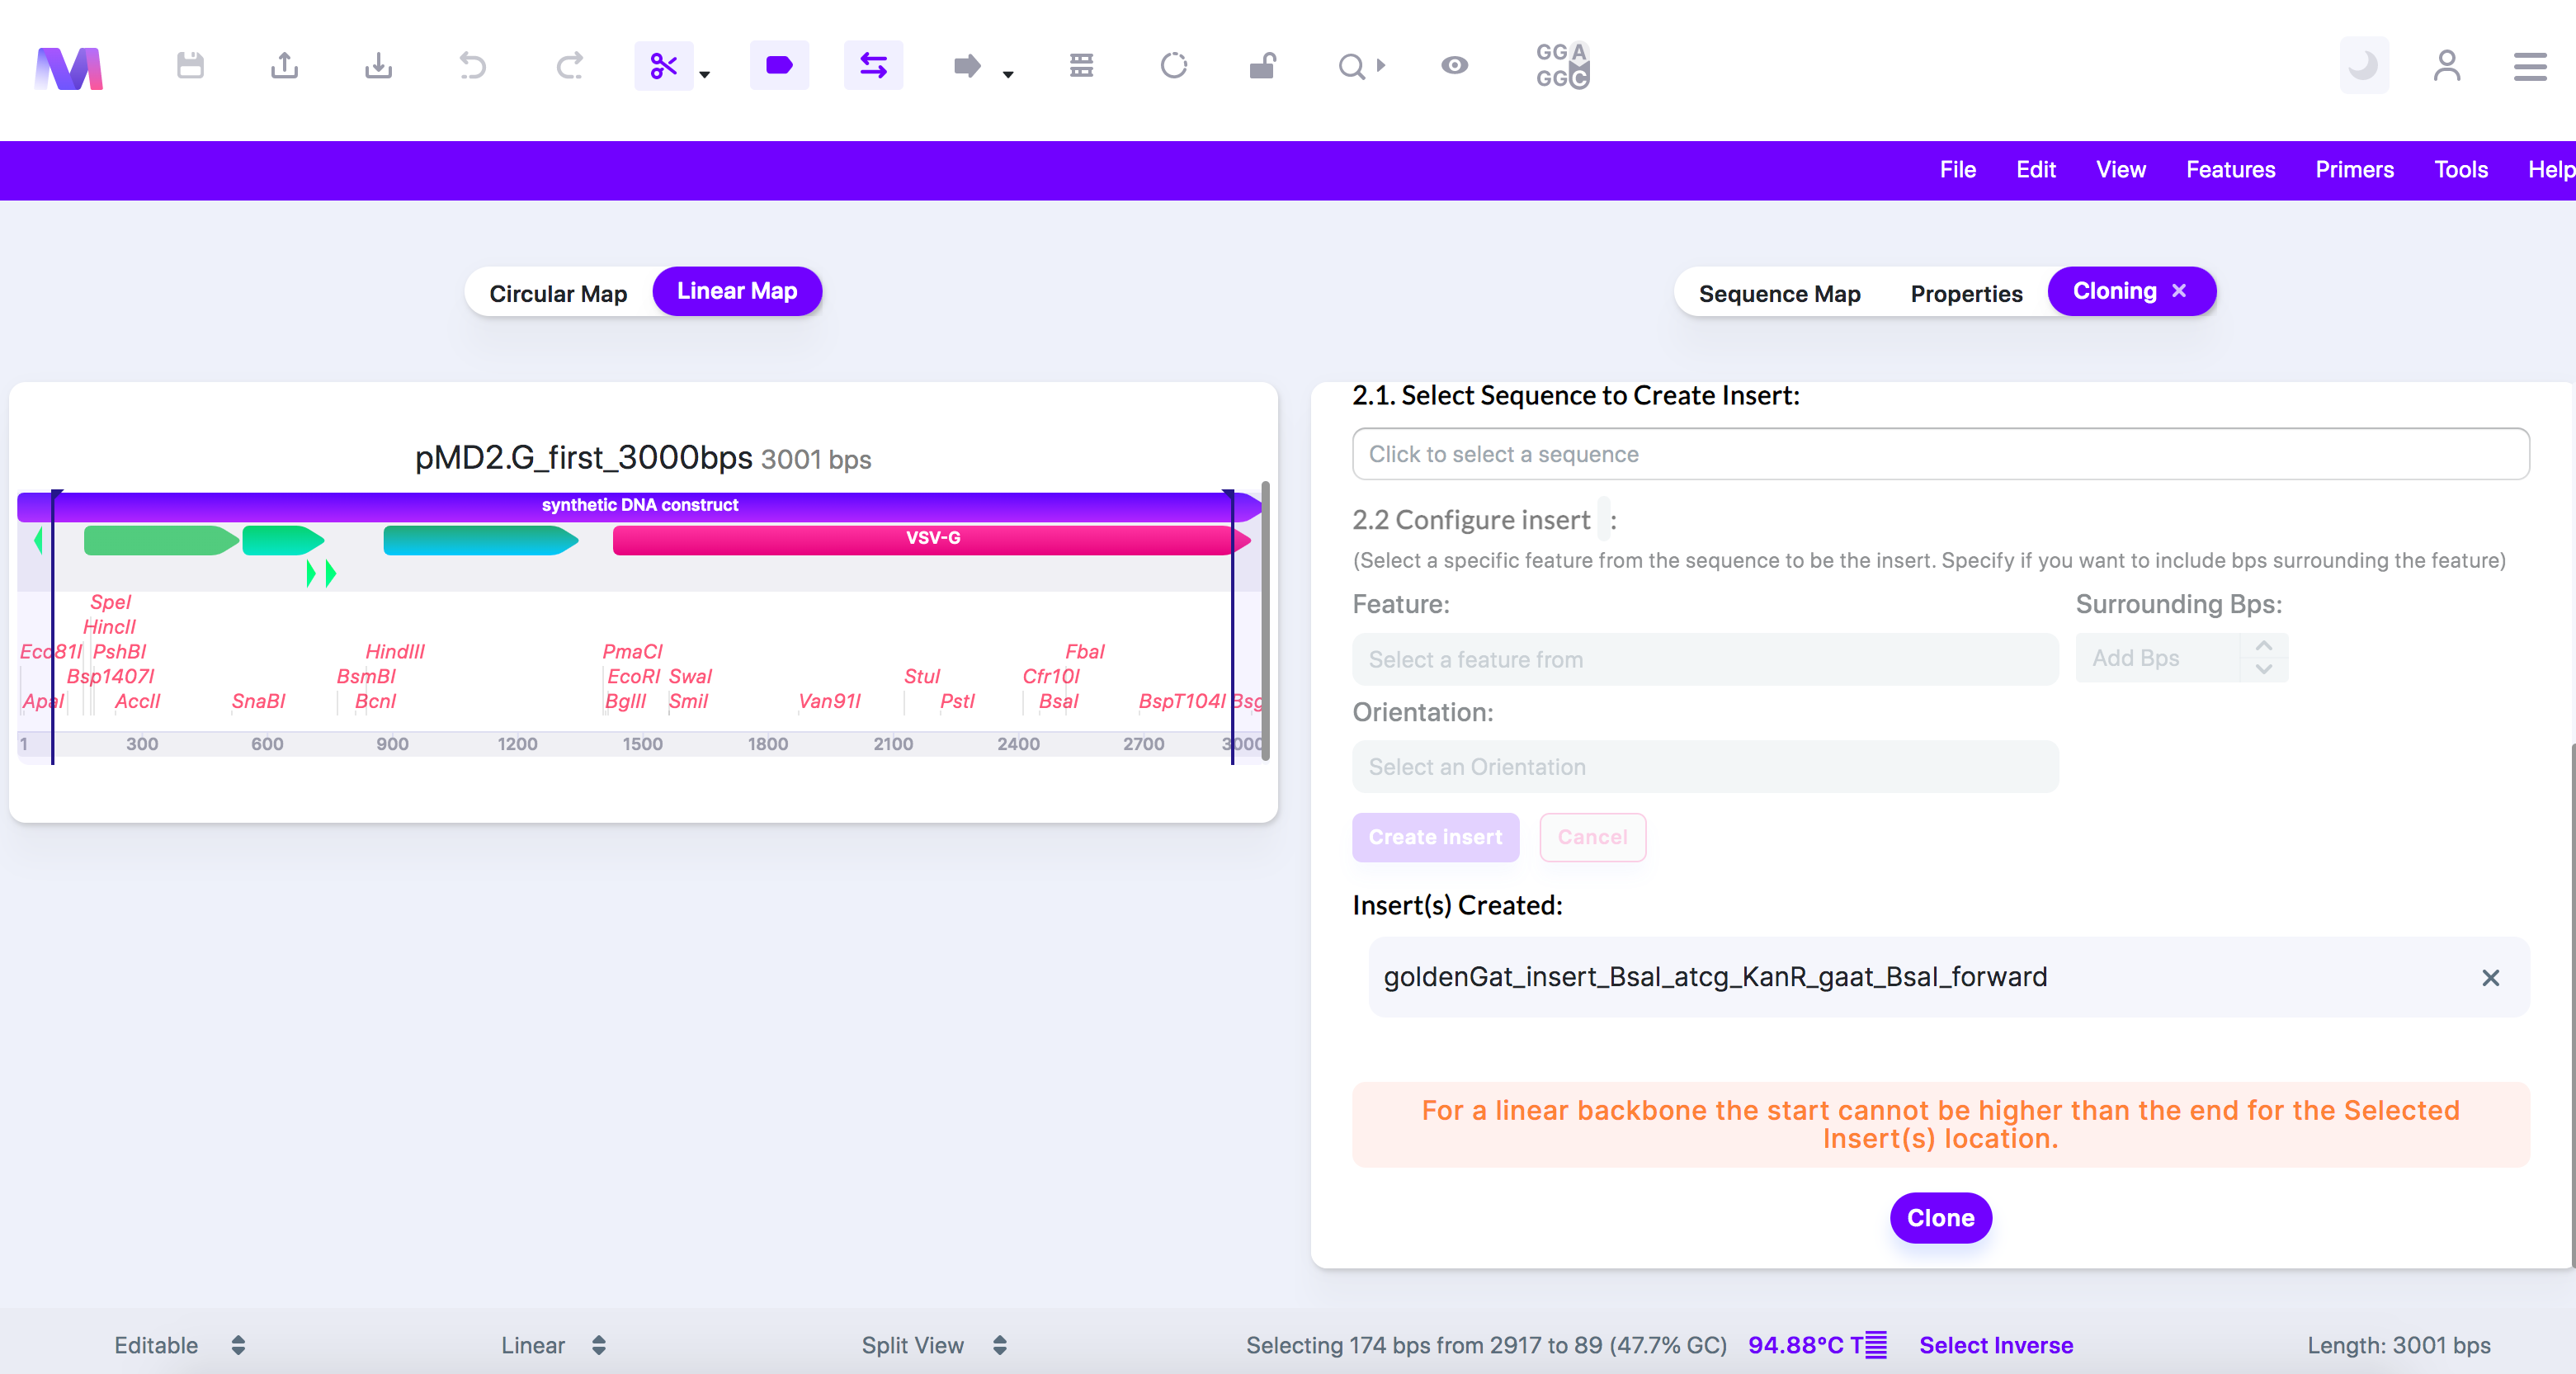
iv. For a linear backbone the start position must be greater than (base pair number provided) so the primers creating overlap between the insert and the backbone can be long enough.
1. For In-Fusion cloning, the backbone section used to build primers to create homology between the insert and the backbone must be at least 15pb long. If the start position is too close to the beginning of the sequence and doesn't leave at least 15bp before, then the primer cannot be made.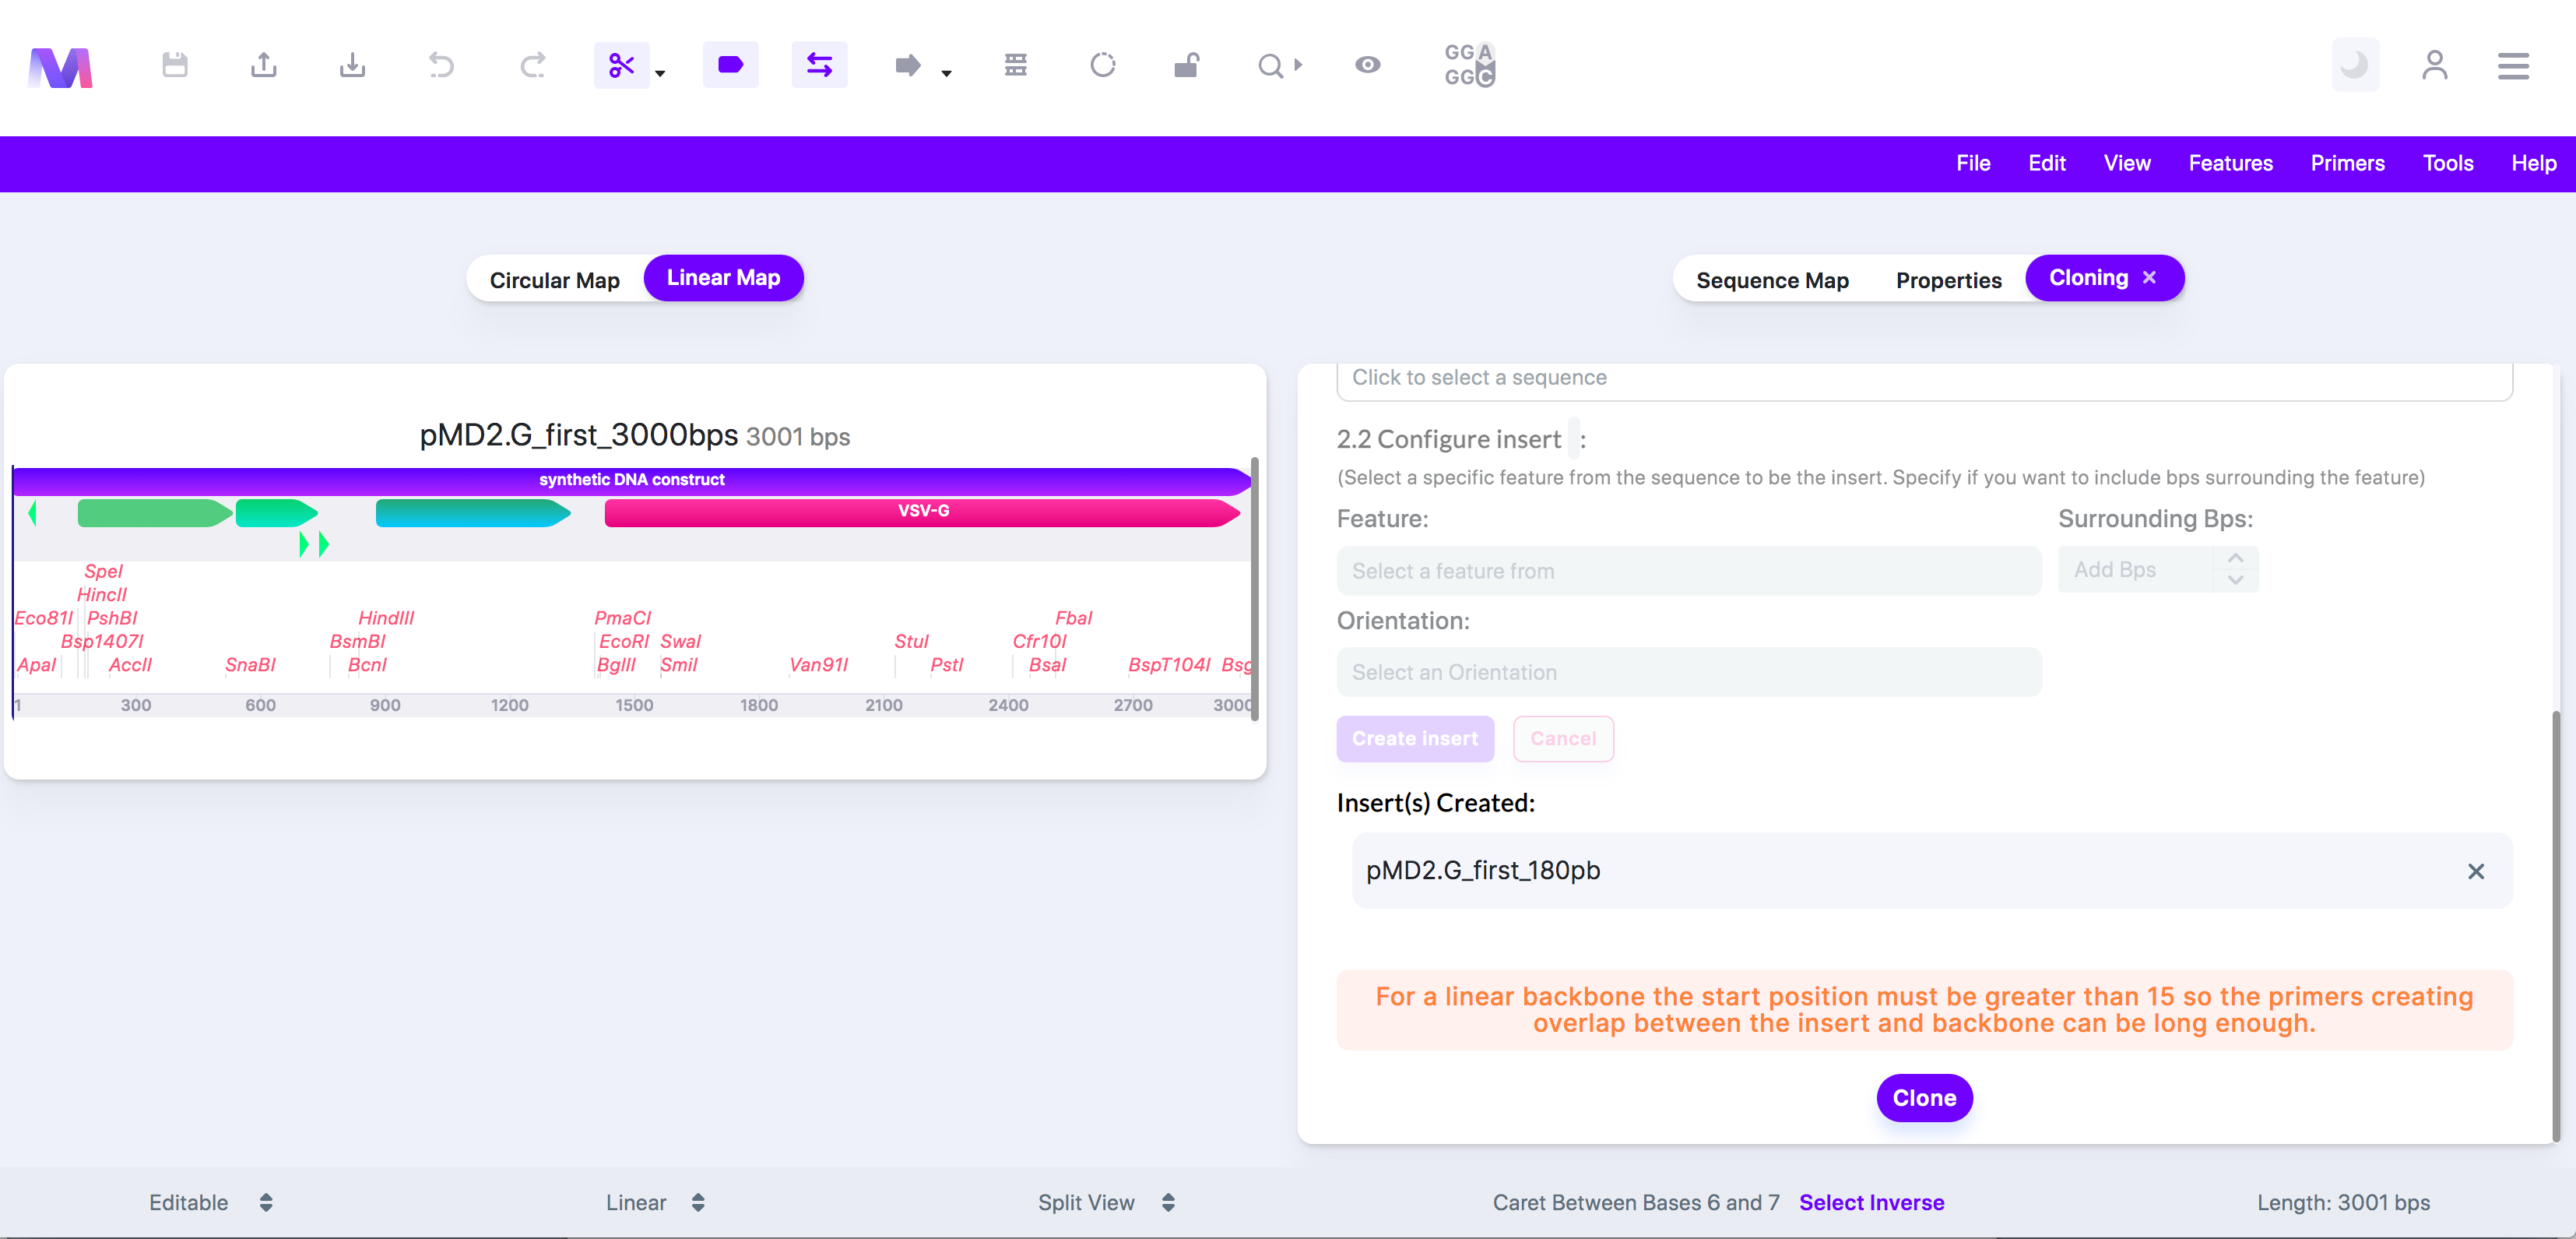
v. For a linear backbone the end position must be less than (base pair number provided) so the primers creating overlap between the insert and the backbone can be long enough
1. For In-Fusion cloning, the backbone section used to build primers to create homology between the insert and the backbone must be at least 15pb long. If the end position is too close to the end of the sequence and doesn't leave at least 15bps after, then the primer cannot be made. 
vi. The backbone must be at least 30bps in length so the primers creating the overlap between the insert and backbone can be long enough.
1. For In-Fusion cloning, the backbone needs 15bps to build a primer used to create homology between the insert and the backbone. Therefore the backbone must be at least 30bps in length to create a forward and reverse that do not overlap.
vii. The insert must be at least (number of base pairs provided) in length so the primers creating the overlap between the insert and backbone can be long enough.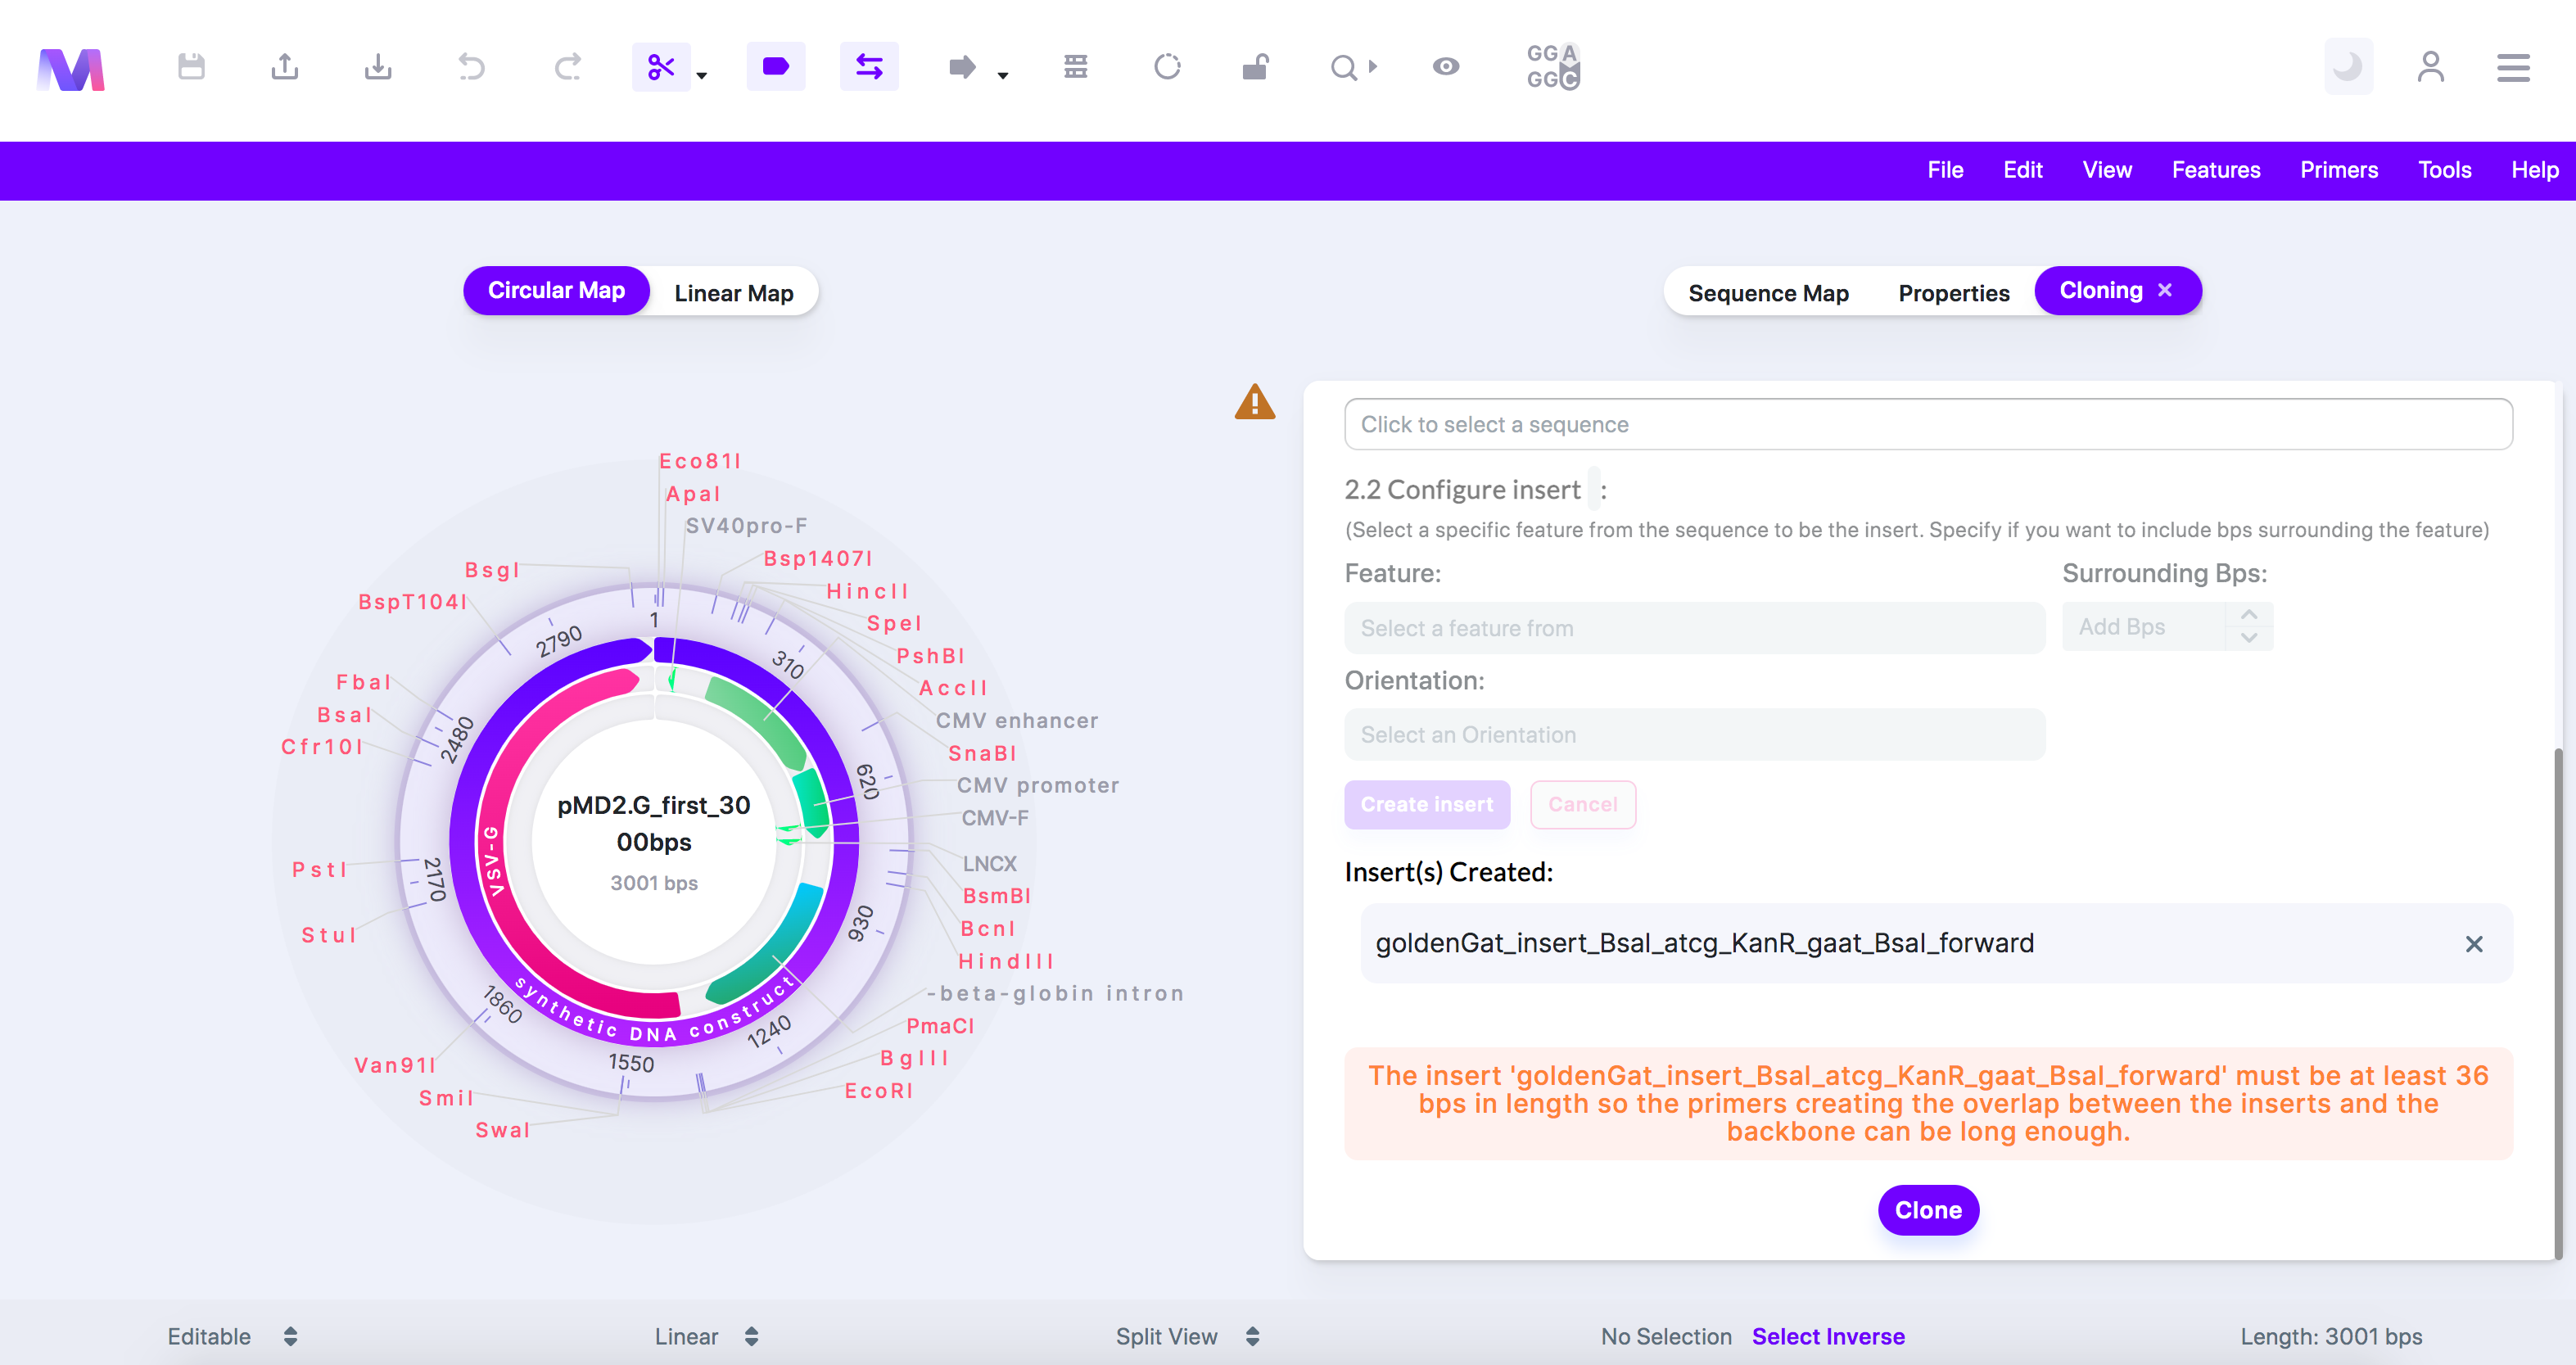
1. For In-Fusion cloning, the insert needs 18-25bps to build a primer used to create homology between the insert and the backbone. Therefore the backbone must be at least 36bps in length to create a forward and reverse primer that do not overlap.
9. The final resulting vector will be displayed in the viewer.
a. Mendelgen has simulated the following events allowing the final cloning vector to be produced.
i. Linearization of the backbone, if need be.
ii. The addition of homologous ends between the backbone and inserts using PCR with specially designed primers.
1. In the viewer we show the sequences of the primers used to create homology.
iii. An enzyme mix chewing back the 3' ends on the backbone and inserts allowing for complementary base pairing between the homologous ends.
iv. The joining and annealing of the inserts and backbone through complementary base pairing.
v. Transforming the newly produced cloning vector into stellar competent cells.
b. View your finished cloning simulation with two inserts. 🥳
