


Gibson Assembly Overview
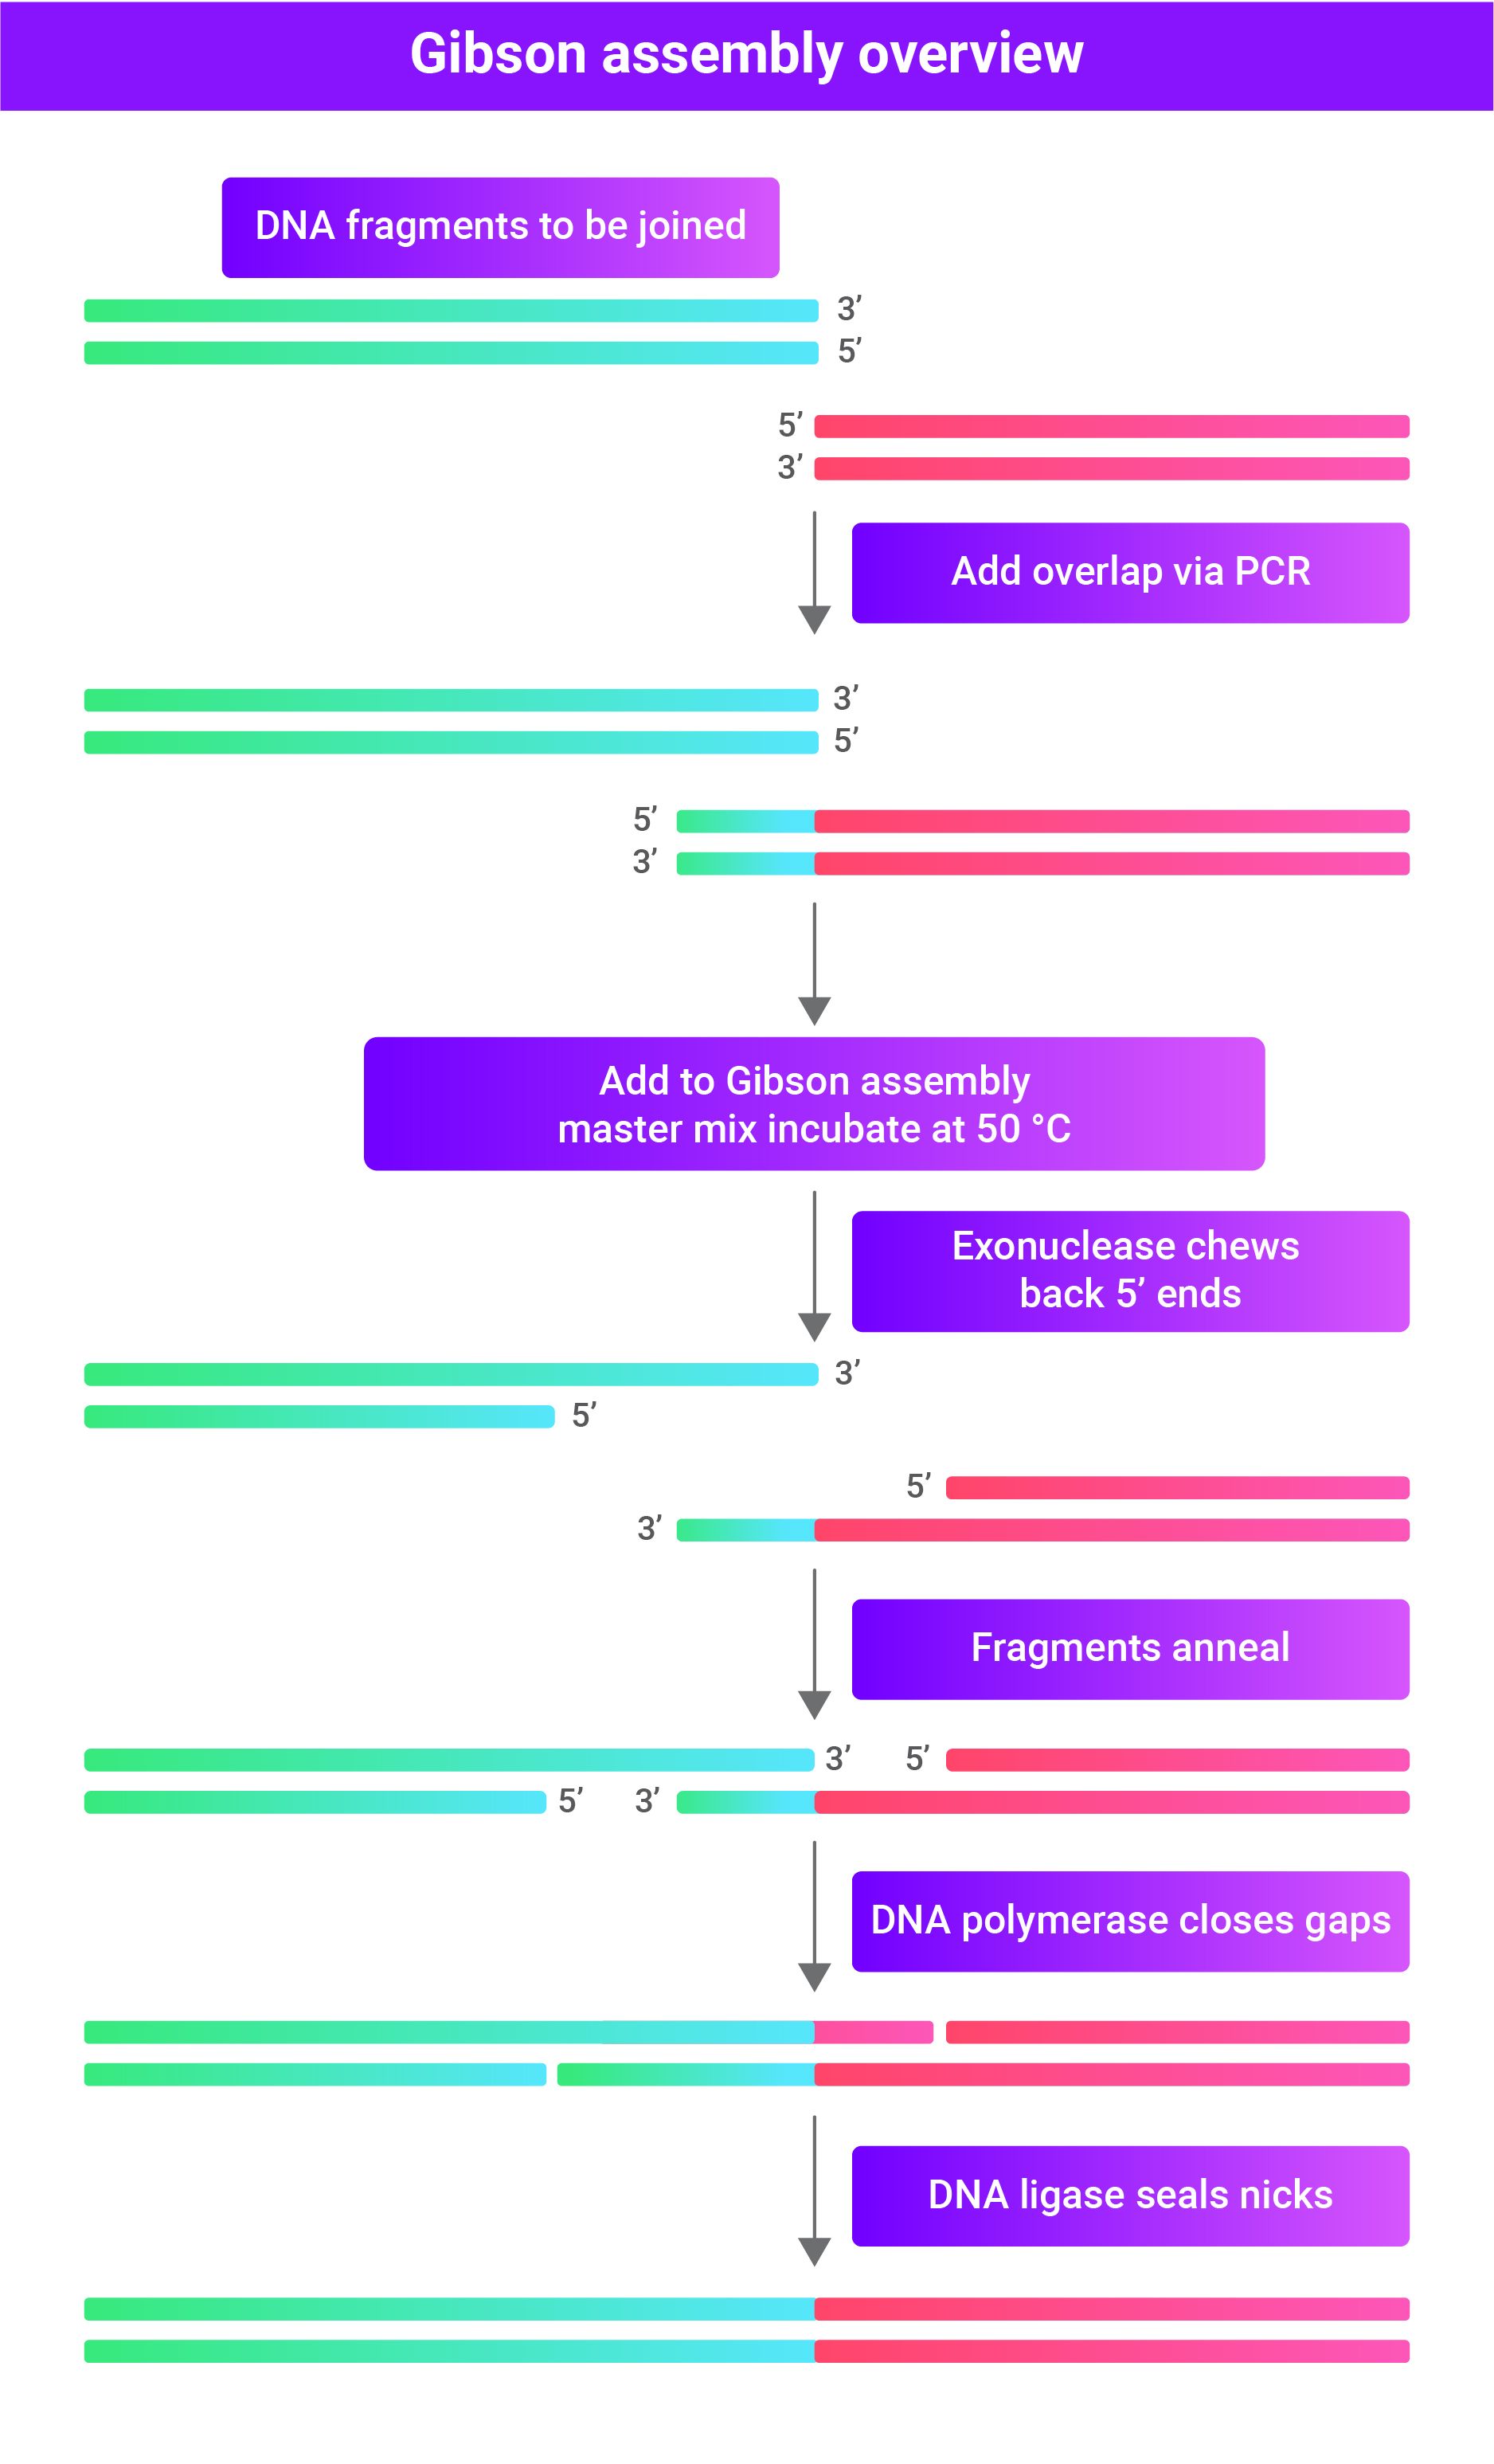
Gibson Assembly Cloning is a form of homology-based cloning that can reliably assemble up to five linear DNA fragments. The cloning method starts with constructing linear DNA fragments with 20-40bp homologous ends. Adding homologous ends to the fragments can be done through PCR using primers containing the homologous sequences. By carefully creating the primers, you can ensure that the end of one fragment is homologous to only one other fragment. This process will lead to the fragments annealing in the correct order and orientation.
After you add the homologous ends, you place the DNA fragments in a master mix containing three different enzymes. First, an exonuclease chews back the 5' ends of the fragments leaving the double-stranded DNA fragments with single-stranded overhangs. These single-stranded overhangs allow the homologous ends of the fragments to anneal through complementary base pairing. A DNA polymerase then fills the leftover single-stranded gaps between the fragments where the exonuclease has chewed back further than the overlapping homologous ends can cover. Finally, a DNA ligase seals any leftover nicks producing a directional, scarless vector.
General overview of Gibson Assembly Cloning:
- Production of linear DNA fragments with homologous ends.
- The 5' ends are chewed back by an exonuclease.
- The homologous ends anneal and fill gaps with DNA polymerase.
- DNA ligase seals the nicks, producing a directional, scarless vector.
Gibson Assembly allows the use of multiple DNA fragments simultaneously, relying on the homology between the ends to achieve the correct order and orientation.
How to simulate Gibson Assembly
With Mendelgen, performing a simulation of Gibson Assembly cloning is simple. Follow the steps outlined below.
- Open Mendelgen and sign in.
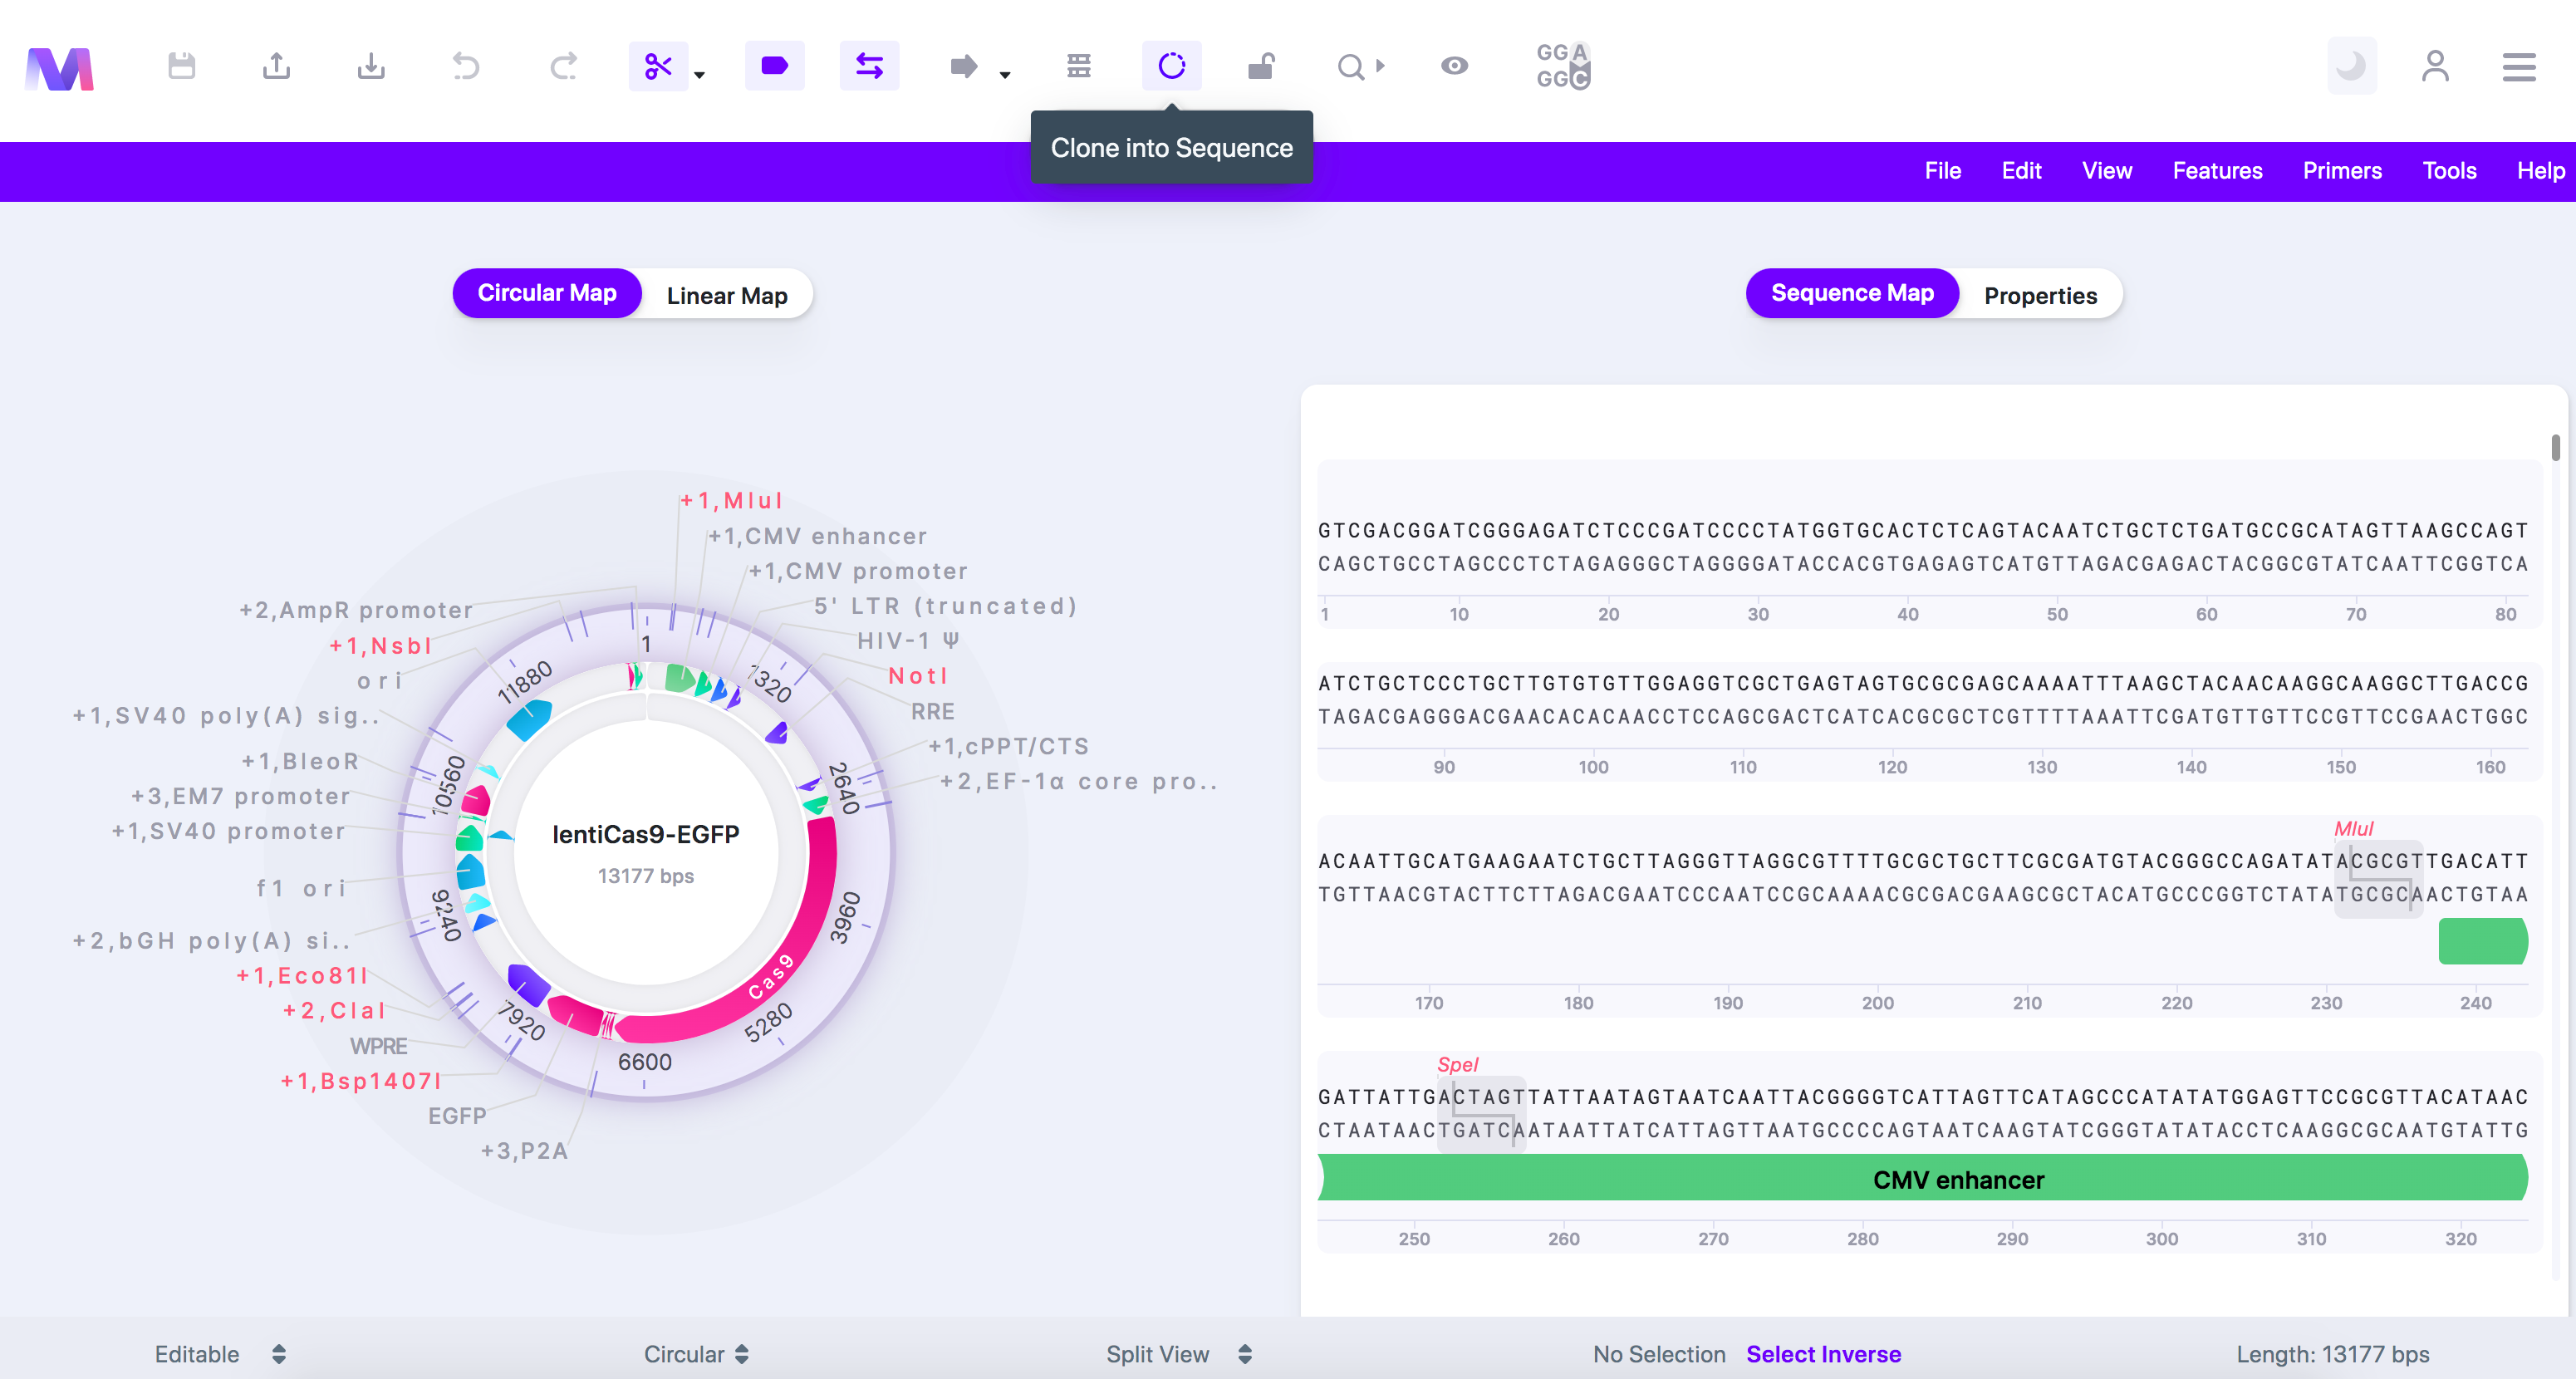
- Select and click a vector from your library to be used as the backbone DNA fragment.

- When the page opens, you'll see the selected backbone in the viewer.
- In our example, we choose 'lentiCas9-EGFP' as the backbone.
- Click the cloning tool button, displayed as a circular DNA sequence, in the toolbar at the top of the page.
- Select 'Gibson Assembly Cloning' in the dropdown.
- A tab titled 'Create a Gibson Assembly Cloning Vector' will open to the viewer's right.
- The cloning tool clicked with 'Gibson Assembly Cloning' highlighted, and the cloning tab opened.
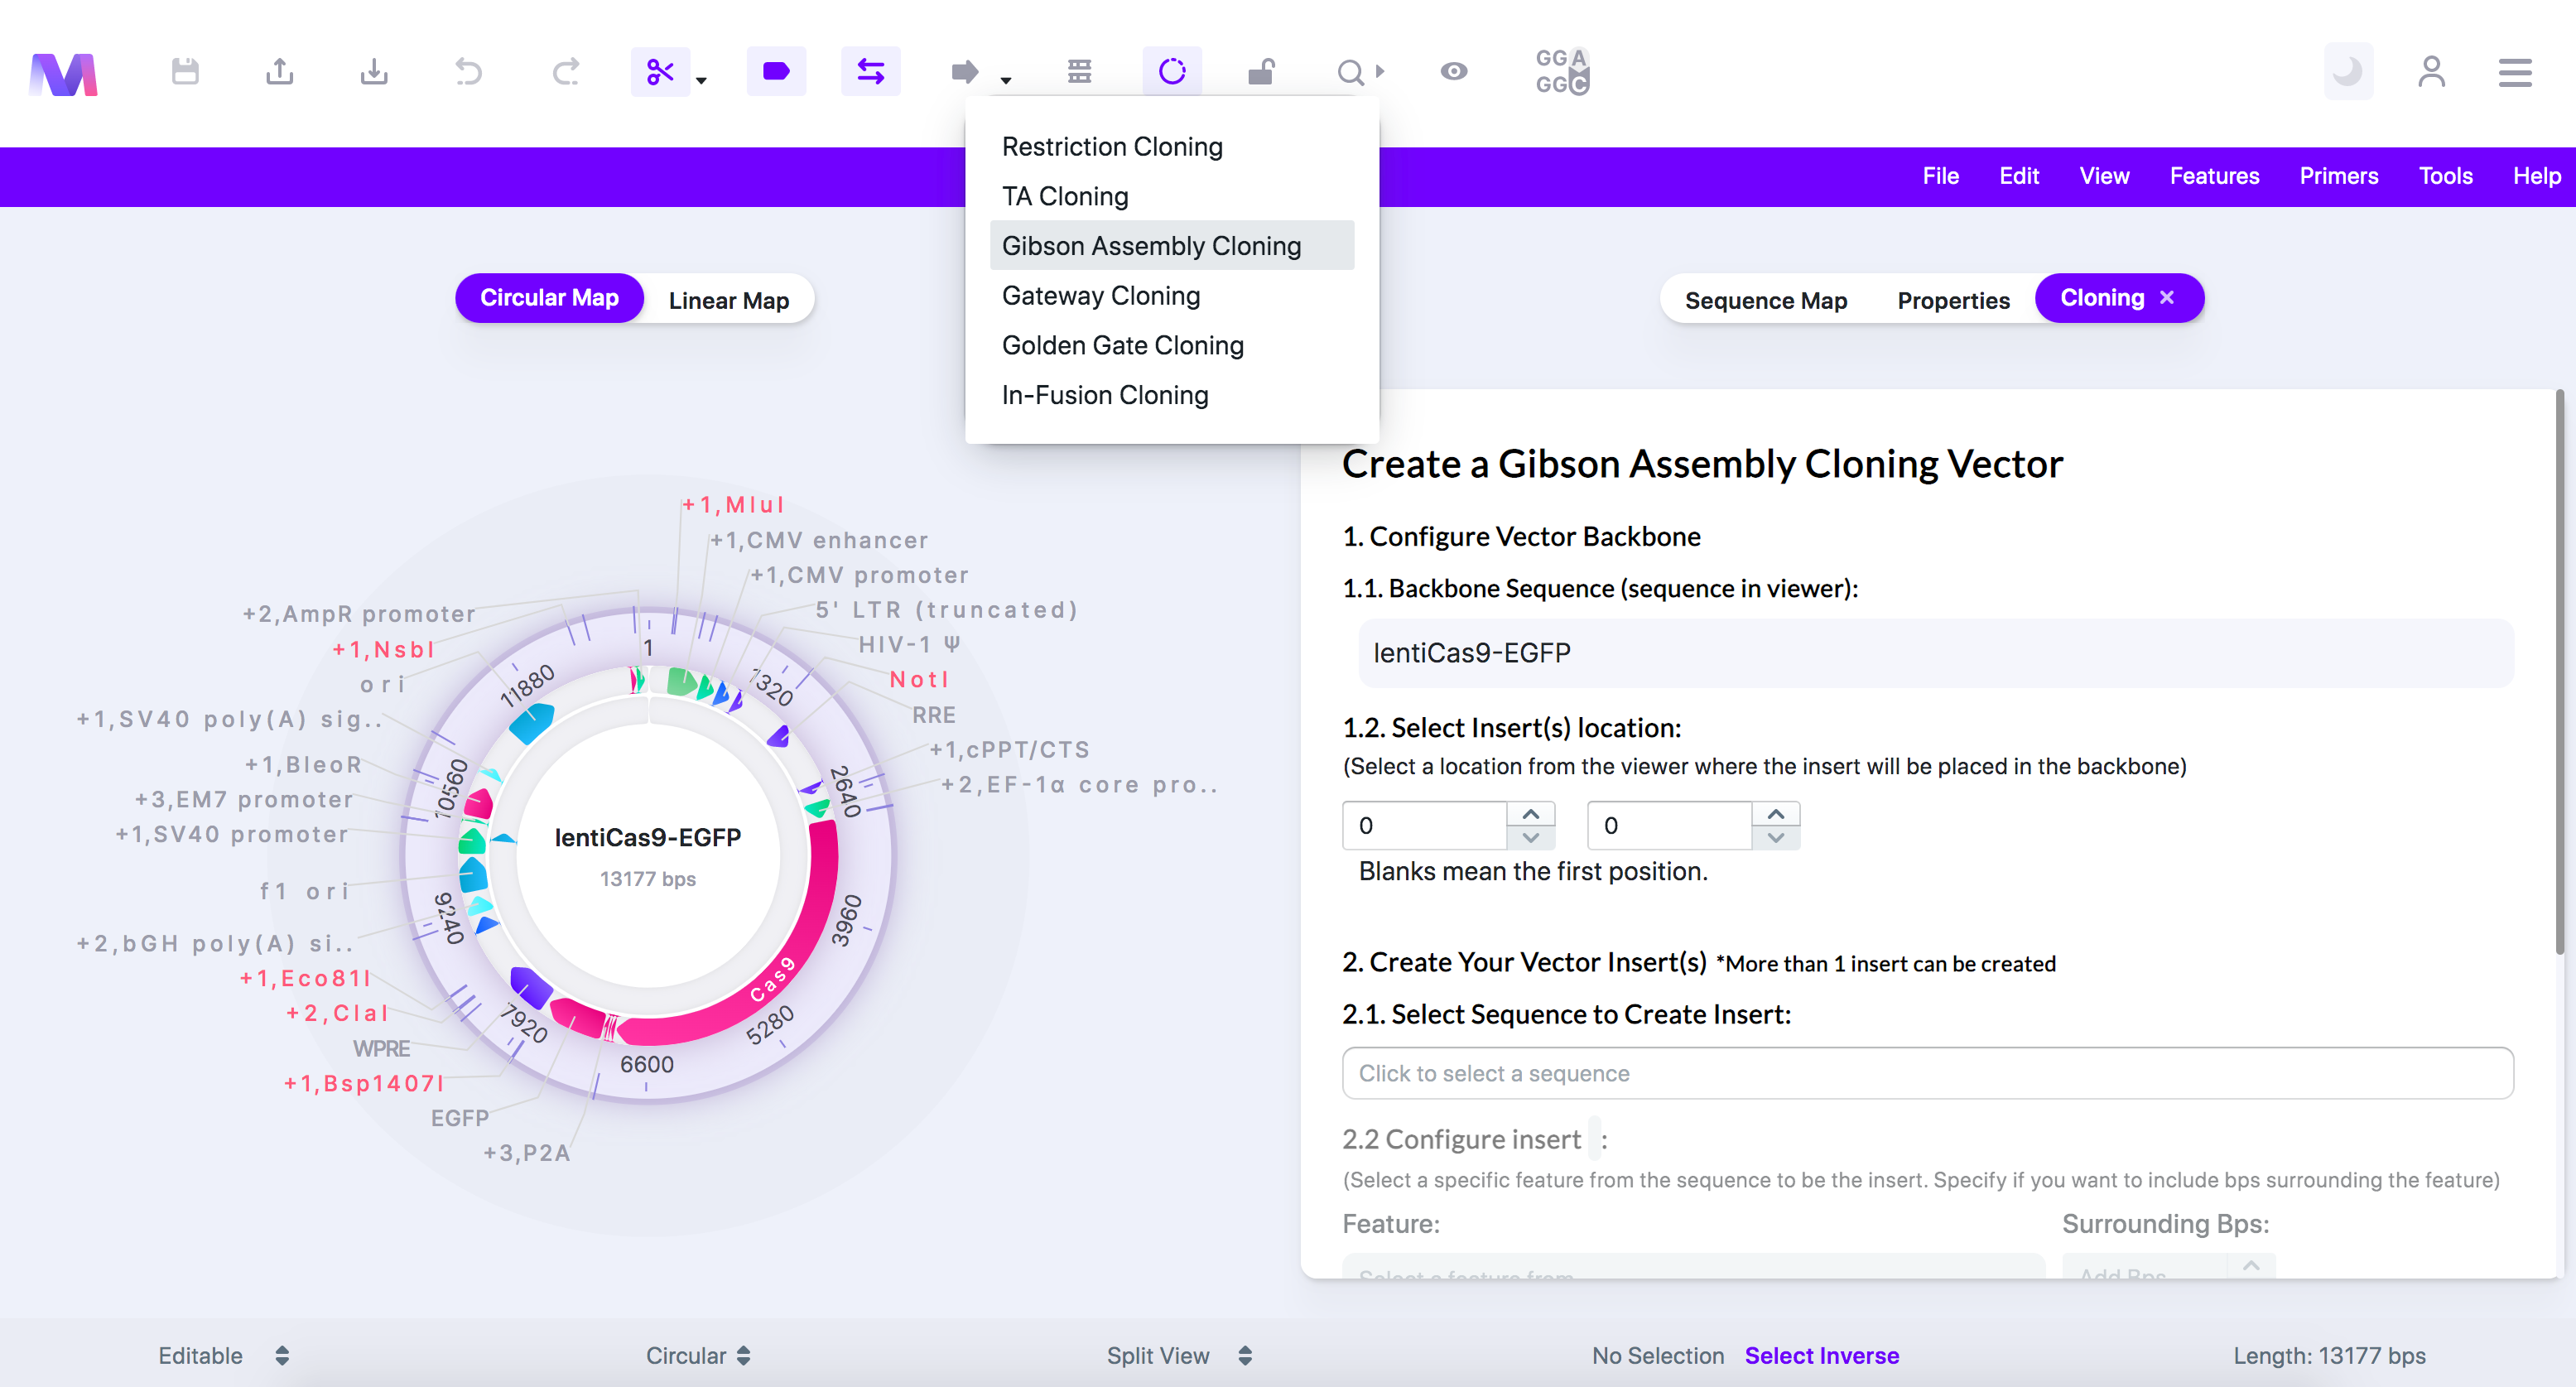
- In the first step, choose where the inserts get placed in the backbone.
- The backbone is the sequence displayed in the viewer.
- Click a feature, or click/drag over a location in the viewer, to select where the insert gets added.
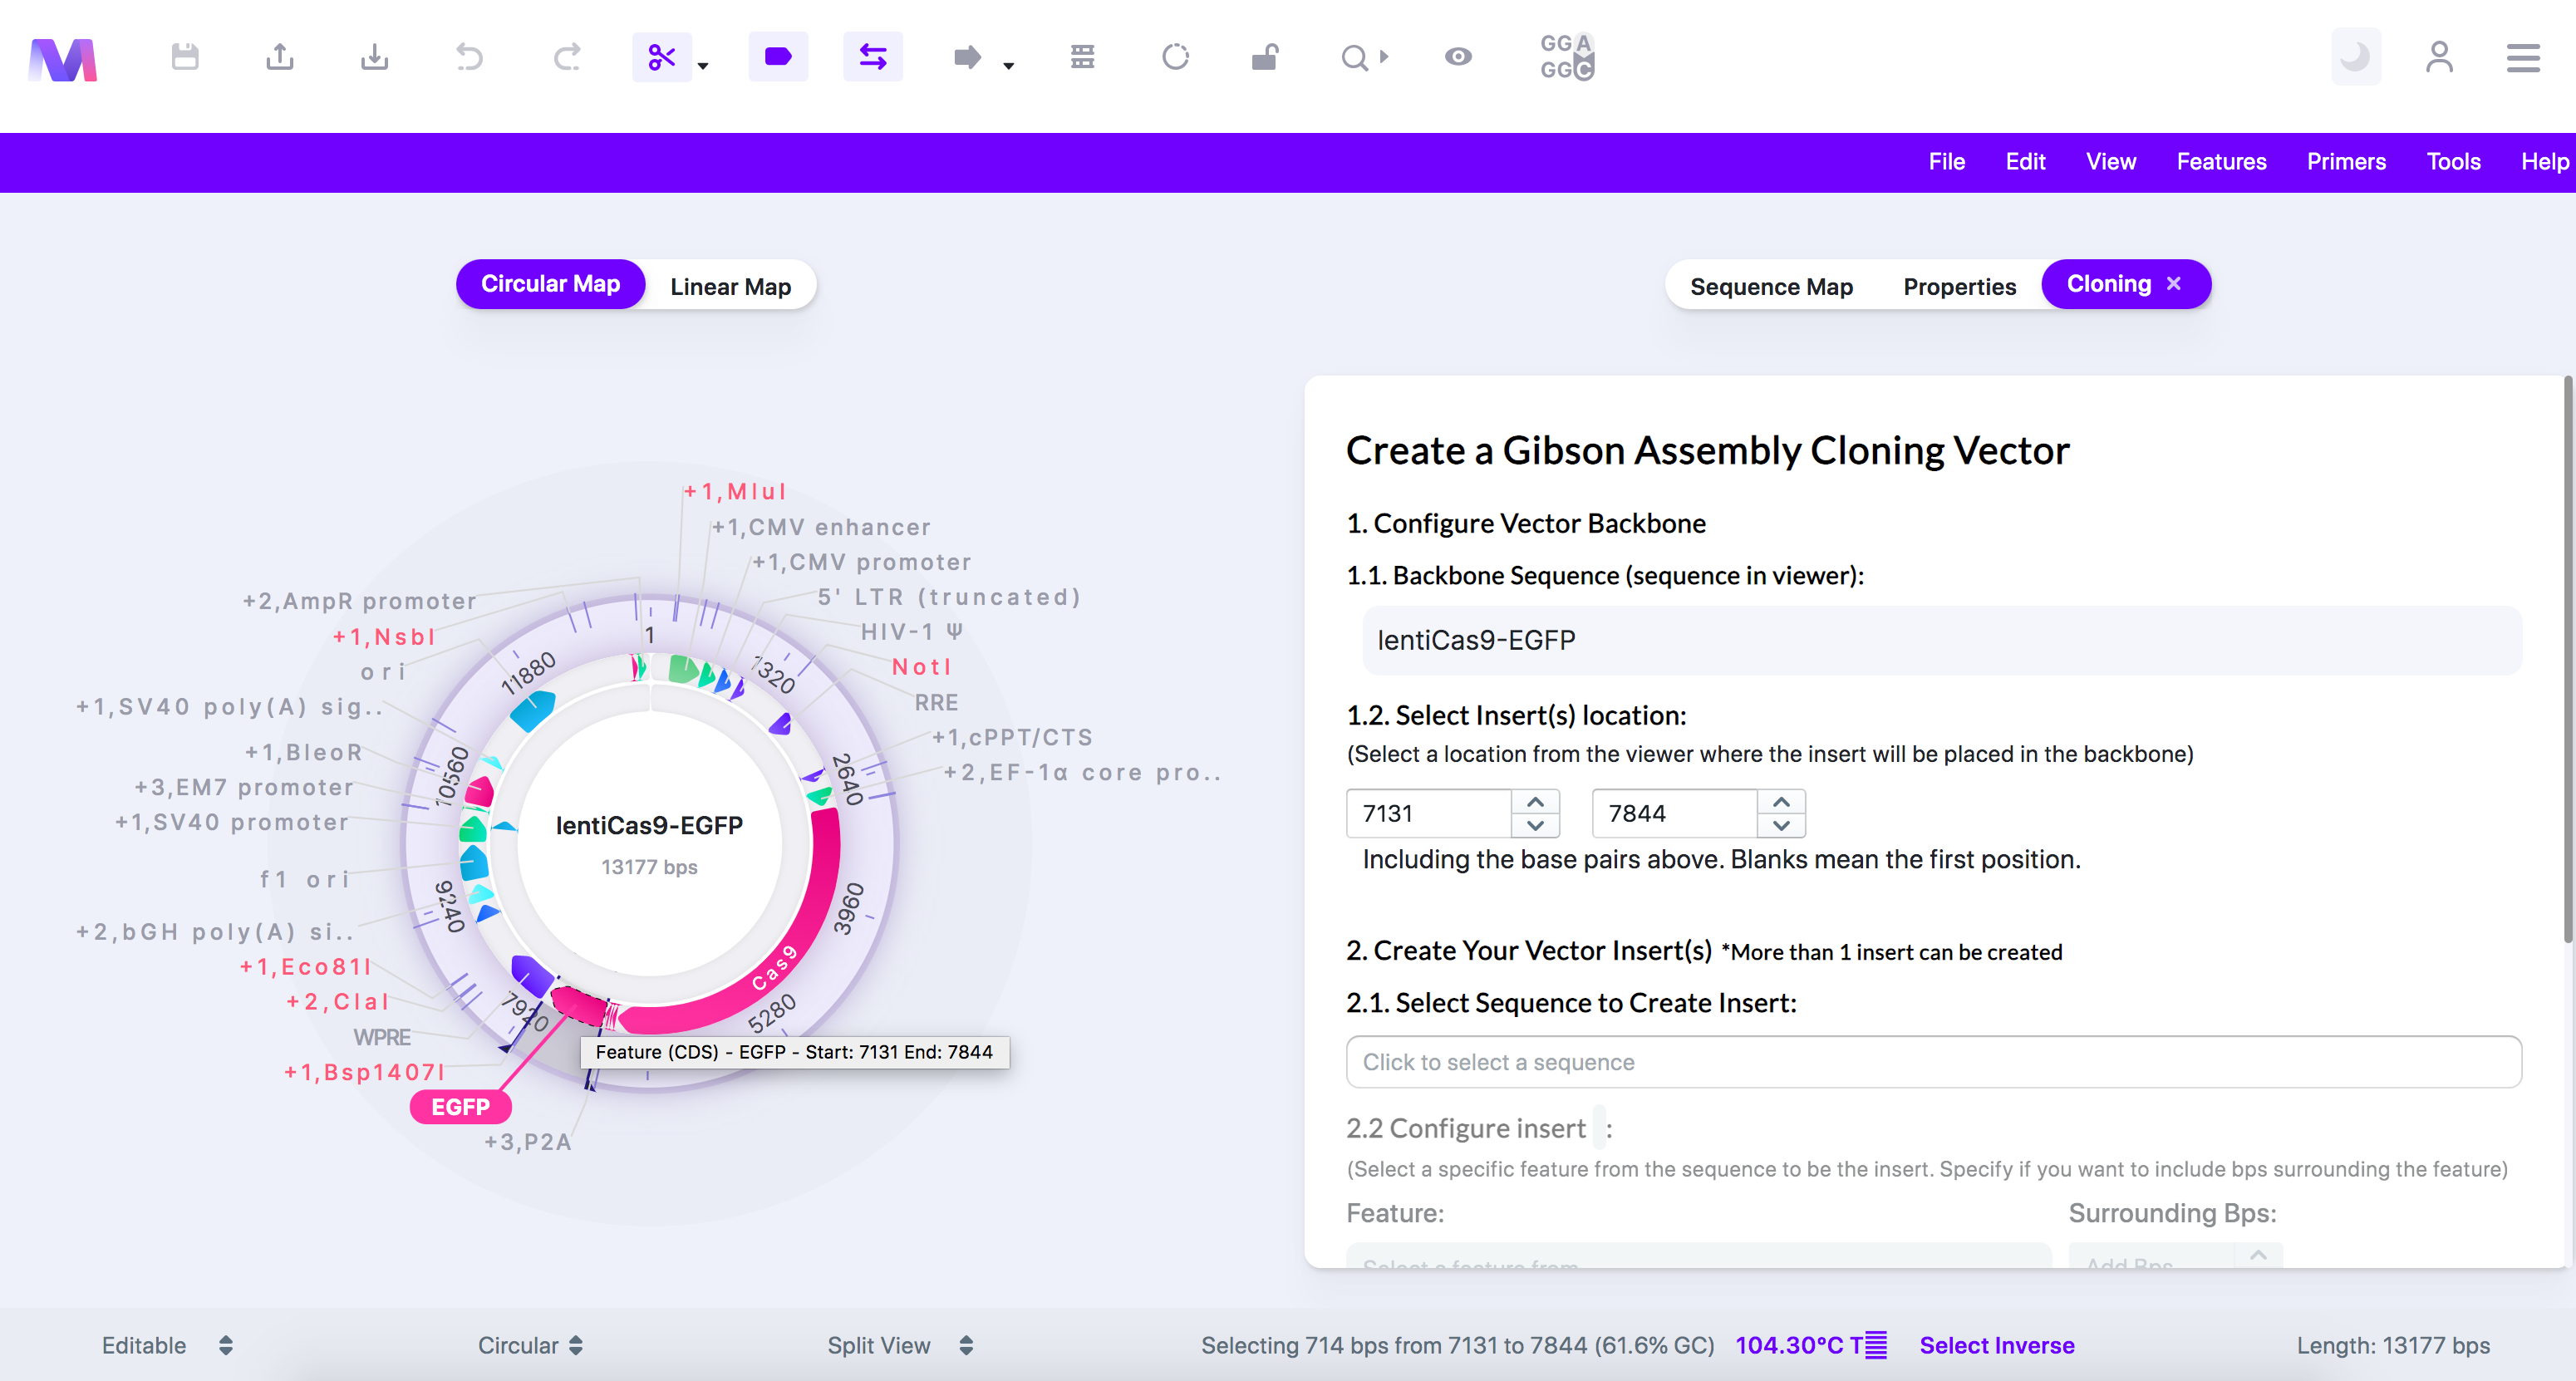
- Or switch to the 'Sequence Map' tab, click on a feature or location, and then switch back to the 'Cloning' tab.
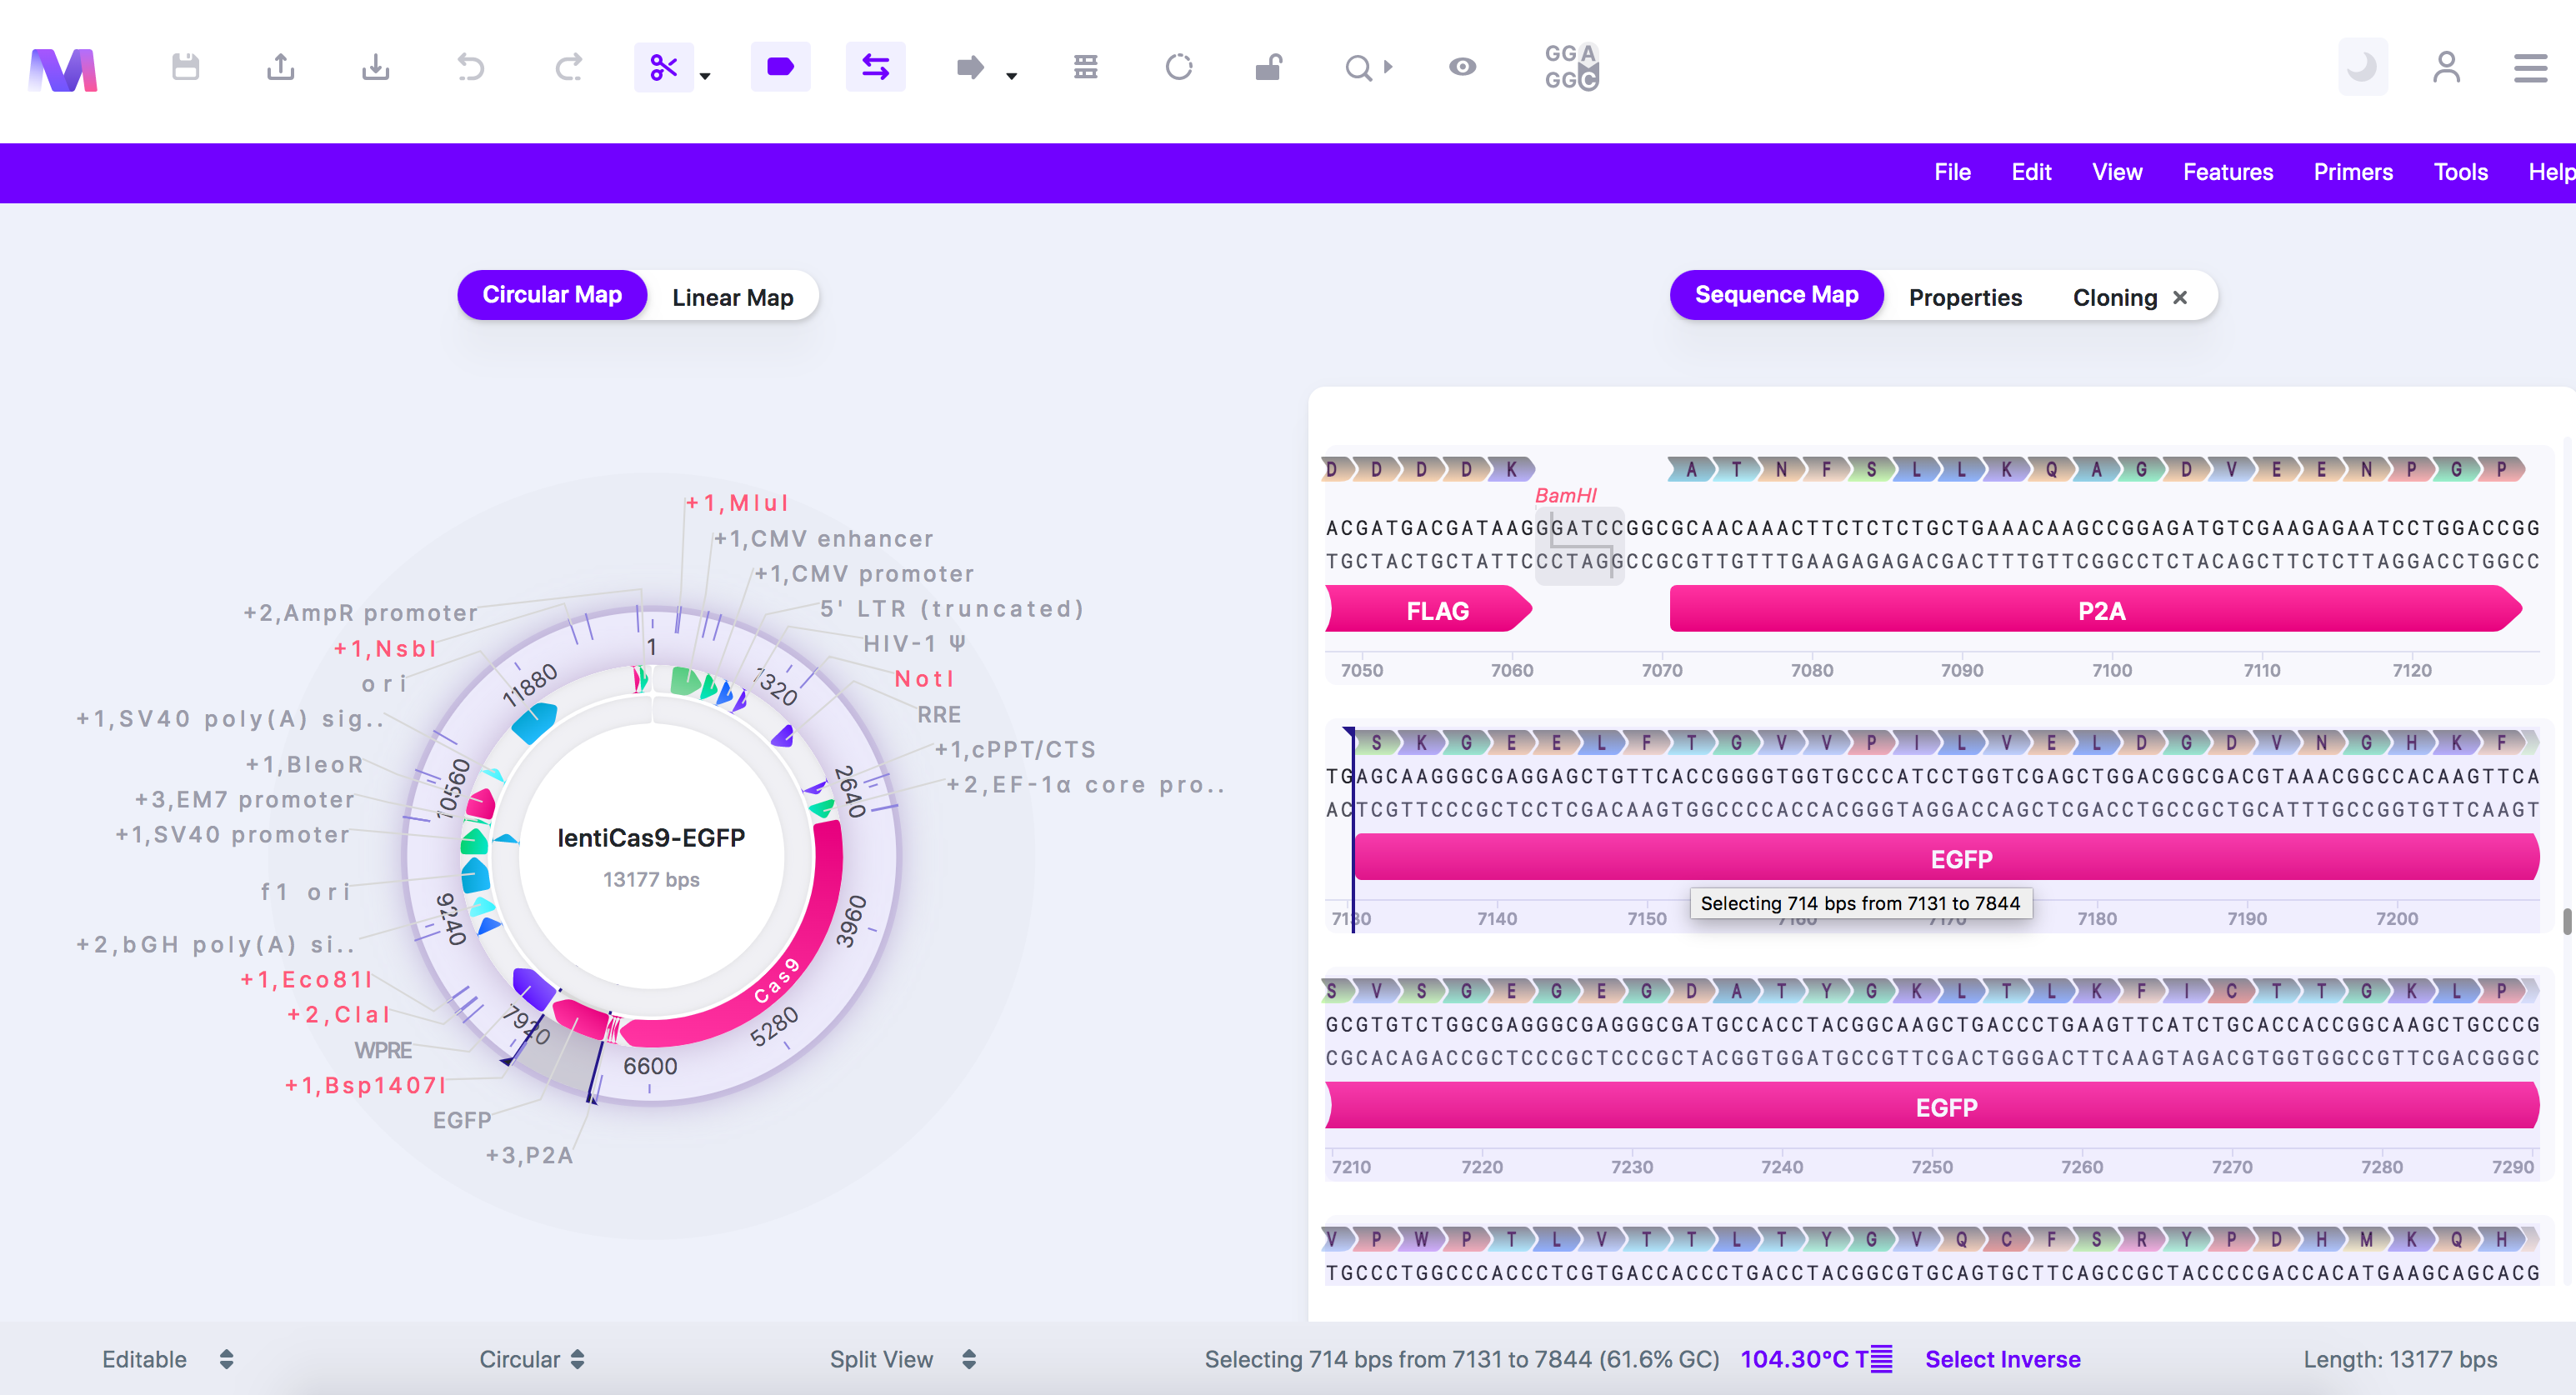
- In our example, we clicked 'EGFP' as we will use Gibson Assembly cloning to replace 'EGFP' with another reporter.
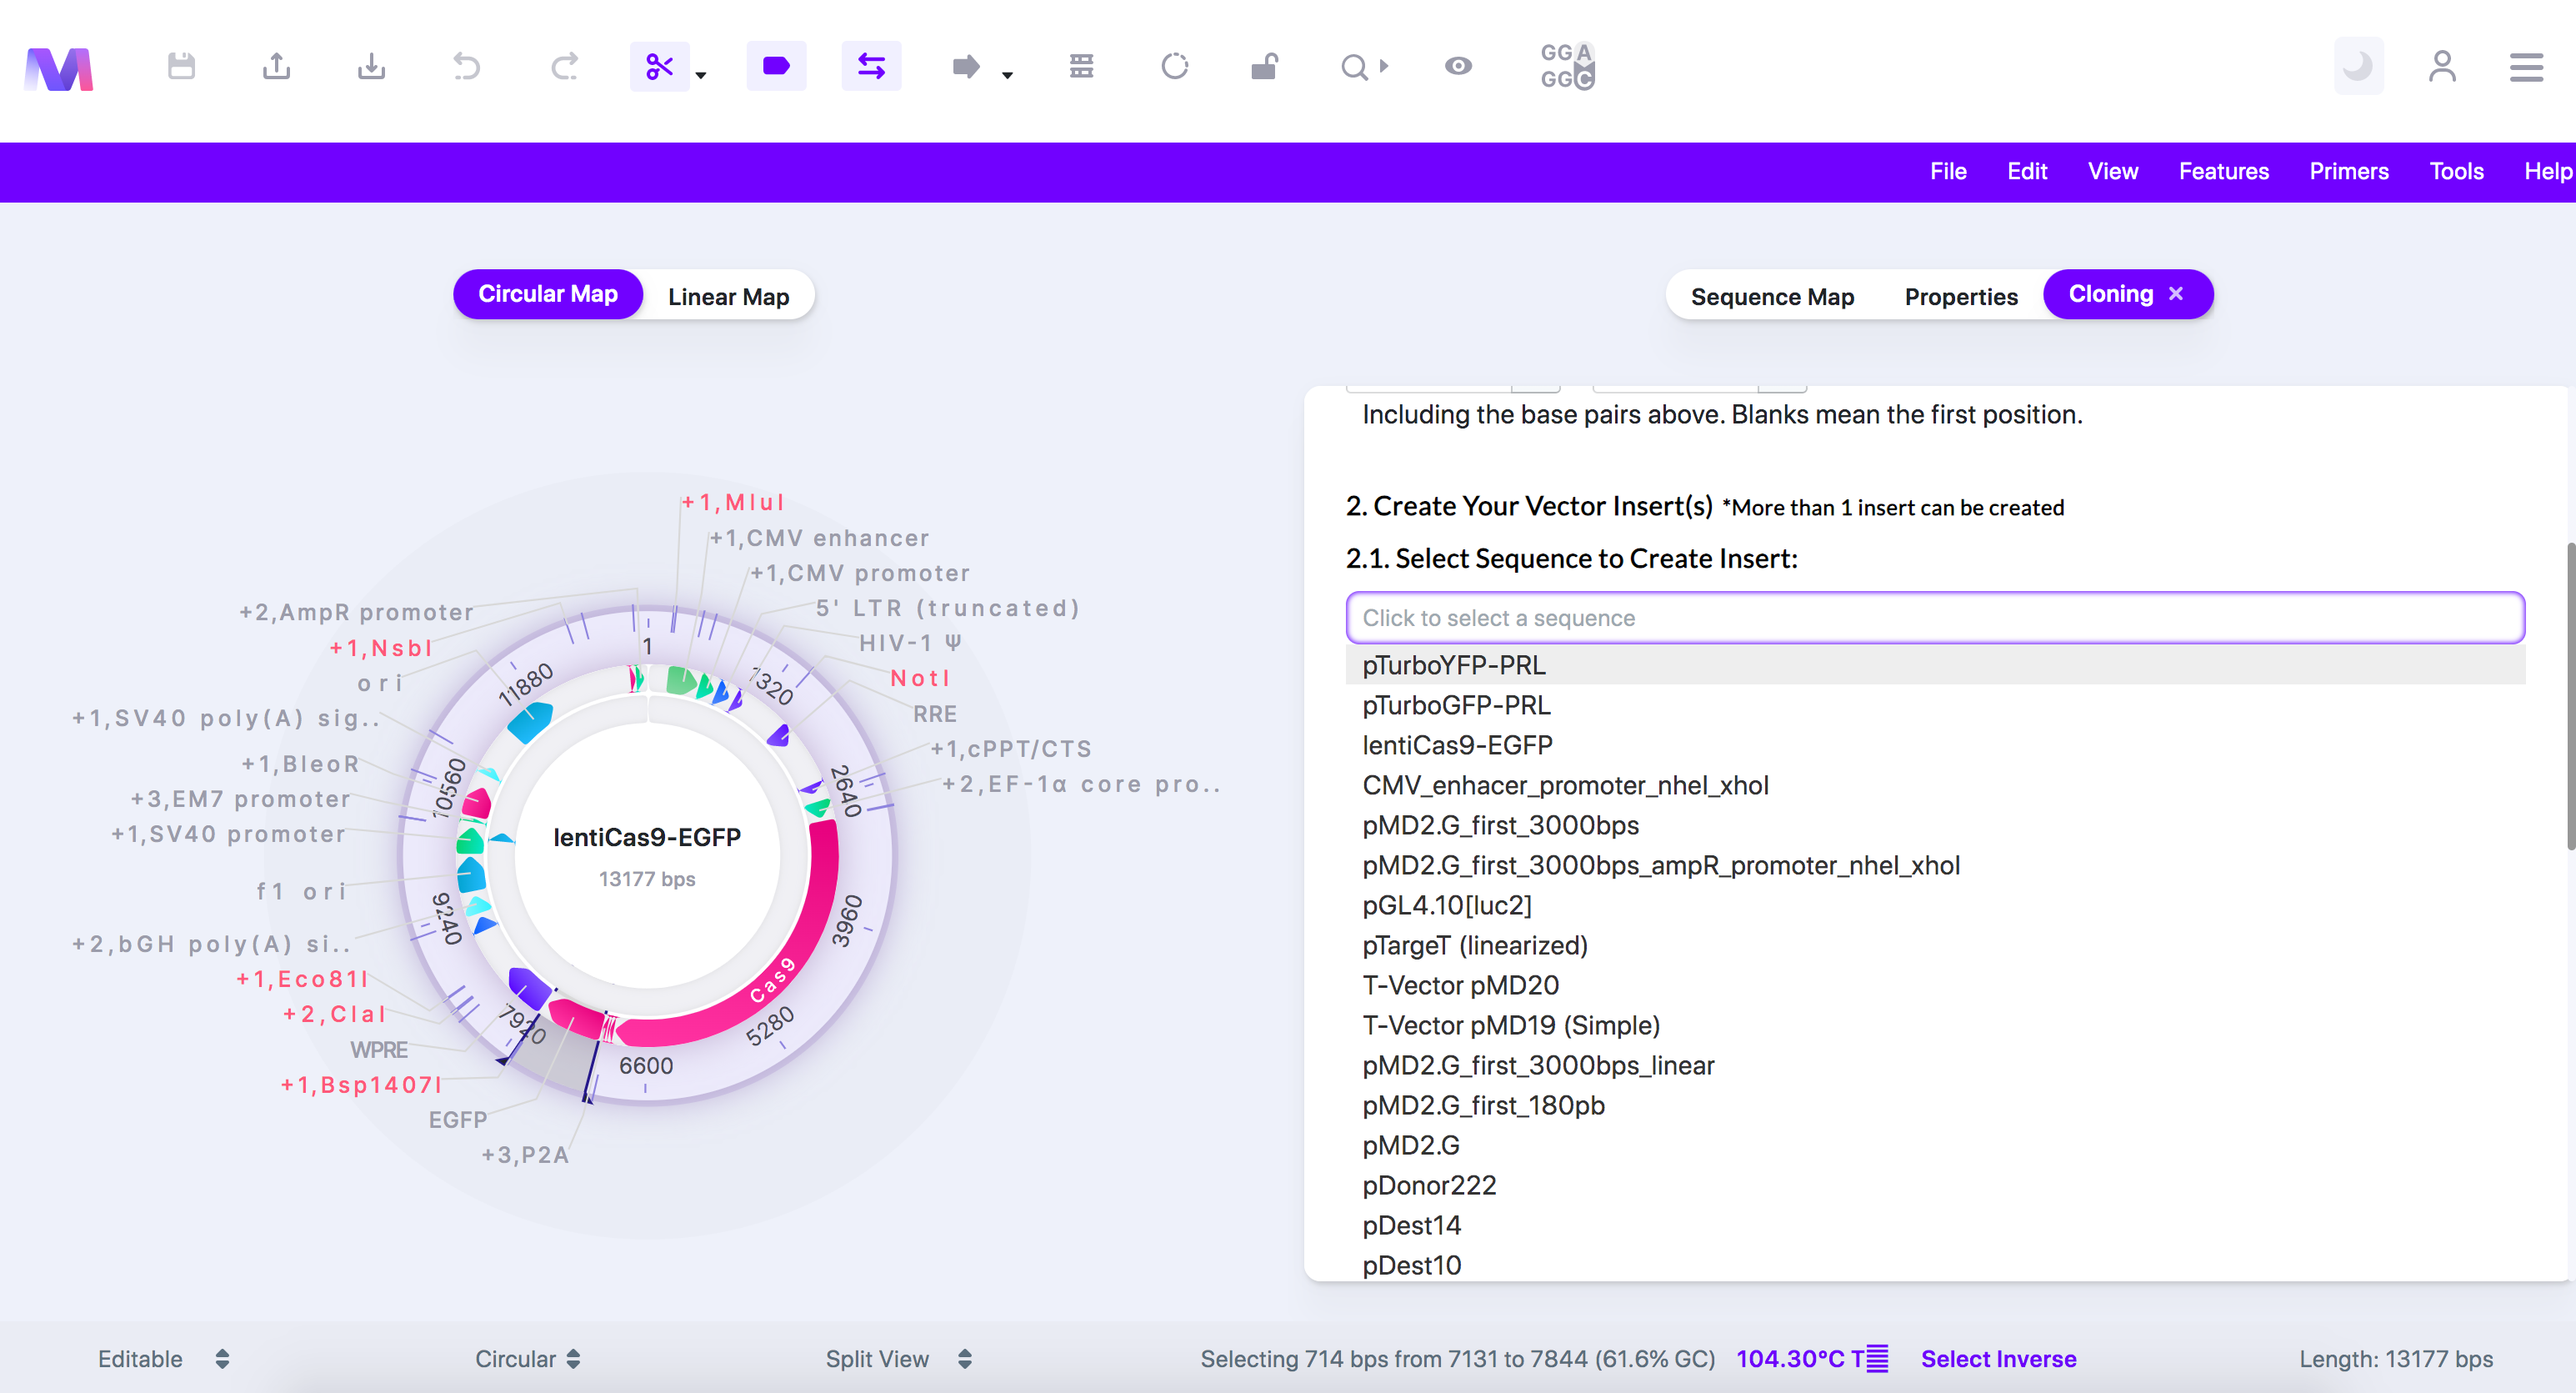
- Select the insert sequence(s) containing the gene(s) of interest.
- Select a sequence loaded from your library.
- In our example, we select ' pTurboYFP-PRL' as it contains the reporter we will replace 'EGFP' with.
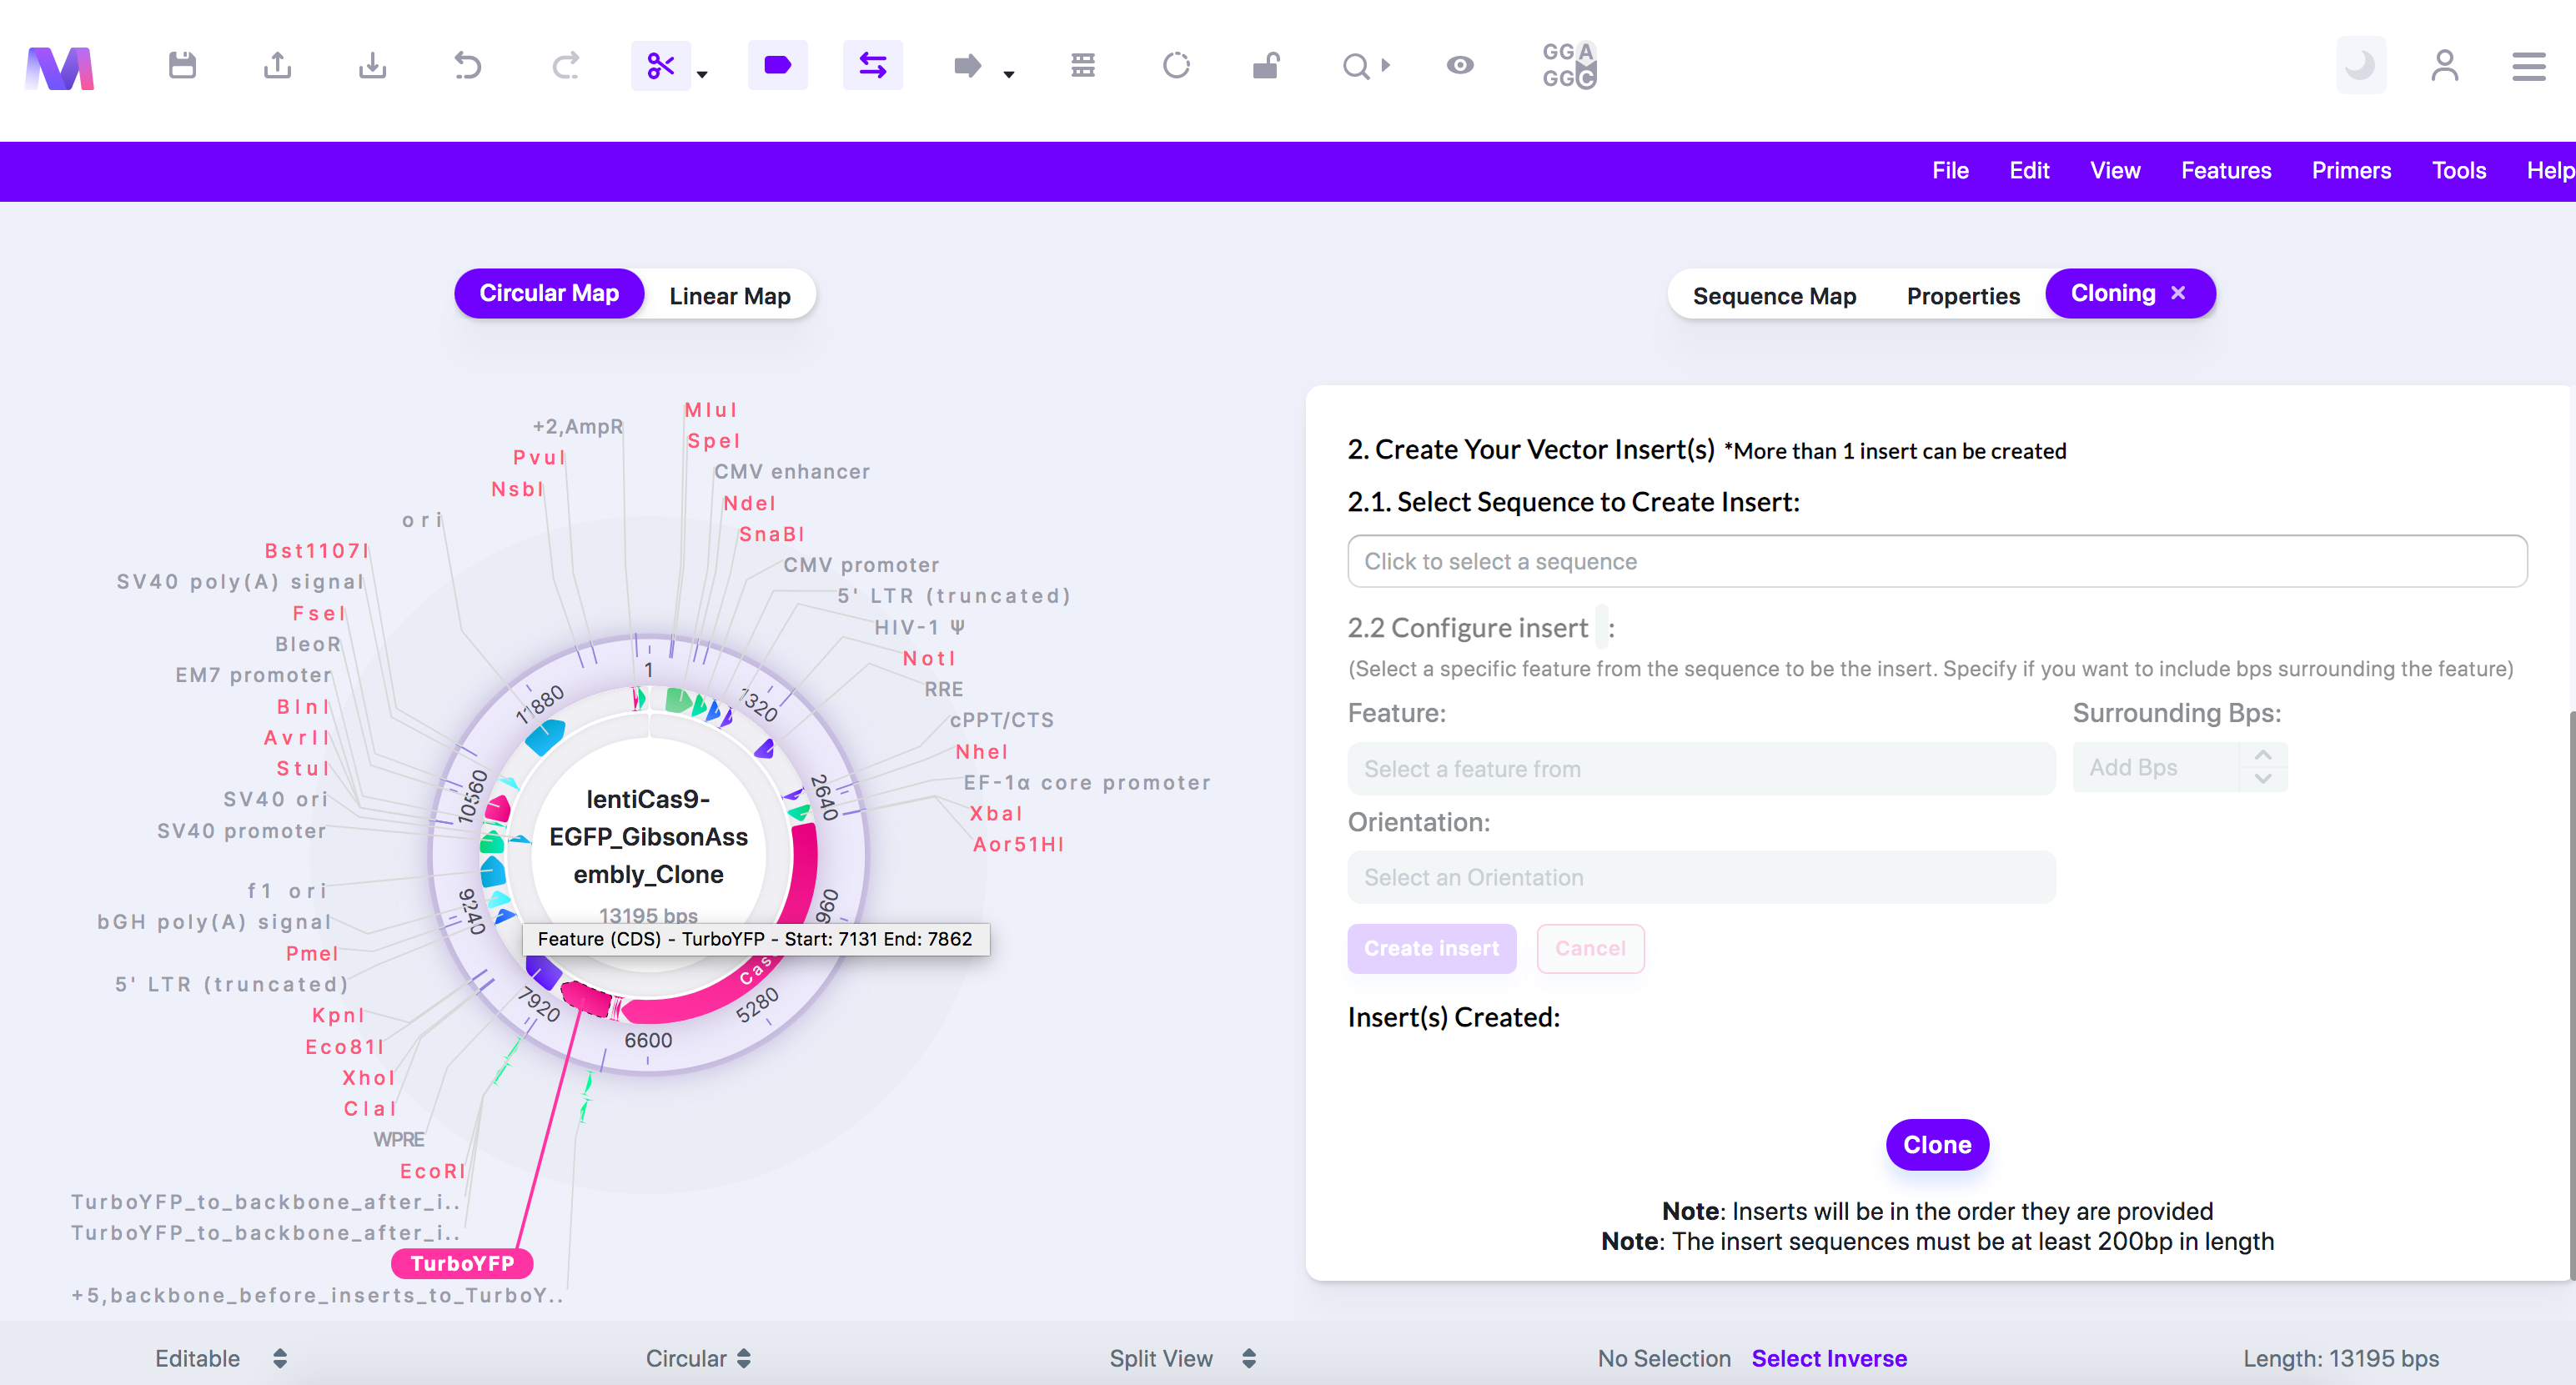
- Configure the sequence so only your region of interest will be inserted in the backbone. You can skip this step if you want the entire sequence to get inserted.
- Choose the feature, base pairs surrounding the feature, and the orientation of the insert.
- We have selected 'TurboYFP' as it is the reporter that will be replacing EGFP.
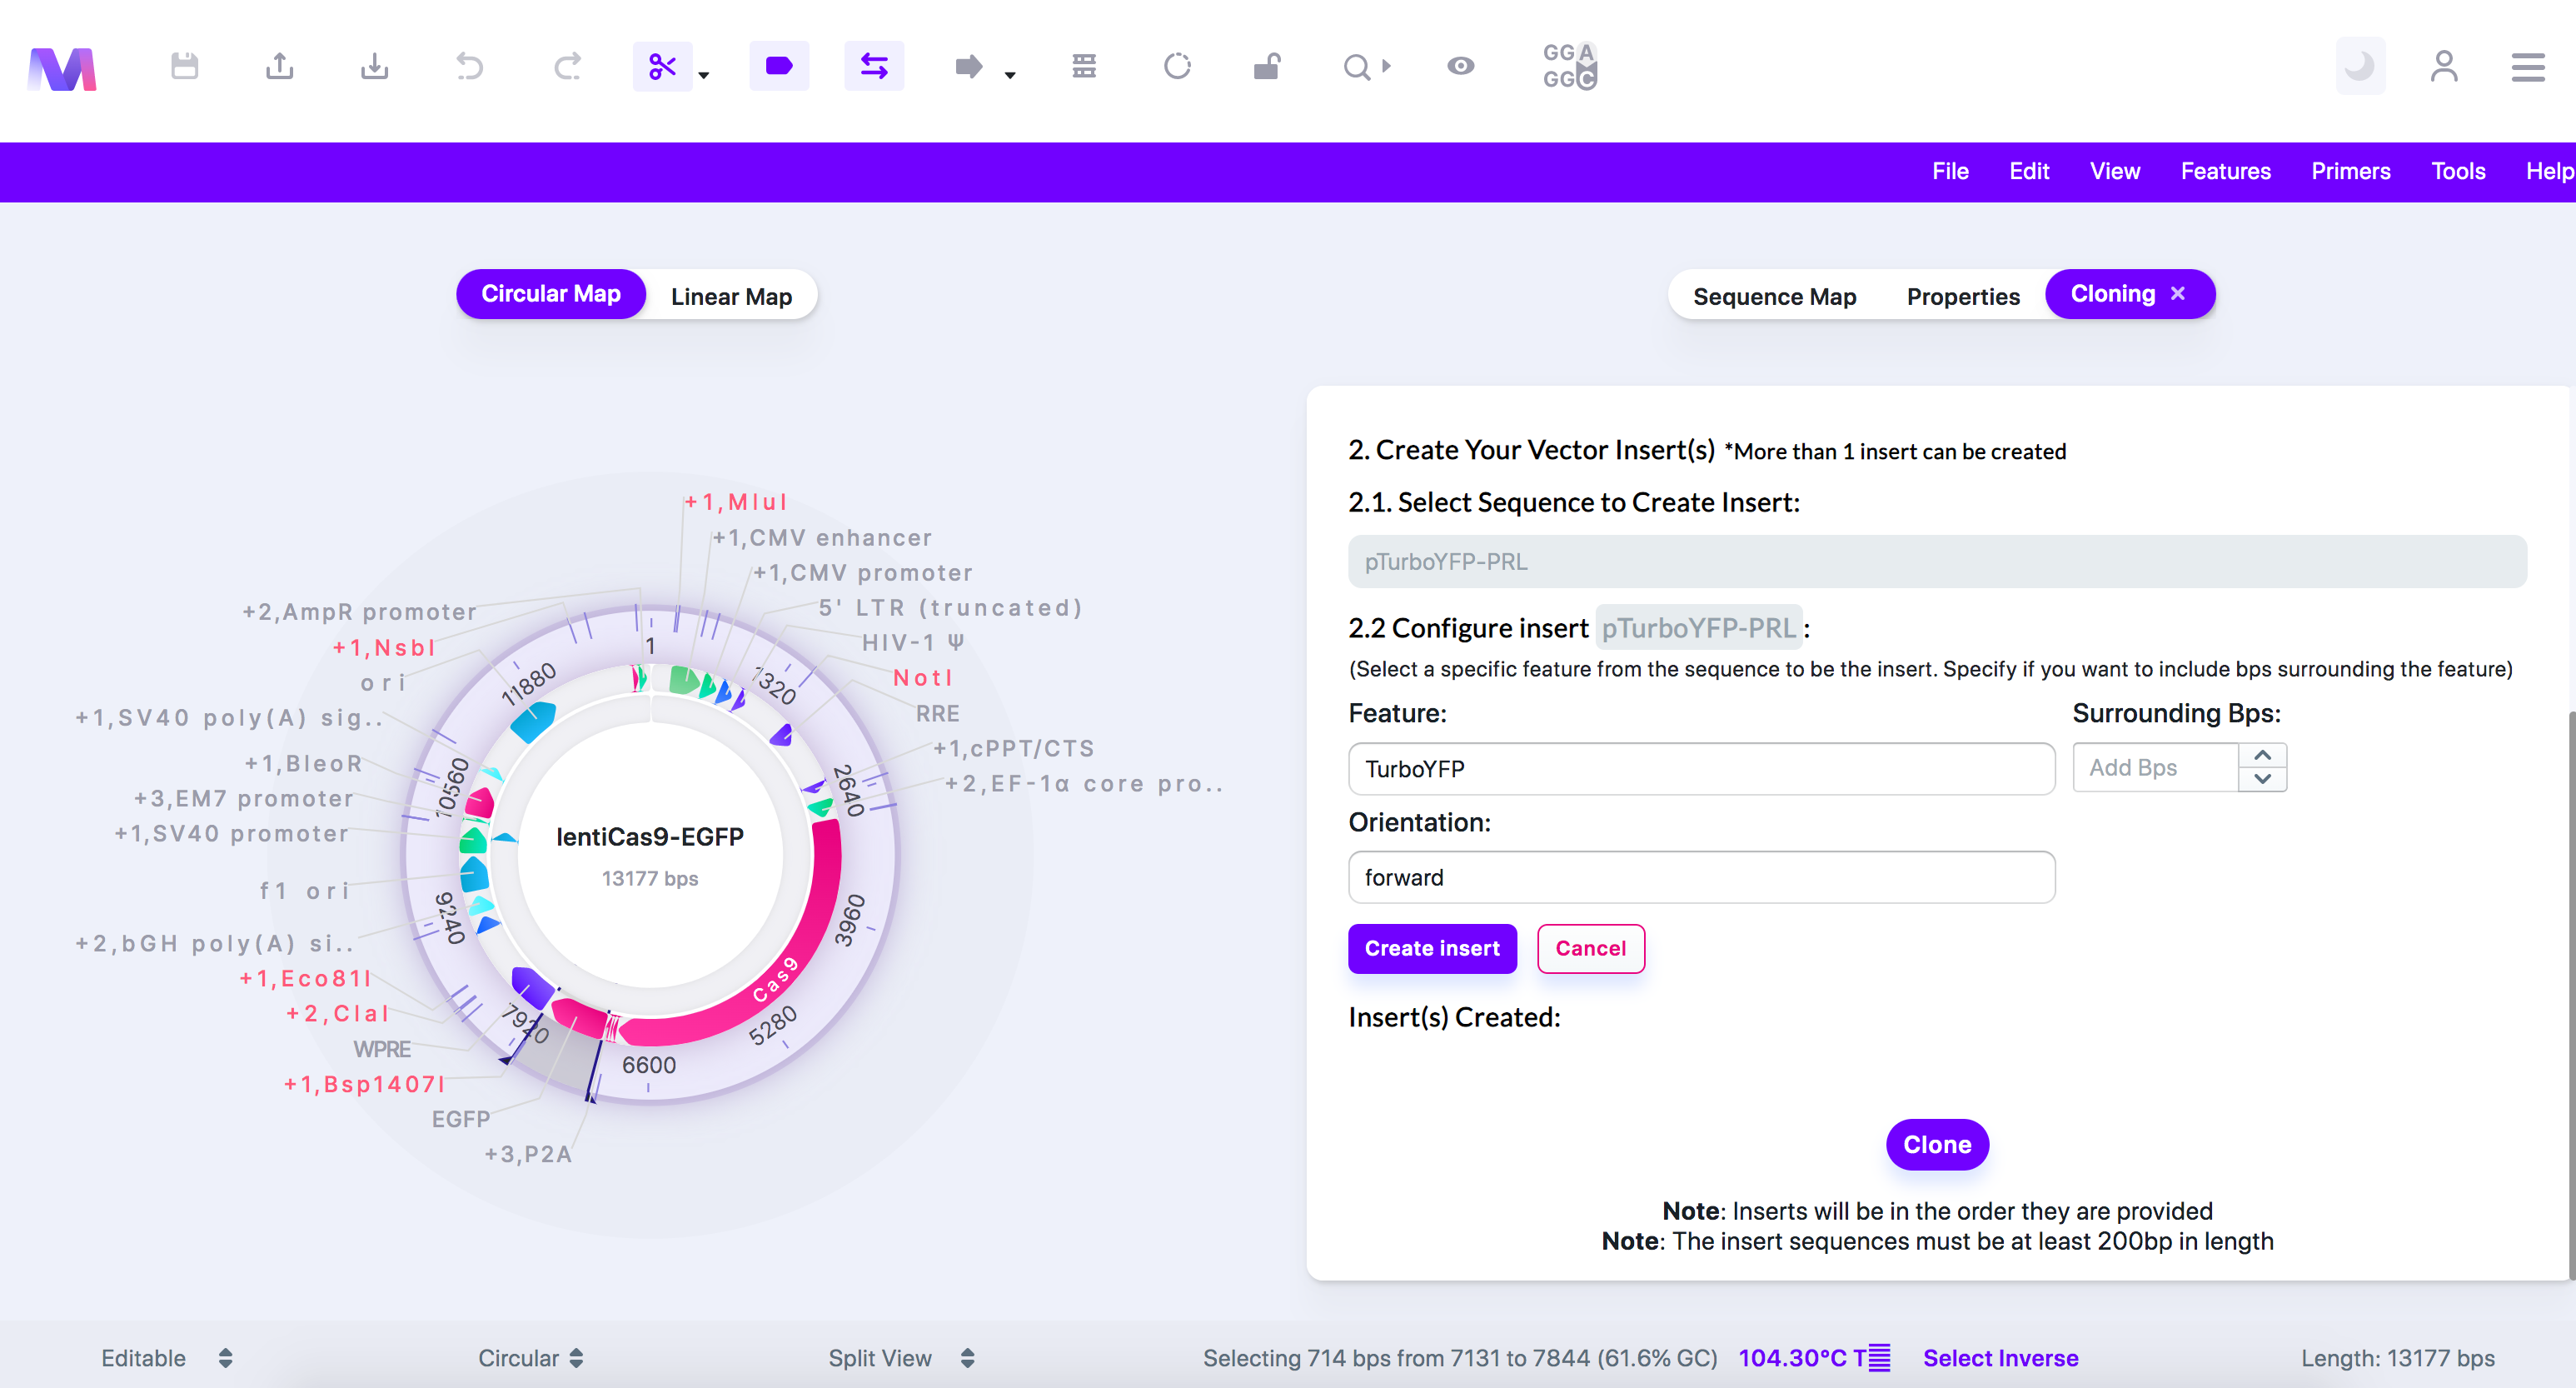
- Click 'Create Insert,' and the insert will be added under 'Insert(s) Created.'
- You can create up to 4 inserts at a time.
- The sequences get placed in the backbone in the order they are added.
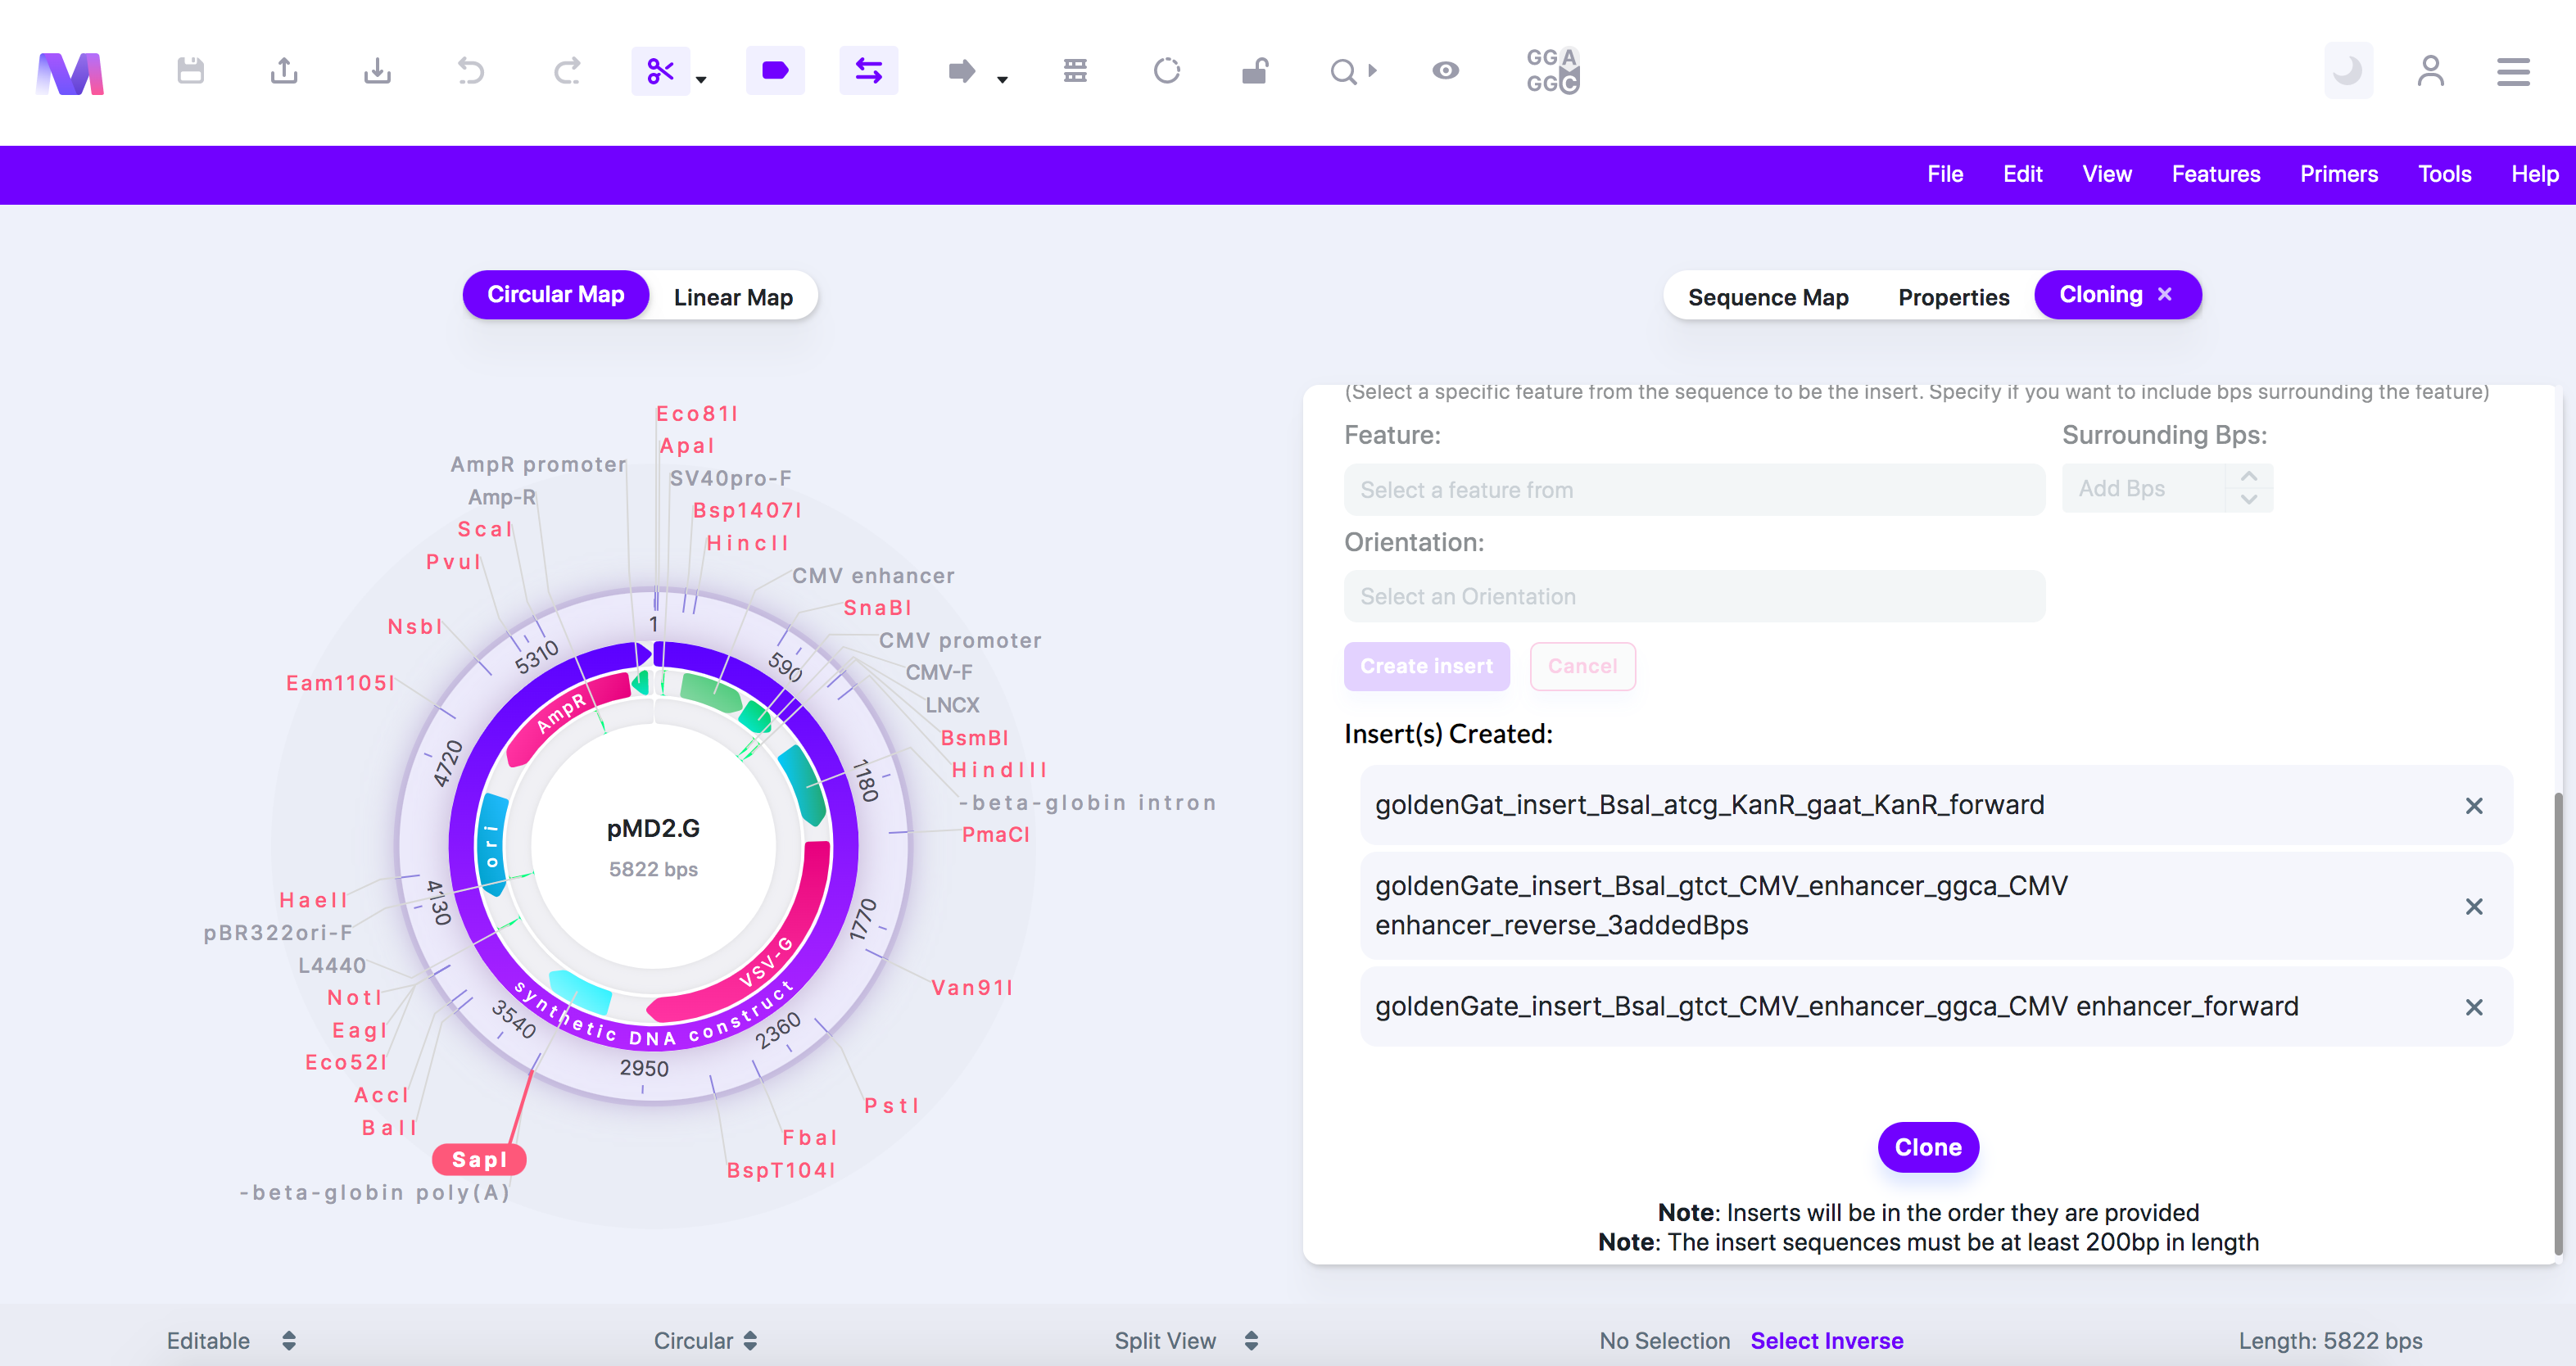
- Check the correct inserts have been added under 'Insert(s) Created.'
- Click the 'X' by the insert under 'Insert(s) Created' to remove it from the list of inserts.
- Many Inserts are shown under 'Insert(s) Created.' This photo isn't used in this example but is another case of using Gibson Assembly.
- Click the 'Clone' button to perform a Gibson Assembly Cloning simulation.
- You will not be able to click the clone button if any errors exist. Many errors described below are from other cases and do not follow our example.
- An error highlighted above the cloning button prevents cloning.

- Errors and their description
- An insert must be added.
- Too many inserts have been added. Only 4 are allowed.
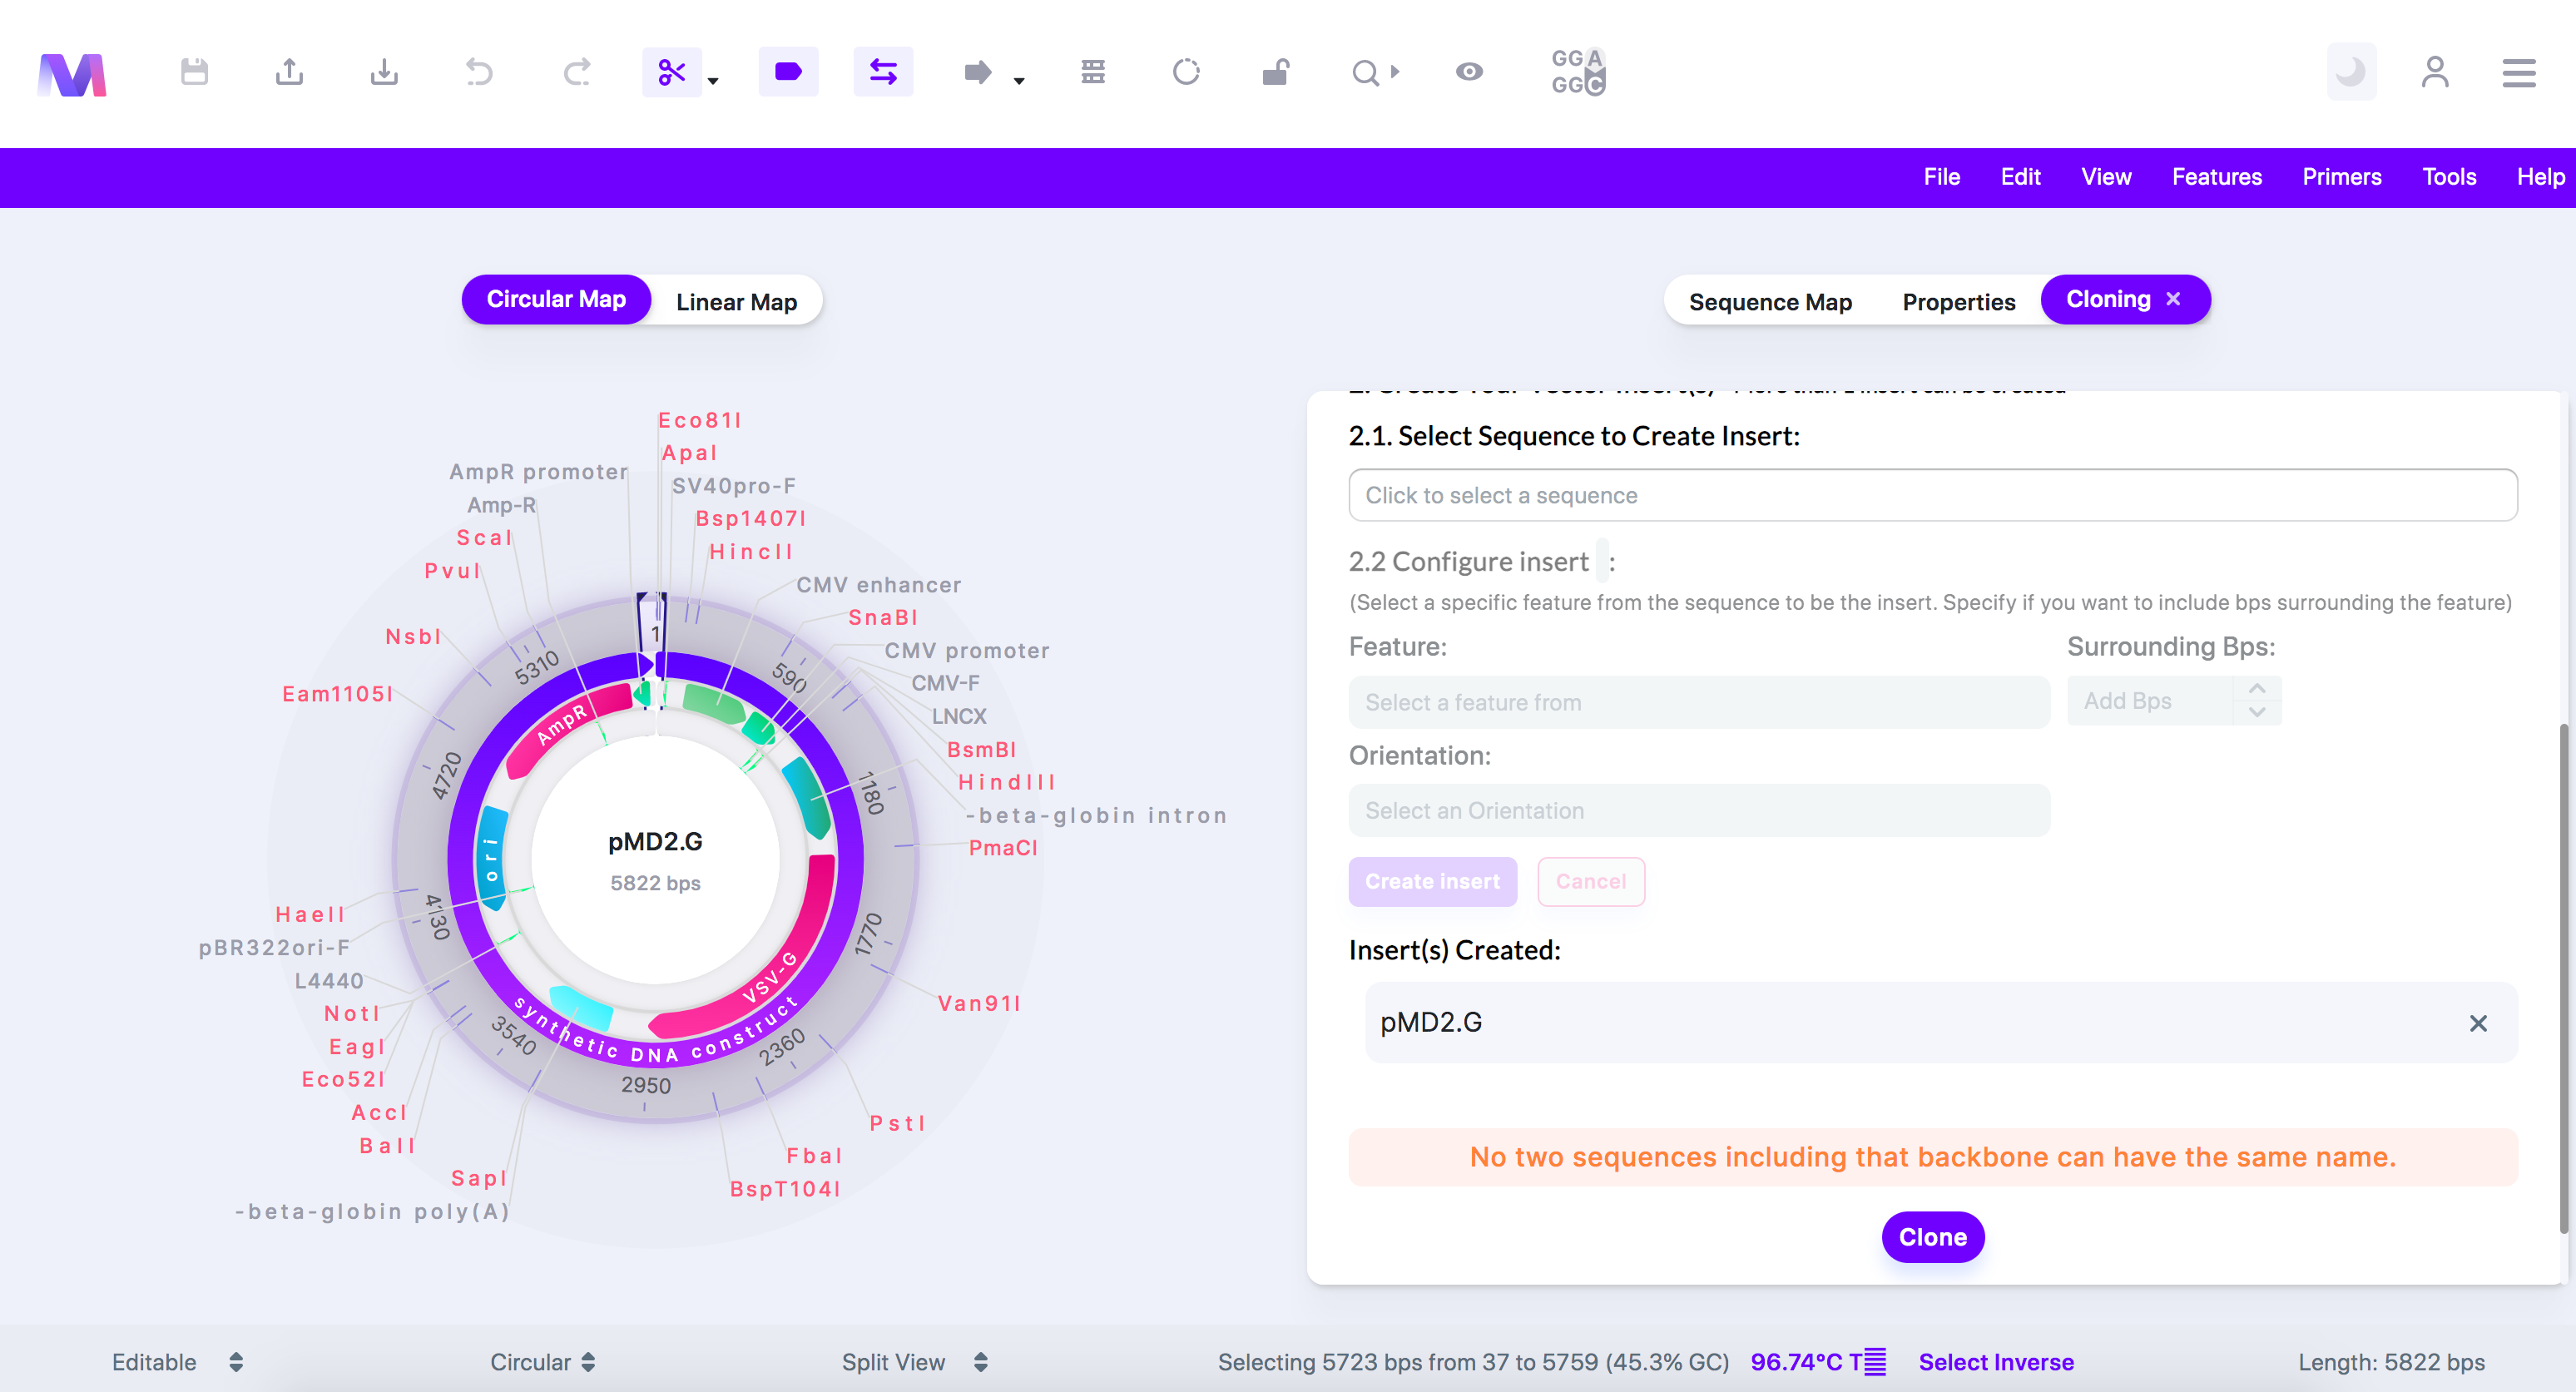
- No two sequences including the backbone can have the same name.
- The backbone must be at least 200bps in length
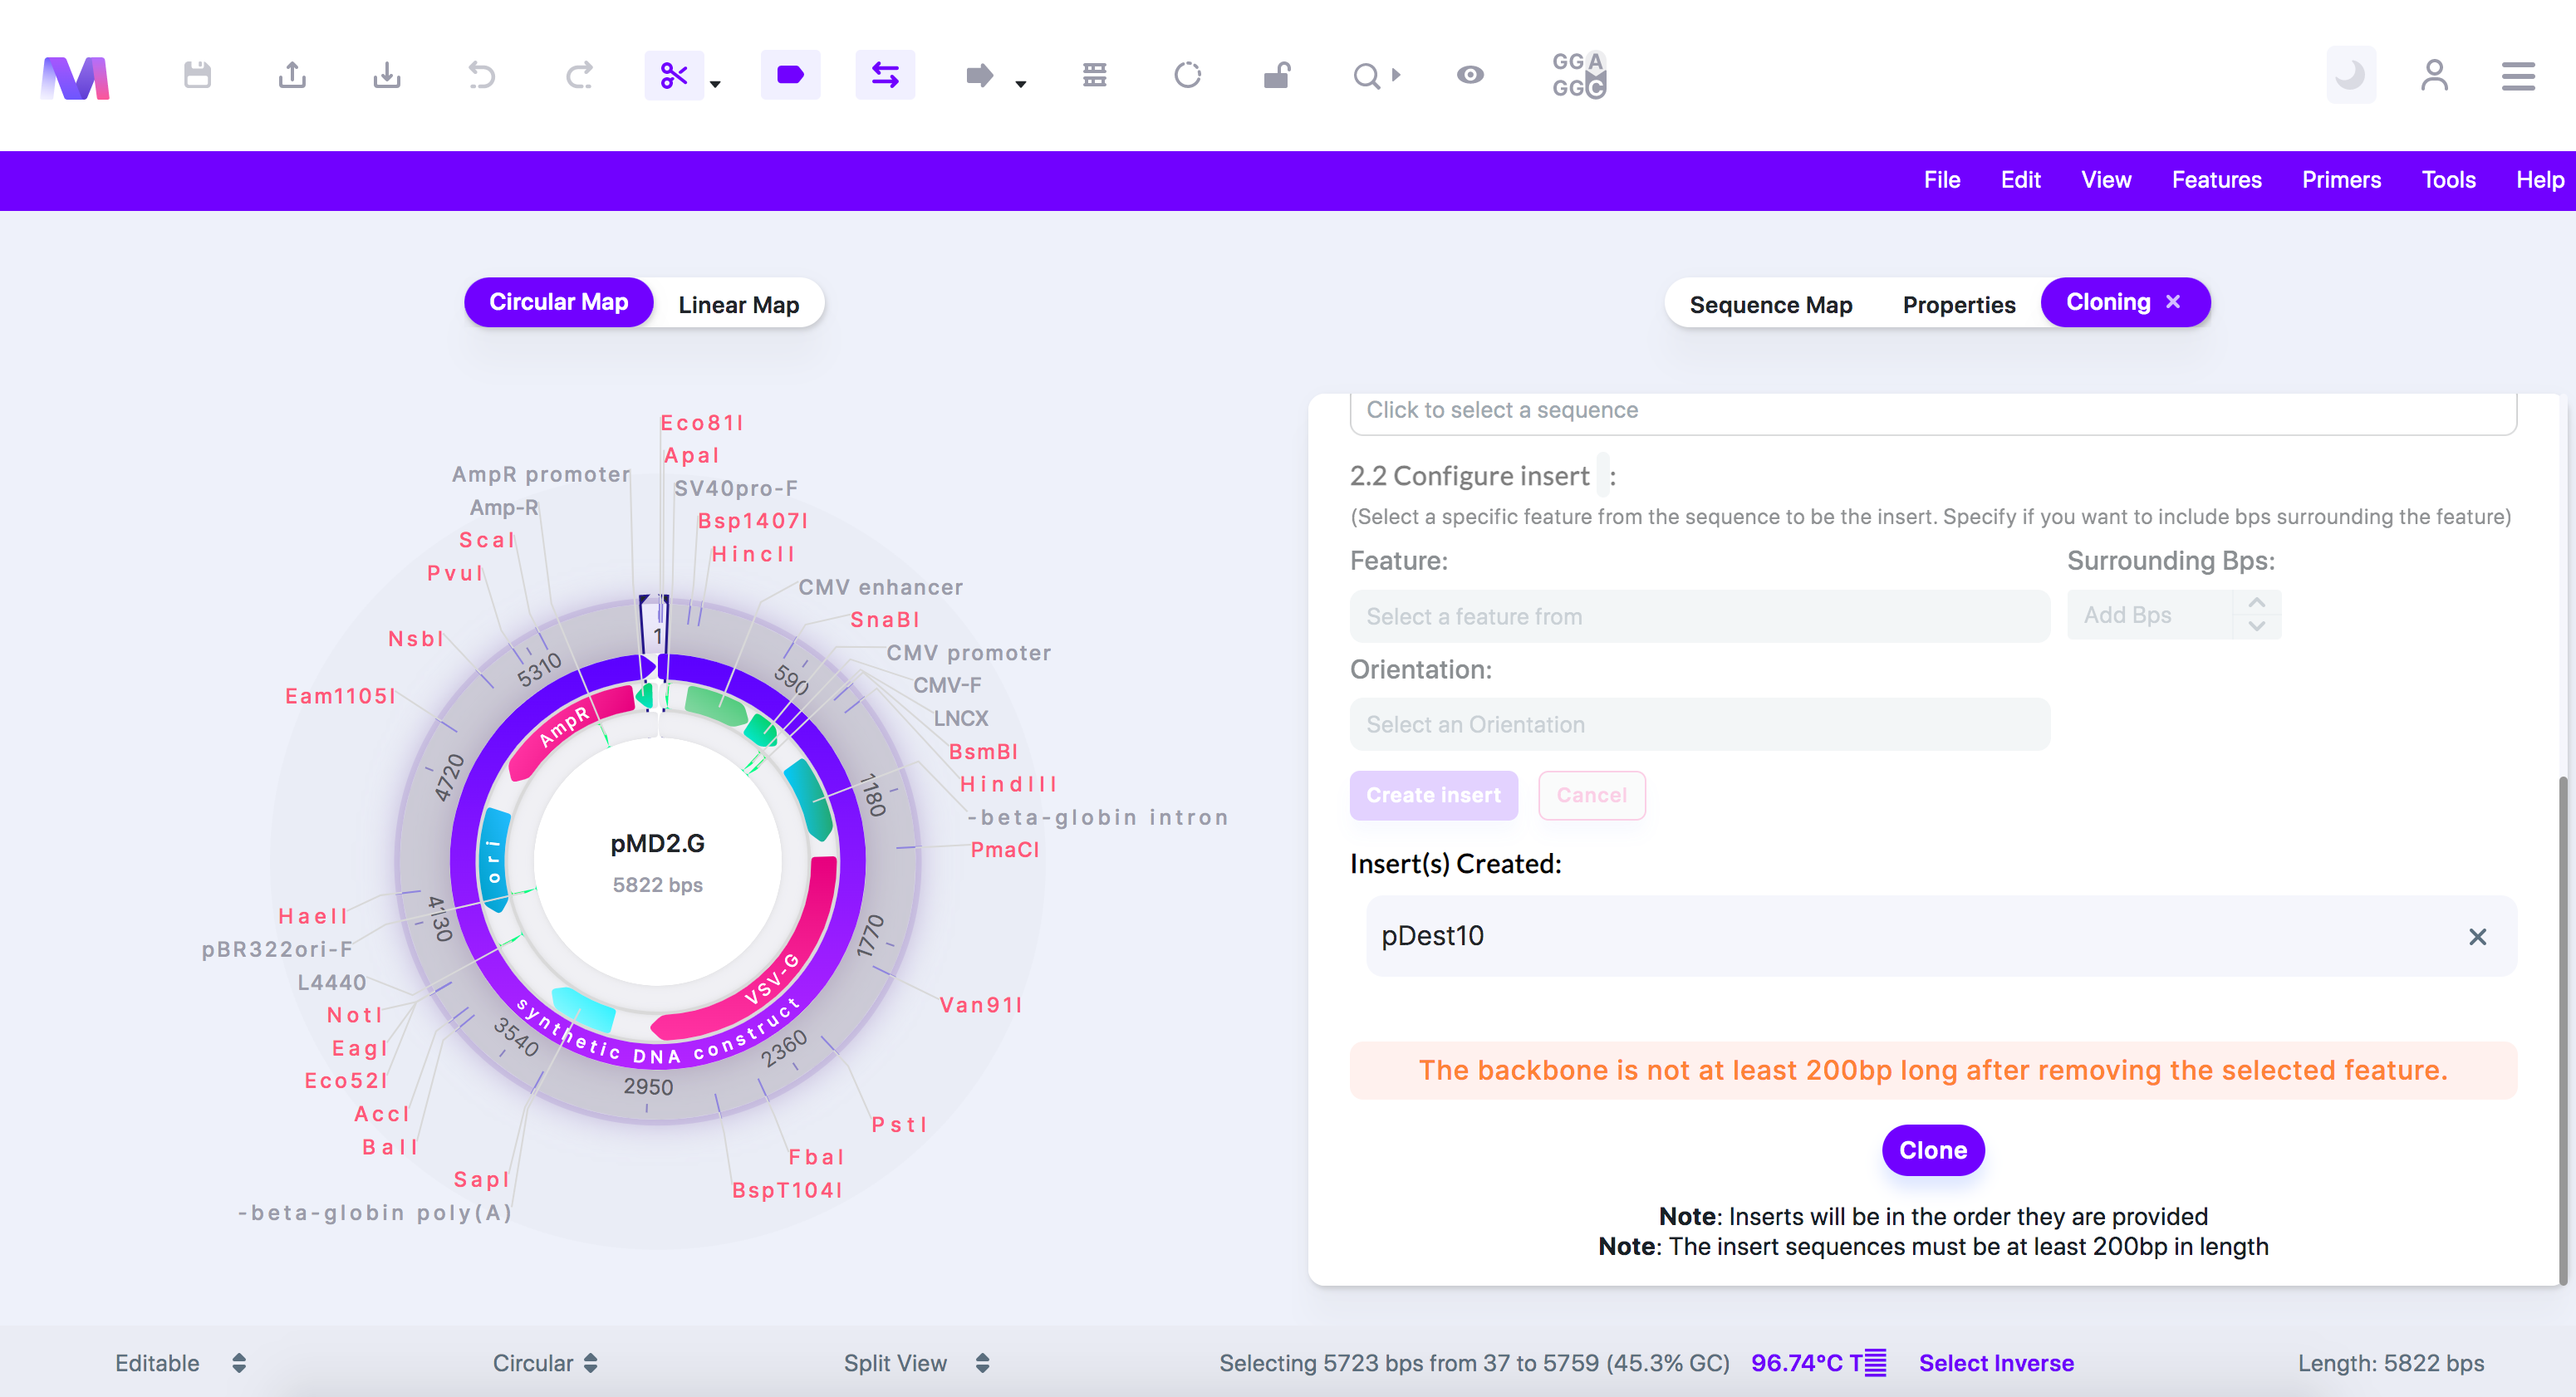
- The backbone must be at least 200bps in length after removing the selected feature.
- The (beginning/end) side of a divided linear backbone must be at least 200bps in length.
- Gibson assembly works best with fragments over 200 base pairs. If you attempt to put inserts in the middle of a linear backbone, the sequences located before and after where the inserts will be added must be over 200bps.

- Gibson assembly works best with fragments over 200 base pairs. If you attempt to put inserts in the middle of a linear backbone, the sequences located before and after where the inserts will be added must be over 200bps.
- The insert (insert name provided) is not at least 200bps in length.
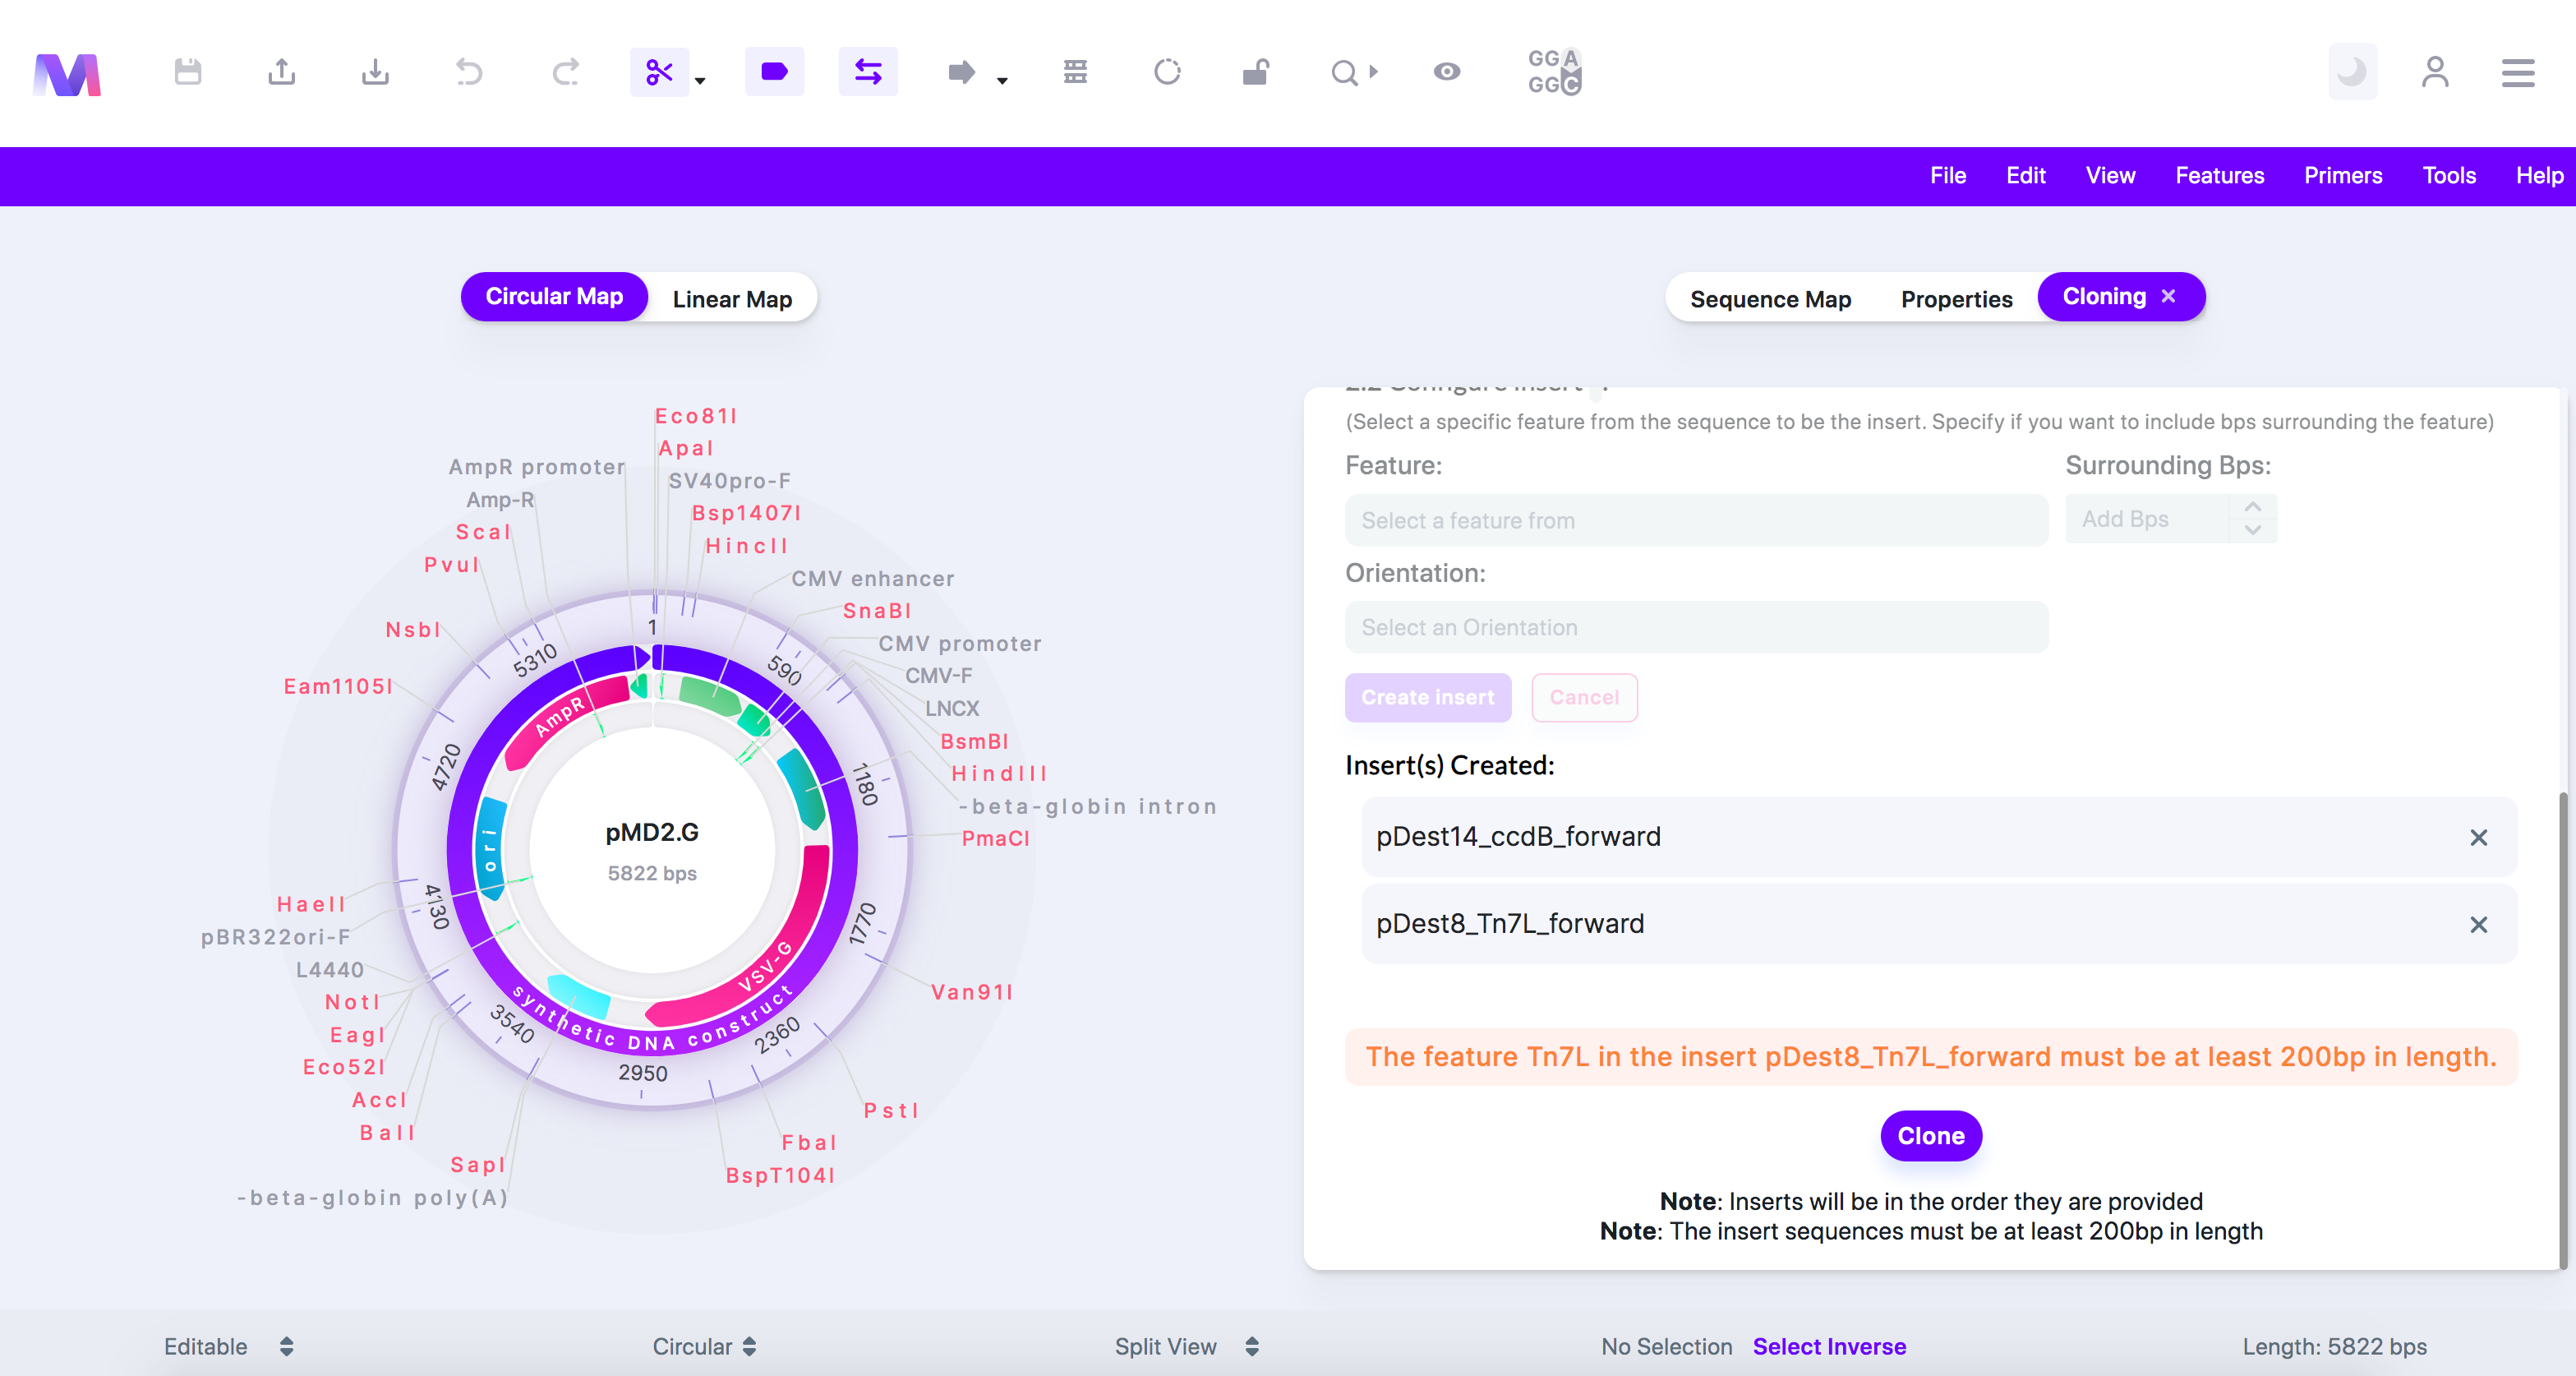
- The feature (feature name provided) in the insert (insert name provided) must be at least 200bp in length.
- Again, Gibson assembly works best with fragments over 200 base pairs. Any insert fragment must be over 200bps.
- Again, Gibson assembly works best with fragments over 200 base pairs. Any insert fragment must be over 200bps.
- The final resulting vector will get displayed in the viewer.
- Mendelgen has simulated the following events allowing the final cloning vector to get produced.
- Linearization of the backbone, if need be.
- The addition of homologous ends between the backbone and inserts using PCR
- In the viewer, we show the sequences of the primers used to create the homology.
- An exonuclease chews back the 5' ends on the backbone and inserts allowing for complementary base pairing between the homologous ends.
- A polymerase will fill any gaps that occur after complementary base pairing.
- A ligase to ensure everything gets put together and complete.
- Now that you've finished your Gibson Assembly cloning simulation, the resulting vector in the viewer is below. 🥳
- You can see that 'TurboYFP' has replaced 'EGFP,' and primers are around the insertion points. These primers show the sequence used to create the overlap homology.
- Mendelgen has simulated the following events allowing the final cloning vector to get produced.